


Trying to make a timeline in Google Slides feels like wrestling with shapes that never align and text boxes that refuse to behave.
It’s clunky, slow and often ends with something that looks more like an eighth-grade school project than a polished presentation.
In this blog, I’ll show you how to fix that. You’ll learn about two ways to create a timeline in Google Slides, practical design tips to make it look sharp and better alternatives for adding timelines to your slide decks.
Method 1: How to create a timeline in Google Slides manually
This method lets you make a clean timeline slide from scratch. It’s the best way when you want full creative control and basic polish.
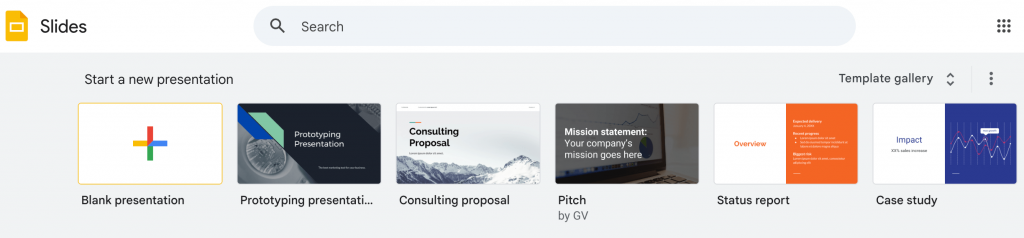
Step 1: Open a new Google Slides presentation
Go to slides.google.com and start a blank presentation. If you want to build your slides your way, start with a blank one. If your deck already has branding, use that theme instead.
Step 2: Set up your slide
Decide if your timeline is wide and linear or vertical. Landscape layout works well for horizontal timelines. Portrait is better for vertical or mobile‑friendly presentations.
For this tutorial, we’ll go with a horizontal left-to-right linear timeline.
Click Shift and select the default text boxes on the blank slide to delete them in bulk so you start with a clean canvas.

Step 3: Insert a line or arrow
Go to Insert → Line or Arrow.
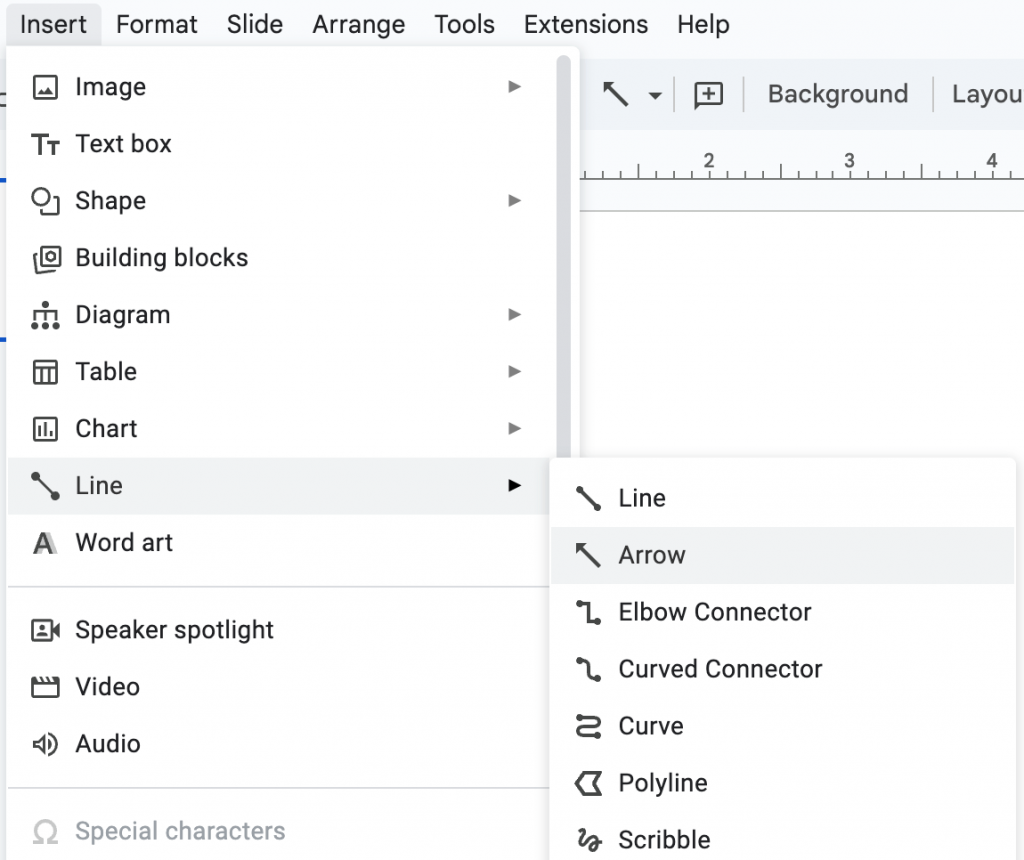
Draw across the slide from left to right to create your timeline base. Hold the Shift key while dragging to keep the line straight.
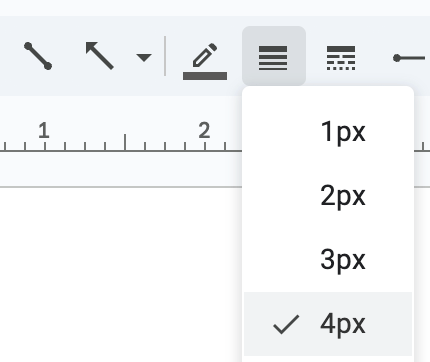
Pro tip: Increase line weight or change its color from the toolbar so it stands out and aligns with your brand colors. For this example, I clicked on the Line Weight on the toolbar and chose a 4 px weight.
Step 4: Add milestones with shapes
Every timeline has notable events and milestones, like the year a company was founded, when it got funded or when it was acquired.
To add milestones to your timeline, go to Insert → Shape. Pick a circle or a rectangle to indicate a milestone. I’ll go with circles.

Just a few things to note here:
- Give all circles a 4 px line weight to keep it consistent with the arrow weight.
- Keep sizes uniform across shapes.
- Space them evenly along the line by going to Arrange → Align → Middle or Arrange → Distribute → Horizontally (for linear timelines like the one above).
Step 5: Add text to each event
Double‑click inside a shape or go to Insert → Text box to add the date and a short description for each event.
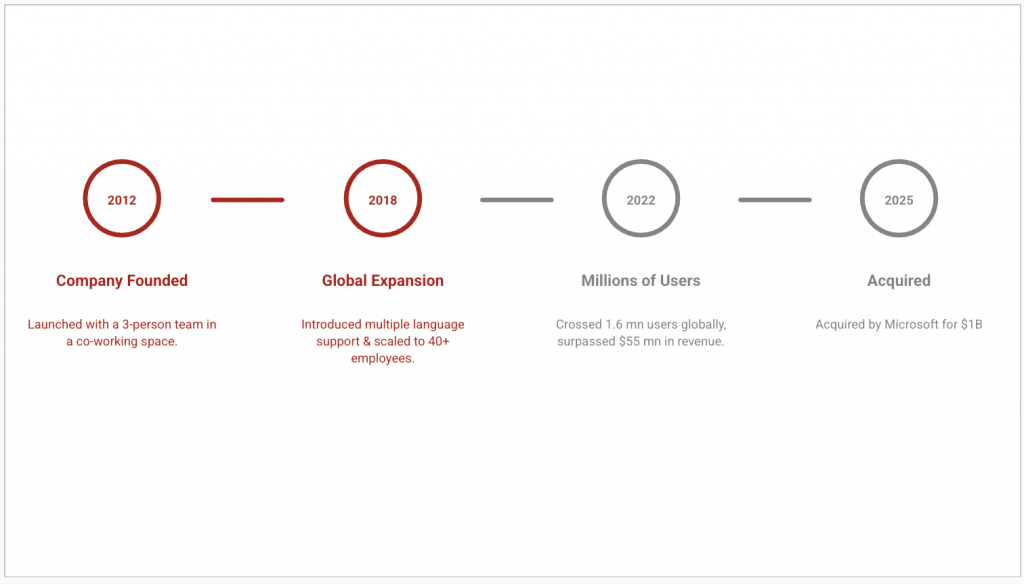
Keep the copy brief and aim for consistent length across milestones. Here’s how mine looks after I added events across a hypothetical company’s timeline:

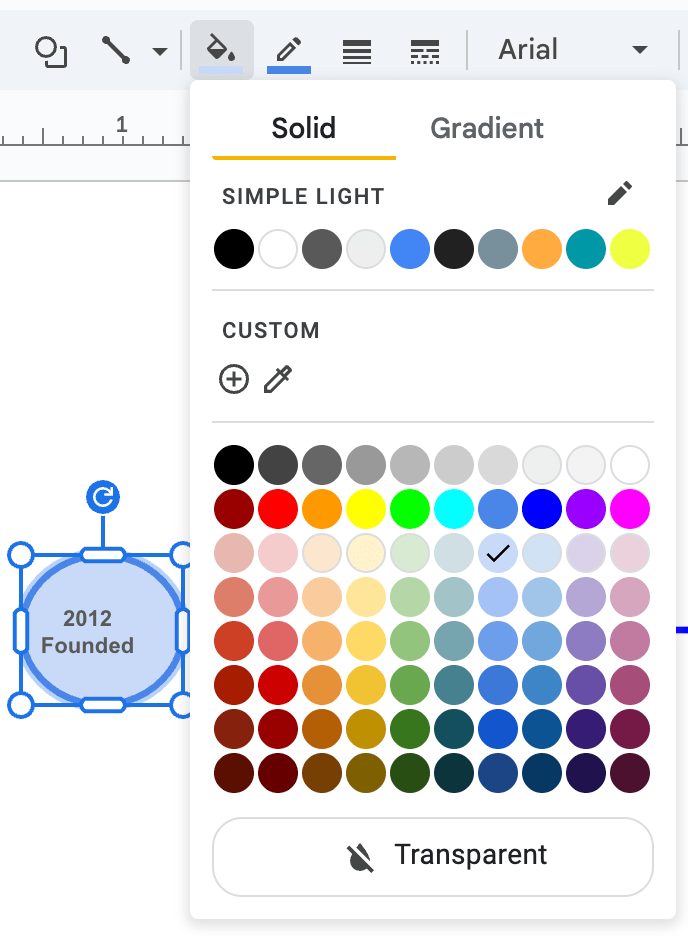
Step 6: Customize with colors and icons
Use the Font and Fill Border options in the toolbar to customize your timeline.
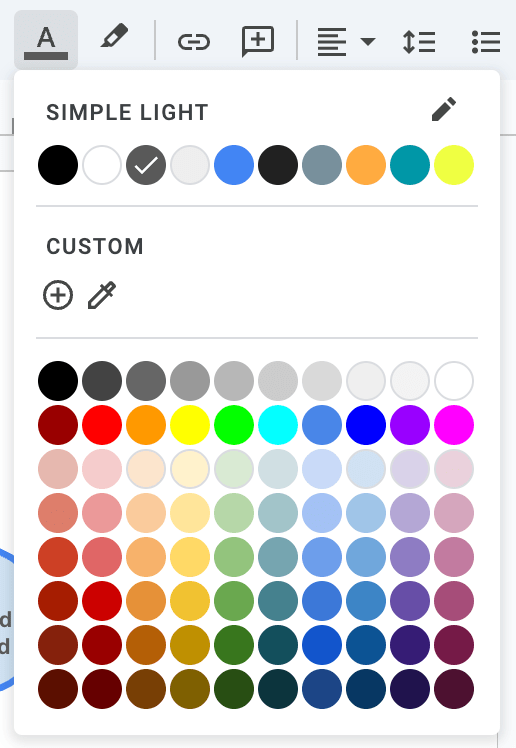
For customizing the border fill, pick a color that contrasts with the text color.
You can also add icons or symbols via Insert → Image or an add-on. I recommend keeping graphics minimal so that your slide doesn’t look cluttered.
I went with zero graphics to keep this tutorial distraction-free:

Method #1 is fairly easy, but aligning the shapes, text box and other elements takes way more time than expected.
For this simple timeline I just showed you, it roughly took me 40 minutes to fix the alignment spacing and color.
Method 2: Use a timeline template in Google Slides
Templates let you skip the grunt work and focus on content. This method works well when you need speed, consistency and polished visuals without building every element by hand.
To keep this method simple, follow steps #1 and #2 from the previous method. Then proceed with the steps below.
Step 1: Explore available templates
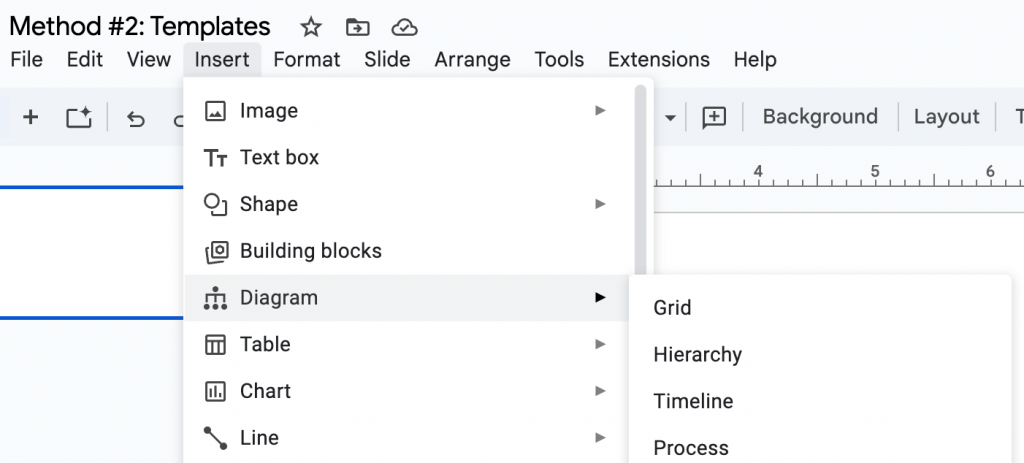
Google Slides offers built‑in timeline templates via Insert → Diagram → Timeline. You can pick styles and sets of dates.
The templates will appear on the right-hand side of the slides that you can scroll through. As of this writing, I counted a total of eight templates:

The templates work, but feel generic after one use.
If you don’t like any of the options in Google Slides, you can create a timeline infographic in Venngage and import it to Google Slides.
To upload your own templates, go to File→ Import Slides in Google Slides. We’ll get to how to create a timeline infographic in Venngage in just a bit.
For now, I’ll go with the second template option since it matches the one we created earlier (with arrow and circles).
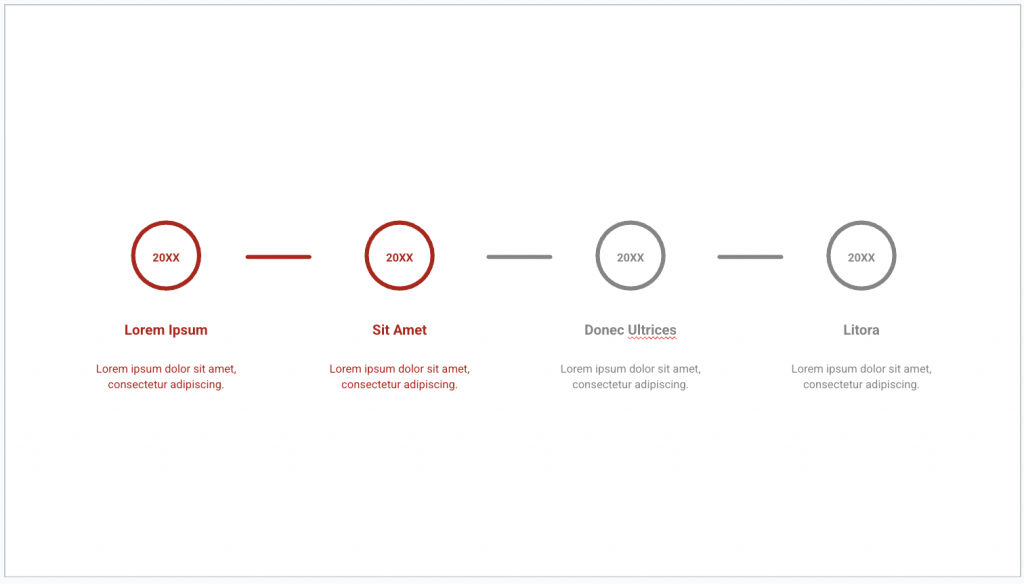
As you can see, you can edit the copy, change the color and customize the timeline elements as much as you want.
Here’s how it looks after I tweaked it a little to fit the details from the hypothetical example from earlier:
As a reminder, you can play around with the shapes, colors, copy and other elements as much as you like. But if it’s for business and presentation purposes, I’d recommend keeping the decorations minimal.
Method #2 took me approximately 20 minutes from start to finish. But I wish I had more templates and better control over the design elements.
Pros of using a template
Templates are what smart people use who don’t want to design pretty decks from scratch. Here’s why using a timeline template actually makes you better at your job:
- Save time: Deadlines don’t care if your boxes are aligned perfectly. Templates give you a head start so that you can focus on building the story instead of choosing the right words.
- Ensure consistency: Good templates come with pre-built styles, spacing and visual elements. Also, many templates allow you to add your branded assets (e.g., logo, fonts, mascot) so that they look on-brand. That means you don’t risk making your time designs look like you borrowed someone else’s work. That kind of brand consistency also improves brand recall and makes it easier for you to create amazing visuals without second-guessing design choices.
- Best for non-designers: If you’re a product marketer creating quarterly feature launch timelines, you’re probably not trained in design principles like visual hierarchy or spacing.
Templates solve that since they already have the fundamentals like layout and design rules baked into them. You can just copy and paste your content and still make a professional impression.
Why use Google Slides to create a timeline?
According to Exploding Topics, over 800 million people use Google Slides every month. And if your team already works with Google Workspace, using Slides to create timelines is almost a no-brainer.
Sometimes you have to work with what you have got. It’s like cooking with what’s already in your kitchen pantry; the ingredients are right there and it makes sense to use them.
When it comes to creating a timeline using Google Slides, here’s what works best:
1. It’s free
Google Slides is free if your team already uses Workspace. Also, you can create, edit or share your timeline presentation on a browser, tablet or phone. There’s no need to pay extra for subscription licenses or download yet another app on your device.
Of course, Google Slides isn’t the only tool people use to build timelines. You can also create a timeline in Microsoft Word or in PowerPoint for free. And depending on how familiar you are with these tools, it can be pretty simple or just as frustrating.
2. Collaboration-friendly
With Google Slides, you can tag your design colleague, ask your peer to review the copy or leave comments for your marketing manager. And since it’s an easy tool to use, people can offer their feedback quickly without having to overcome any learning curve.
3. Good for simple presentations
If you’re creating a project timeline for internal reviews, the basic features and template options are good enough. For internal communication needs, you can get away with stick figures drawn on a whiteboard as long as the message is clear.
But when it’s for external decks, campaigns or clients, that’s a different story.
Timeline design tips for Google Slides
Your timeline design can either improve your message or confuse people. Use these tips to keep it clean and effective.
1. Keep it simple
Most presentations suck because people try to fit in too much copy, color and other elements. Visual aids can increase comprehension by up to 83%, but only if they’re clear and well-designed.
As a rule of thumb:
- Use minimal colors and clean shapes.
- Delete any element that doesn’t serve a purpose.
- Give enough white space for people to process the information easily.
As Vania Escobar Villacorta points out in one of her articles for 24Slides, timelines are meant to support your message, not replace your voice:
Remember that the timelines in Google Slides, or the software you use, are a visual aid for your presentation. That way, we recommend using a manageable amount of text in each slide since you’ll need to share the most amount of content orally.
2. Keep spacing and alignment consistent
Bad layout is highly distracting. Here’s a simple trick to fix spacing and alignment issues in your timeline deck:
- Go to View and click on Show rulers to enable rulers.
- Go to View again and click on Guides → Show guides
Turning on rulers and guides helps you align and space elements precisely for a cleaner, more professional slide layout.
You can also center your elements and evenly space them out to make your timeline look balanced. Here’s how:
- Go to Arrange → Align → Middle
- Go to Arrange → Distribute → Horizontally (for horizontal timelines).
3. Use icons and images
Icons are great at giving context fast. But too many or the wrong ones and your timeline might look like one of Dr. Seuss’ book covers.
Here’s what you should do instead:
- Use small visuals to anchor key moments.
- Stick with consistent styles and line weights.
- If you’re importing a Venngage template, access its built-in icon library to find matching visuals fast.
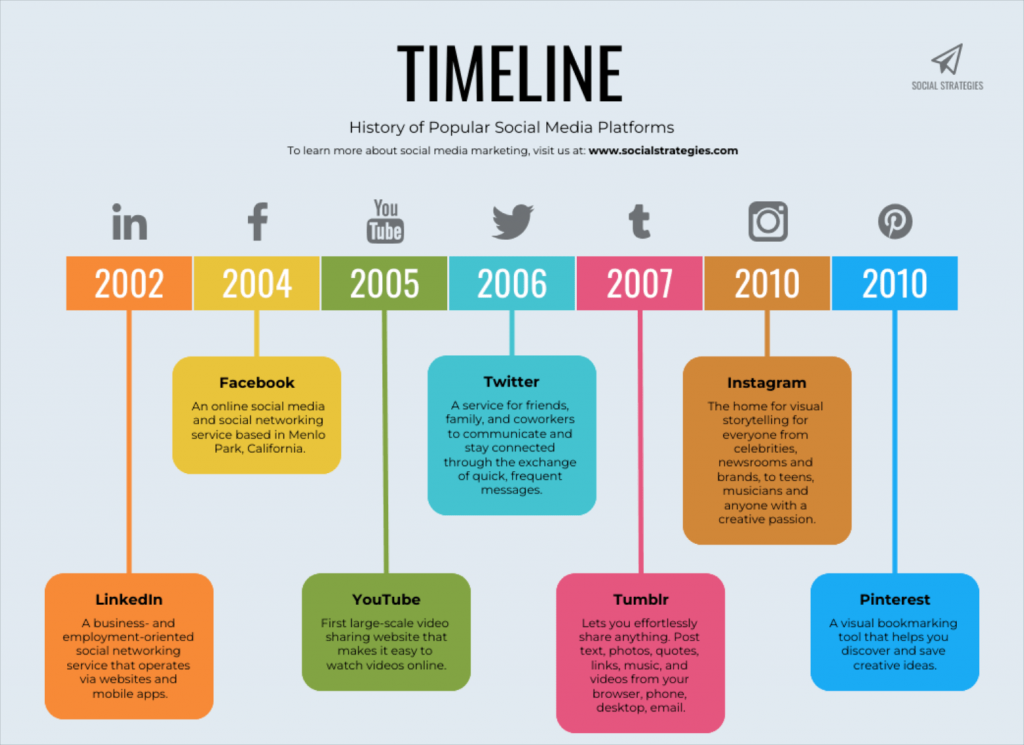
Here’s a timeline example template in Venngage, made mostly with the icons representing the most popular social media platforms:
4. Stick to a color palette
Creating a timeline deck isn’t a tie-dye competition. Using 2–3 colors max is often enough. Also, keep in mind to:
- Choose shades that reflect your brand or theme.
- Use contrast to keep text readable, especially against dark backgrounds.
- Add color codes to highlight task ownership or different phases.
Common mistakes to avoid when making a timeline in Google Slides
Here are the most common mistakes that quietly sabotage timelines, especially in Google Slides (and what to do instead).
1. Using too much text
If your timeline looks like big blocks of text with complementing designs, something’s wrong.
You don’t need full sentences under every milestone. The main purpose of the copy in a timeline is to quickly guide people’s eyes through a series of key moments.
What to do instead:
- Limit your copy to 2-3 short words at max.
- Use titles or action verbs, not paragraphs.
- If something needs more context, create a new slide for it or include it in your speaker notes.
Remember, timelines are visual storytelling tools; not TED Talk scripts.
2. Inconsistent formatting
If your font, formatting and background color change with each slide, your timeline will look like a bag of Skittles: shiny and colorful but hard to follow.
Many presentations prepared by different members of a team are guilty of doing this.
How to fix it:
- Pick one font and stick with it.
- Be intentional with the formatting and color.
- Align all shapes to the same size, position and spacing.
- Go to View→ Theme builder to ensure consistency across all slides.
3. Skipping alignment tools
I assure you, this is the last time I’ll speak about getting alignment right. 🙂
But it’s worth repeating: if you’re dragging and dropping elements without using alignment guides or distribution tools, your slide will look off.
Instead, do this:
- Go to View→ Guides to center and align milestones.
- Go to Arrange→ Distribute → Horizontally (or Vertically) to space items evenly.
- Enable the “Snap to Grid” (View→ Snap to) to align shapes and elements precisely.
4. Forgetting to test on different screens
What looks fine on your laptop might look unreadable on the office projector or a shared screen. For example, text colors might lose contrast or visuals might look pixelated on a different device.
Make sure to:
- Test your slide in presentation mode on a large screen.
- Use high-contrast color combinations. Here’s a You can use Venngage’s free Color Contrast Checker tool to help you with it.
- Keep font size above 18pt minimum (24pt if it’s going to be a boardroom projector).
Pro tip: If you want to avoid all of this text overload, formatting messes and layout headaches, use Venngage. It’s built to help you overcome these mistakes and create timelines that look clean, read well and hold attention.
Alternatives: Better ways to make timelines
Google Slides is good for adding basic timelines, quick school projects or internal team decks. But if you need more professional-looking timelines for high-stakes business situations, Google Slides can be a letdown.
Sometimes, the limitations show up when you least expect them. As one Reddit user put it:
I’ve built a complex timeline in Google Sheets that I need to showcase in a presentation. I tried to copy and paste it in, but it was way too big. Does anyone have any tips on how to work that in? Maybe even a template or add-on that I can use?
u/krimsonking11 on Reddit
It’s a common pain: you already have the data, but turning it into a format that’s presentation-ready is another battle.
Purpose-built tools like Venngage can help. Here’s what you get with Venngage’s timeline maker:
1. Professionally designed templates
Venngage has over 10,000 professionally designed, ready-to-use and customizable templates across all kinds of visual designs. It has hundreds of such templates for timeline presentations alone.
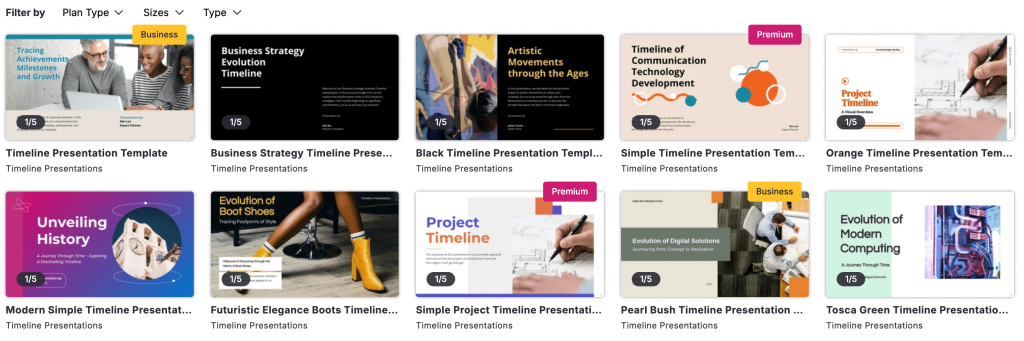
With Venngage, you don’t have to start from scratch. Just choose the templates that are specifically built for presentations, reports and other business use cases.
You can also use the filter to find the right kind of templates based on size, type or subscription plan.
This means you don’t have to worry about the spacing, layout or composition.
2. Drag-and-drop interface
Yes, Google Slides also has a drag-and-drop interface. But moving an element in Google Slides feels like building a piece of wool. It’s clumsy, takes a long time and is imprecise.
On Venngage, you can move things around naturally. For instance, you can rearrange the milestones, fix the layout spacing and replace visuals in seconds without wasting your time.
3. Easy sharing, export or downloads
Venngage lets you export your timeline designs in formats that don’t break or lose quality. And if you ever need to tweak something before the meeting, you won’t have to start over.
Need to import your timeline into a Google Slides deck? Just download the Venngage timeline in PPTX format.
Do you want to send the PDF version for your boss to review? No problem.
Maybe your sales team wants to share the product roadmap timeline privately with just one client? Done.
4. AI-powered timeline generator
This is one of the latest additions. With Venngage AI Timeline Generator, you don’t have to move things around manually.
Just describe your timeline with a text prompt (e.g., “Q3 product roadmap” or “Series A funding journey”) and the AI will give you a structured visual to work from.
Here’s an example I generated using Venngage AI. I pretended to be the founder of a fictional company launched in 2022, gave it a short, specific prompt and this is the timeline it created:
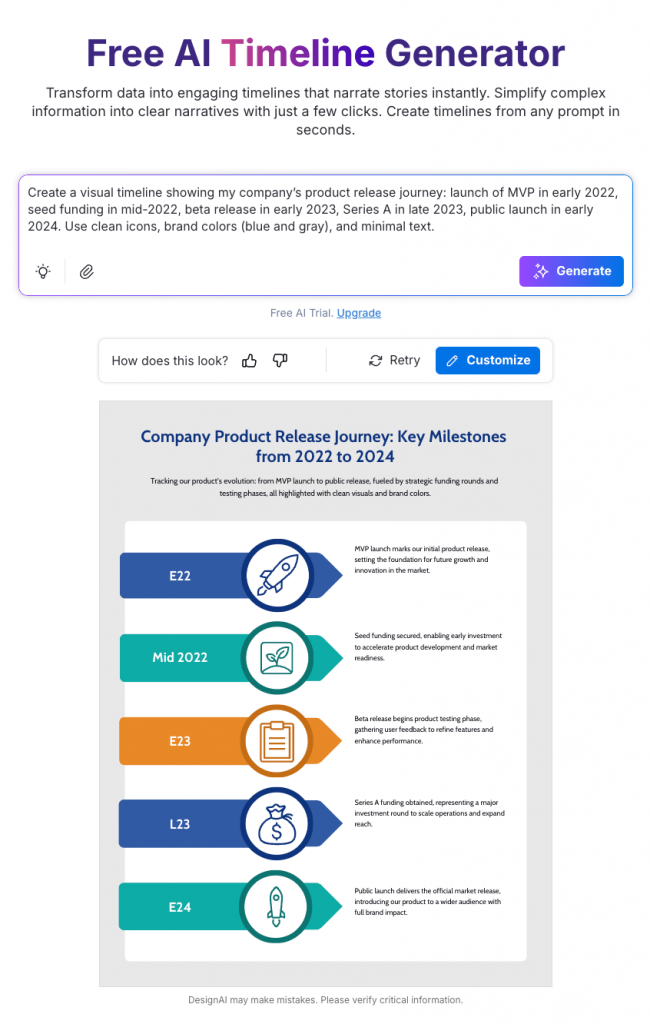
It’s so efficient that it feels like cheating; almost like starting mid-way through a marathon instead of at the starting line.
FAQs
Here are quick answers to three of the most commonly asked questions about creating timeline in Google Slides:
1. Can I add animations to my timeline in Google Slides?
Yes. Click on Insert → Animation to apply effects to your slide transitions and elements. Select the slide or the object you want and pick the effect you want from the dropdown options.
2. How do I collaborate with others on a timeline?
Google Slides lets people edit comments or view their timeline in real time. Just click the “Share” button in the top-right corner, add people by email and set their permission to “Editor,” “Commenter” or “Viewer.”
3. Can I print or export my timeline from Google Slides?
Yes. Go to File → Download to export your timeline as a PDF, PPTX or PNG. For printing, select File → Print and choose layout settings. Make sure colors and fonts stay legible on paper.
You can now create a timeline of your choice
You just learned how to build a timeline in Google Slides; manually with the help of templates and easily with Venngage.
When the stakes are higher and you’re pressed against time, you want to go with an option that makes your timelines look sharp and doesn’t eat up your whole day.
And that’s exactly what Venngage offers. It comes with thousands of ready-to-use customizable templates, a user-friendly interface and even an AI-powered timeline maker that turns ideas in your head into finished slides in minutes.
If you want to make a timeline without all the hassles that come with Google Slides, give Venngage a try. It’s free to start.


