

If you’ve tried to work out how to make a poster with ChatGPT, you’ve probably run into the same problem most people do. ChatGPT can give you a striking image in under a minute, but if it misspells the date, there’s no text box you can click into to fix it.
A lot of older guides tell you to switch to GPT-4 or open the Canva GPT before you start, and some say free users can’t make posters at all. That advice is now out of date, because ChatGPT Images 2.5 (released September 8, 2026) works inside a normal chat on every plan, including Free.
In short, you let ChatGPT plan the poster, write the copy and write the image prompt. You can then generate the poster in ChatGPT or paste the same prompt into an editable AI poster generator like Venngage’s, and check the size before you print.
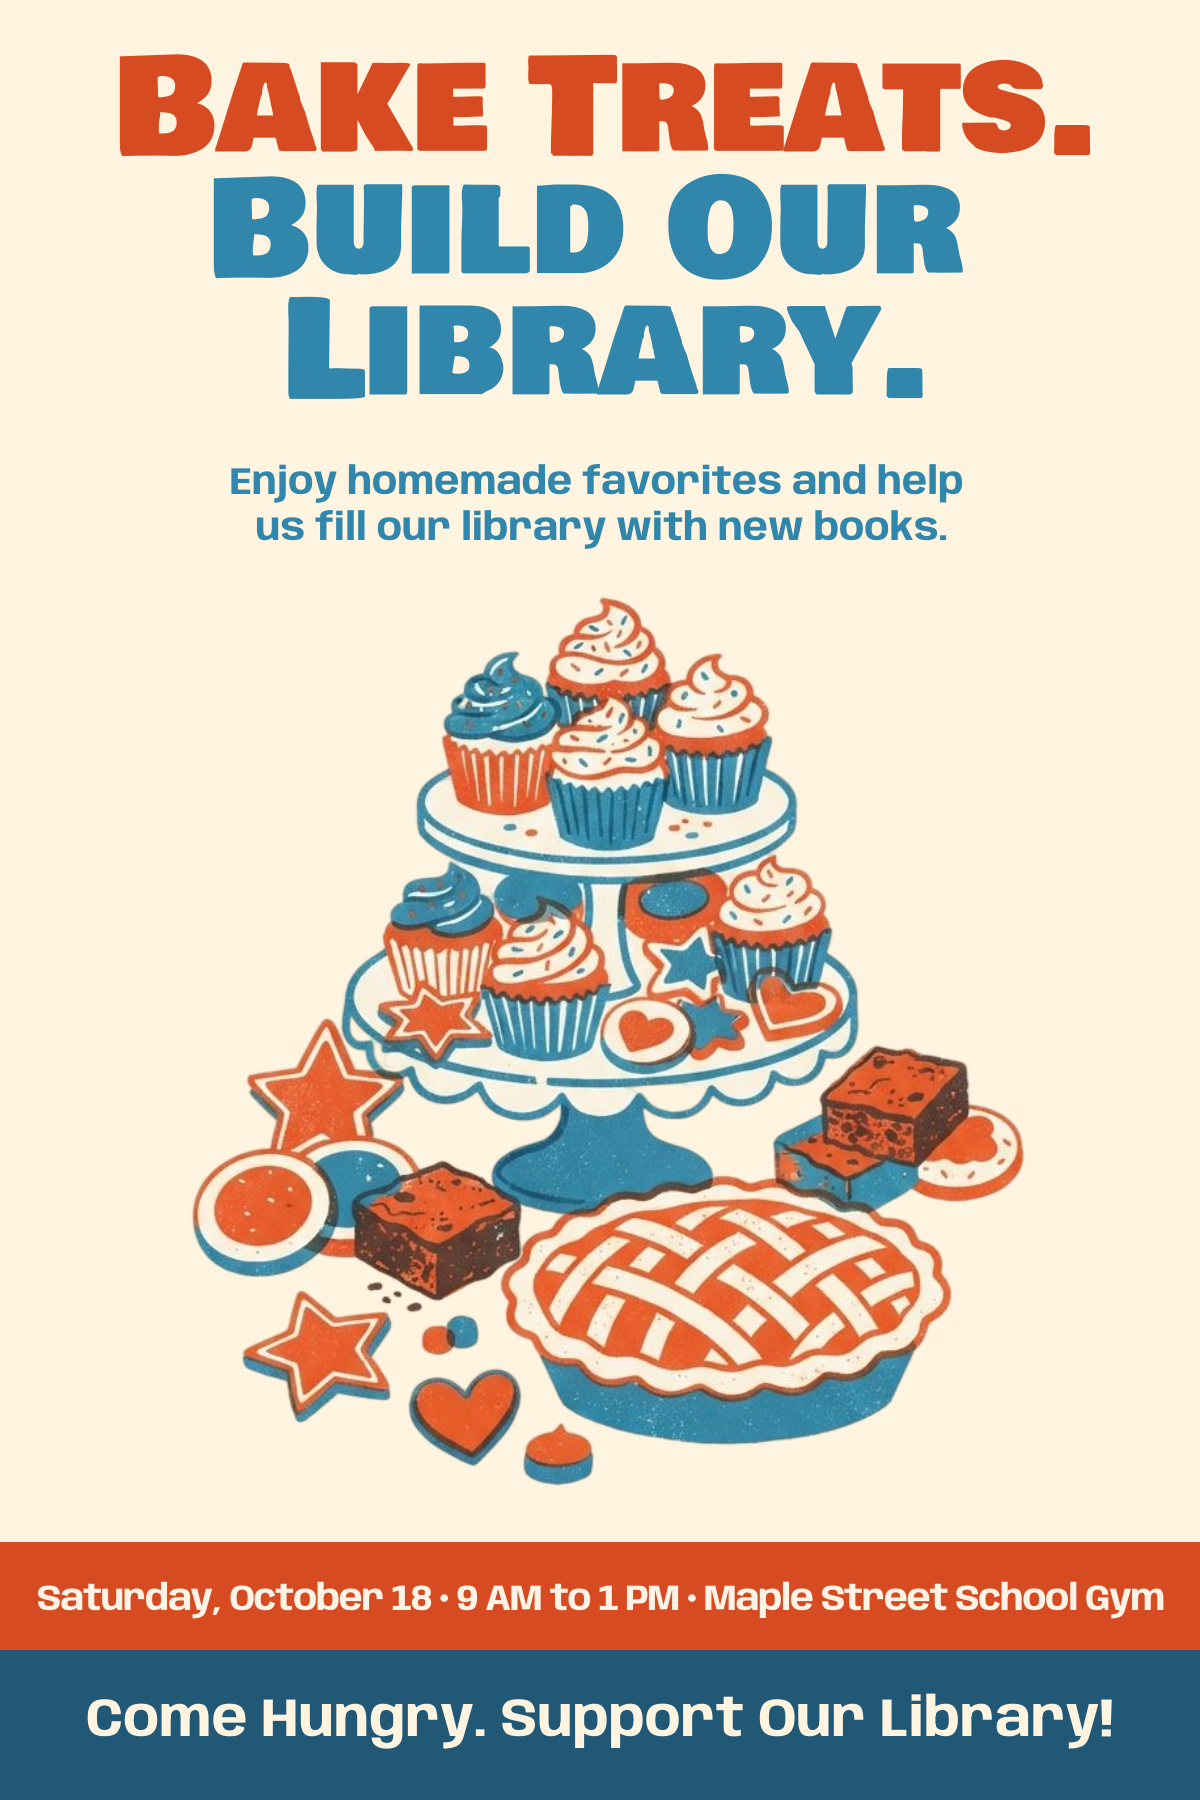
This guide walks through the exact workflow I use, with copy-paste prompts and a clear look at when ChatGPT’s image is good enough on its own. To test it, I made the same school bake sale poster in both ChatGPT and Venngage, and the screenshots in this guide come from that run.
Step 1: Plan Your Poster With ChatGPT
Spending five minutes in a text chat before you generate anything can save you several wasted images later. This matters most on the Free plan, where image limits are stricter and OpenAI doesn’t publish the exact caps.
- Paste this planning prompt into a new chat:
I need a poster for [purpose]. Audience: [who]. Where it will be seen: [hallway / Instagram / shop window]. Ask me up to 5 questions, then give me a one-paragraph brief: goal, the one key message, must-include facts, tone, and the best poster shape.
2. Answer its questions. If you’re making an educational poster, you can let it suggest facts, but check each one before you use it.
3. If you already have the content, paste or upload your event brief, lesson plan or report and ask ChatGPT to pull out the key message. Venngage’s AI poster generator can also start from an uploaded file, which Step 4 covers.
4. Choose the shape at this stage: portrait 2:3 for most printed posters, 4:5 for an Instagram feed or 3:2 landscape for screens. Deciding early means you won’t have to crop out your headline later.
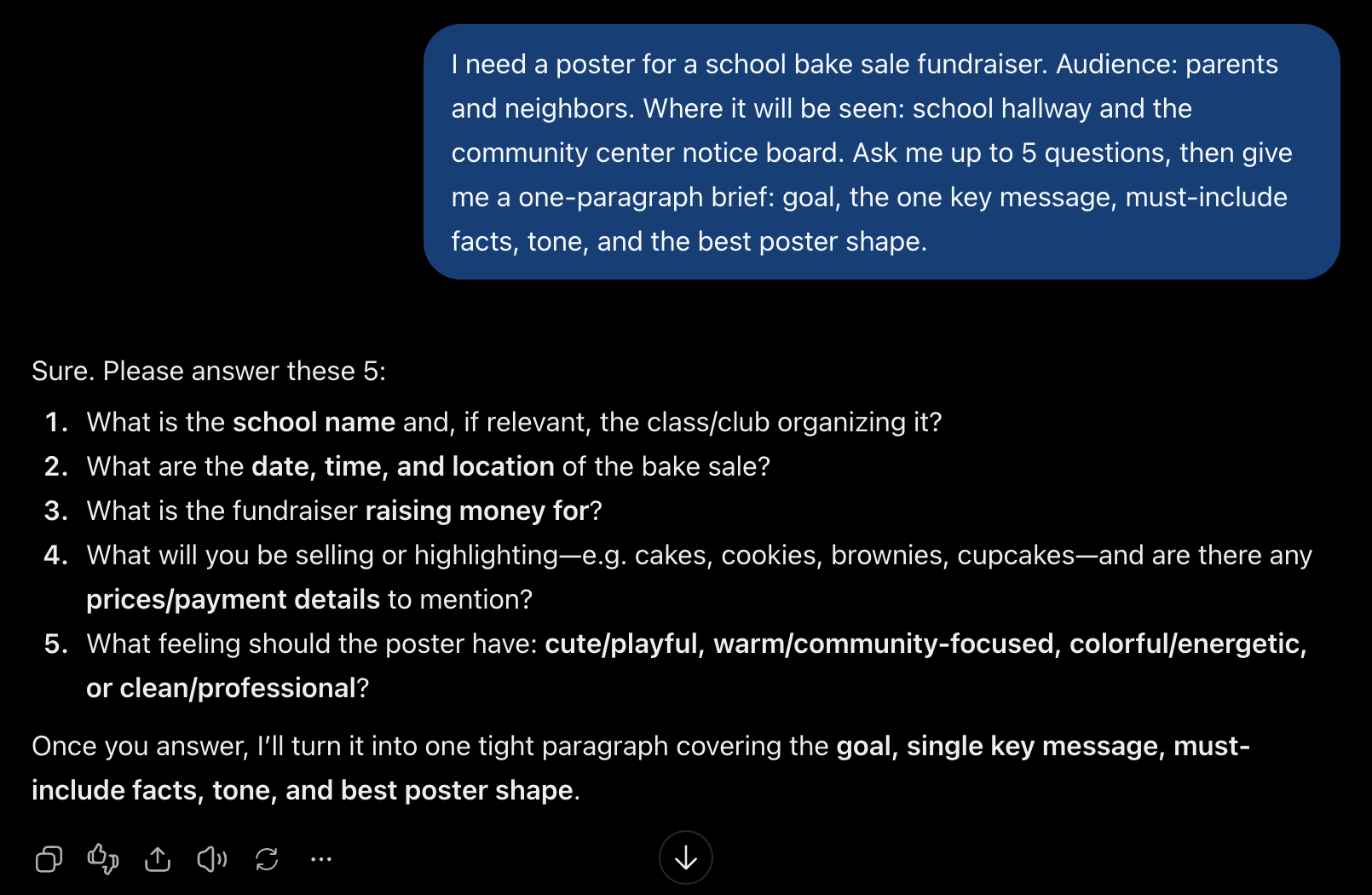
By now you should have a brief with one goal, one message, your key facts and a shape.
If you only take one thing from this step, make sure ChatGPT names the single message your poster needs to get across.
Step 2: Write the Poster Copy in ChatGPT
ChatGPT Images 2.5 usually gets short headlines right, but longer blocks of text can still come out with invented or garbled words. In practice, the less text you put on your poster, the fewer typos you’ll have to fix.
That’s why it pays to lock in the exact wording before you generate a single image.
- Paste this copy prompt into the same chat:
Using this brief, write: a headline of 6 words or fewer, a subhead under 12 words, up to 3 detail lines (date, time, place or key facts), and a call to action. Give me 3 headline options. Then list everything in order of visual importance.
2. Pick your headline. The final list is your visual hierarchy, which is the order you want a reader’s eye to follow.
3. Cut the copy down as far as you can. I aim for about 25 words per poster, which is my own rule of thumb from making these, and every word you remove is one less chance of a typo.
4. Proofread every name, date and price at this point. As Atlas Cloud puts it, “If one wrong character can change a price, a date, or a legal claim, an image that looks right is still a failed asset.”
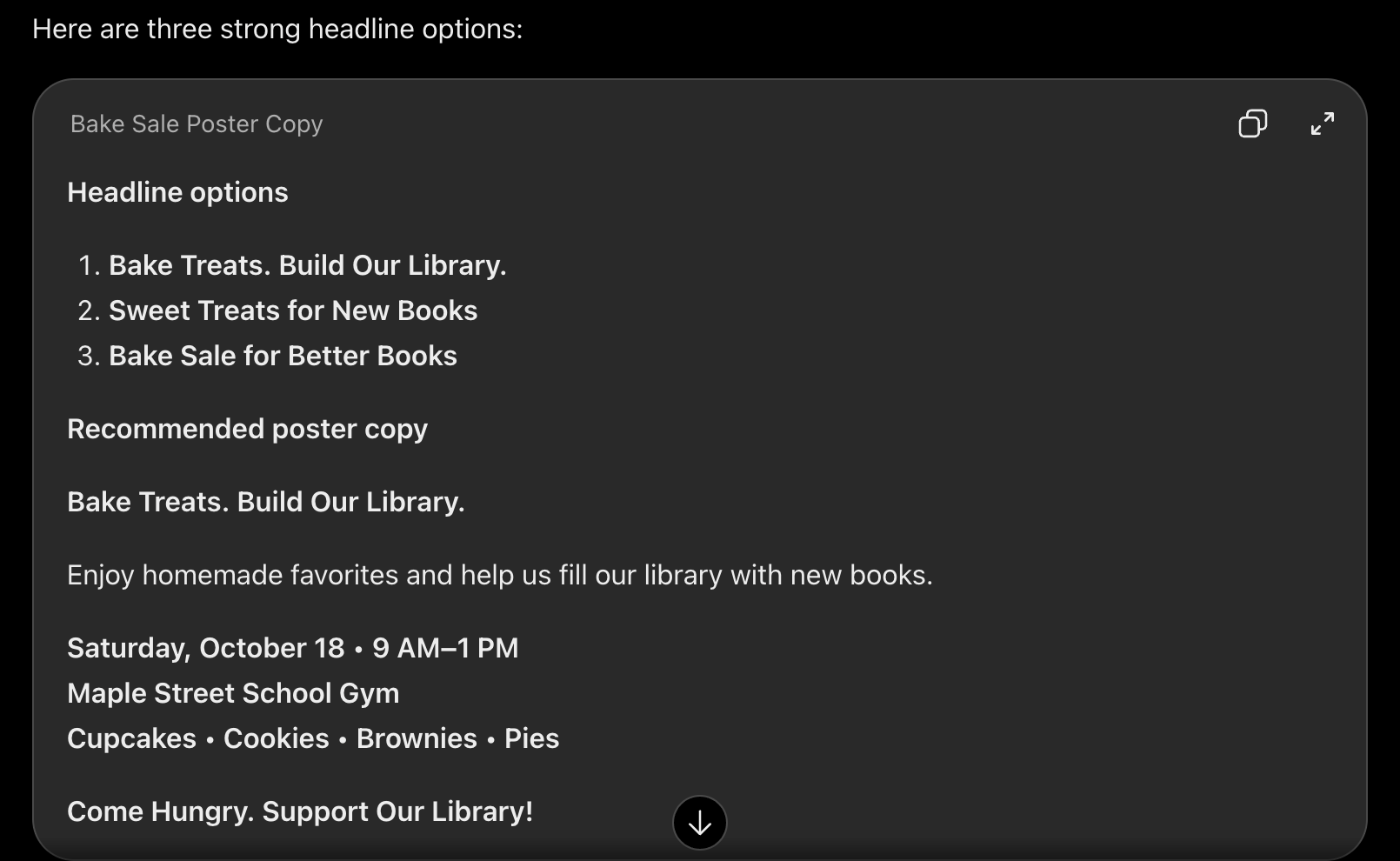
By now you should have final, proofread copy, and this is the only text that should go into any poster tool.
Step 3: Have ChatGPT Turn Your Copy Into a Poster Prompt
Why does one prompt look designed and another look like clip art? The difference usually comes down to three lines: a named style, a locked color palette and text written in quotes.
The goal of this step is a single ChatGPT poster prompt that works in both tools. You can ask ChatGPT to “turn my brief and copy into a poster prompt using this template” and paste the template in after it, or you can fill in the brackets yourself.
Create a [portrait 2:3] poster for [purpose/audience]. Style: [named style, e.g. Swiss modernist / risograph / clean flat illustration]. Colors: only [2-3 hex codes] on [background], strong contrast. Layout: headline at top, main visual in the middle, details at bottom, plenty of empty space. Text (verbatim, exactly once each, no extra words): Headline: “[…]” Subhead: “[…]” Details: “[…]” Call to action: “[…]” Typography: bold sans-serif headline, large and easy to read.
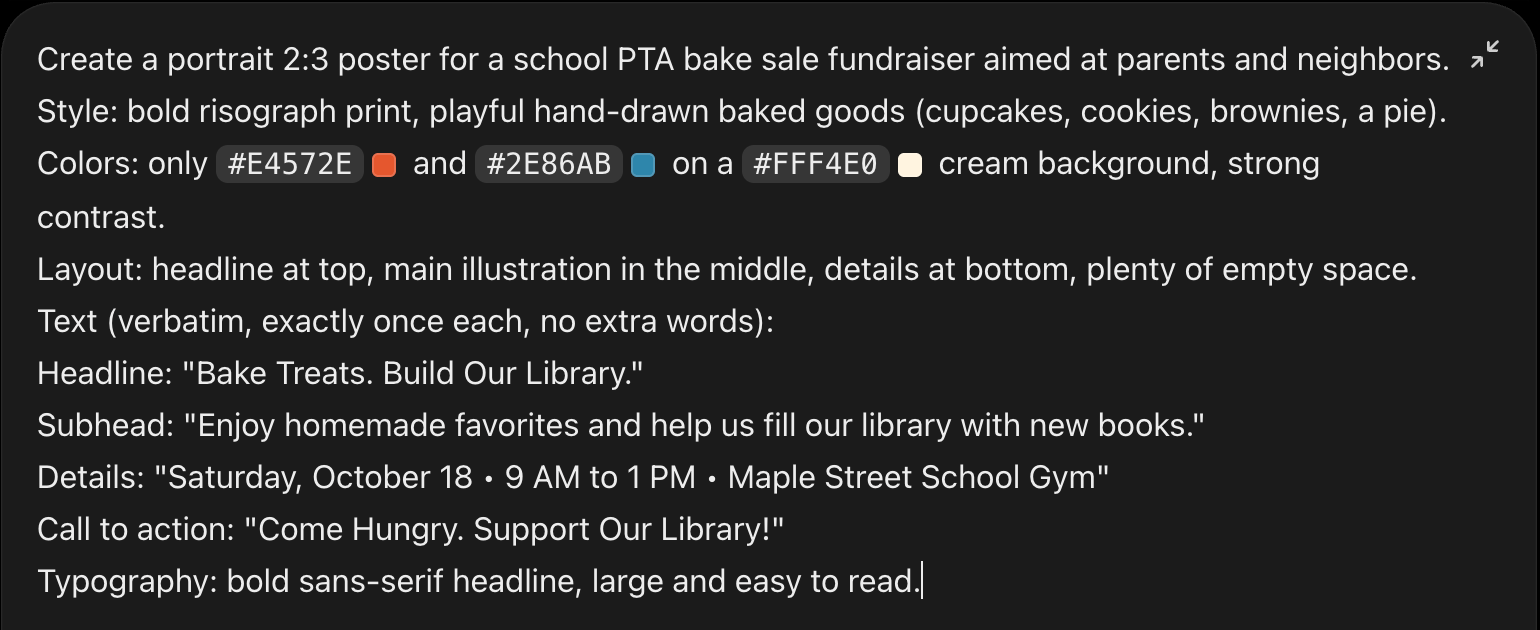
Here’s why this template works:
- Quotes, “verbatim” and one element per line come from OpenAI’s own prompting guide, and in one OpenAI community thread, listing the text line by line was what finally stopped the gibberish.
- A named style, 2-3 hex colors and empty space are the fixes designer Mika Reyes recommends for avoiding the generic “AI look.”
- Logos need firm wording. When you upload a logo in ChatGPT, tell it to “use the uploaded logo exactly; do not redraw, recolor or distort it.”
If you’re not sure which style to name, Venngage’s poster templates are a good place to look for ideas.
By now you should have one prompt ready to paste.
Best for: posters with a short headline and a few supporting details. Leave out fine print, price tables and long paragraphs, since you can add those in Step 5.
Step 4: Generate the Poster in ChatGPT or Venngage
Say you finally get a layout you love, but the date reads “Octber 18.” Whether that’s a 10-second fix or another round of regenerating depends on which route you took.
Both routes work, so choose the one that fits the poster you’re making.
Option A: Generate it in ChatGPT
- Paste your prompt into a normal ChatGPT chat, which is what I did, or start from Images. You don’t need to switch models or use the Canva GPT. It also works on the Free plan with stricter limits, and while OpenAI doesn’t publish exact caps, unofficial community reports suggest about 2-3 images a day.
2. Fix text errors with a follow-up like this:
Change only the headline to read “[exact text]”, spelled [L-E-T-T-E-R-S]. Keep everything else the same.
3. Ask for one change per request and restate what needs to stay the same, as OpenAI’s cookbook recommends.
4. For small fixes, click the image to open the editor, choose Comment, click the spot you want changed, type the change and click Send. The editor also includes Markup, Erase, Remove BG and Resize. Afterwards, check the whole poster again, because ChatGPT regenerates the image and other details can shift.
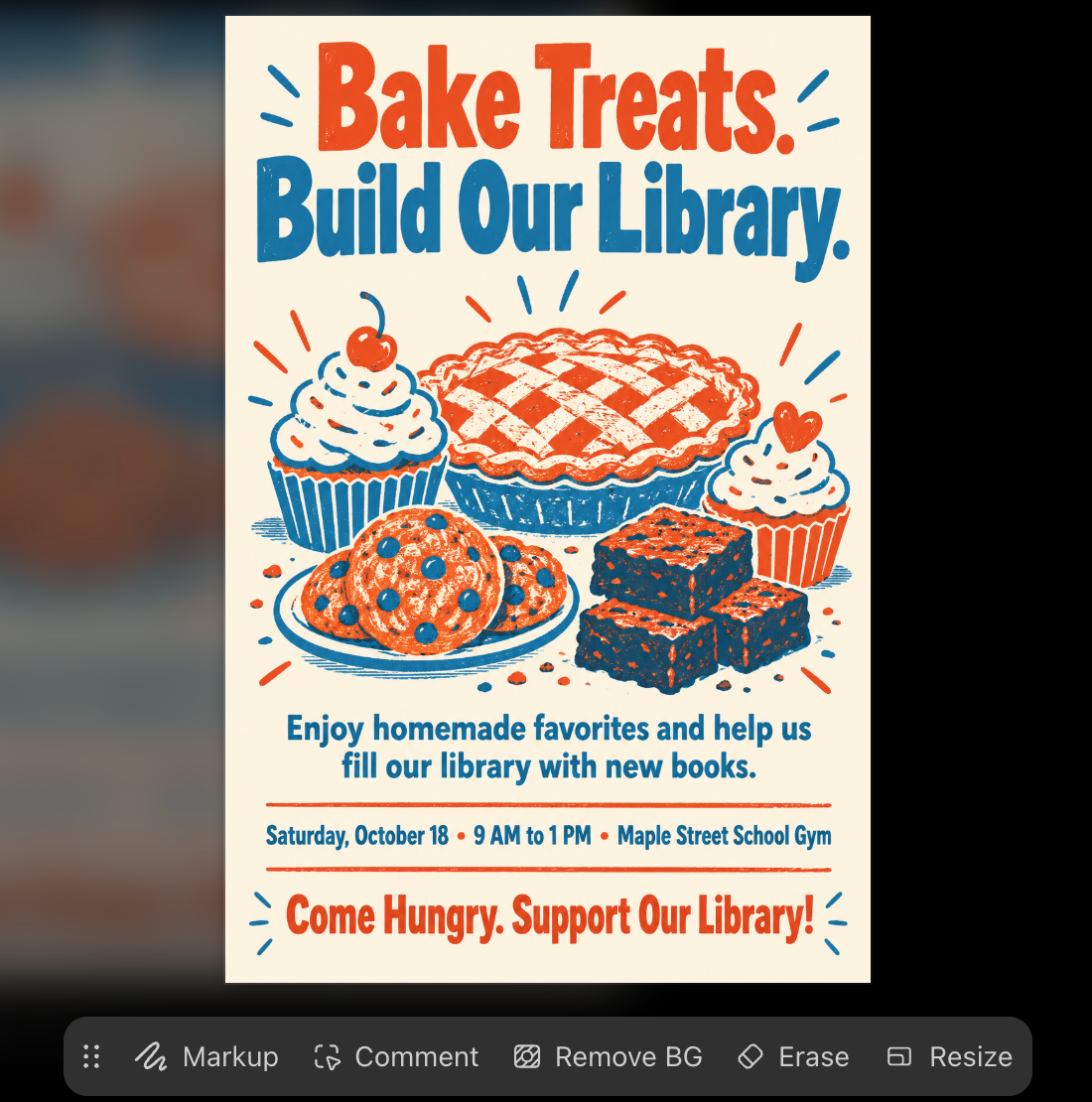
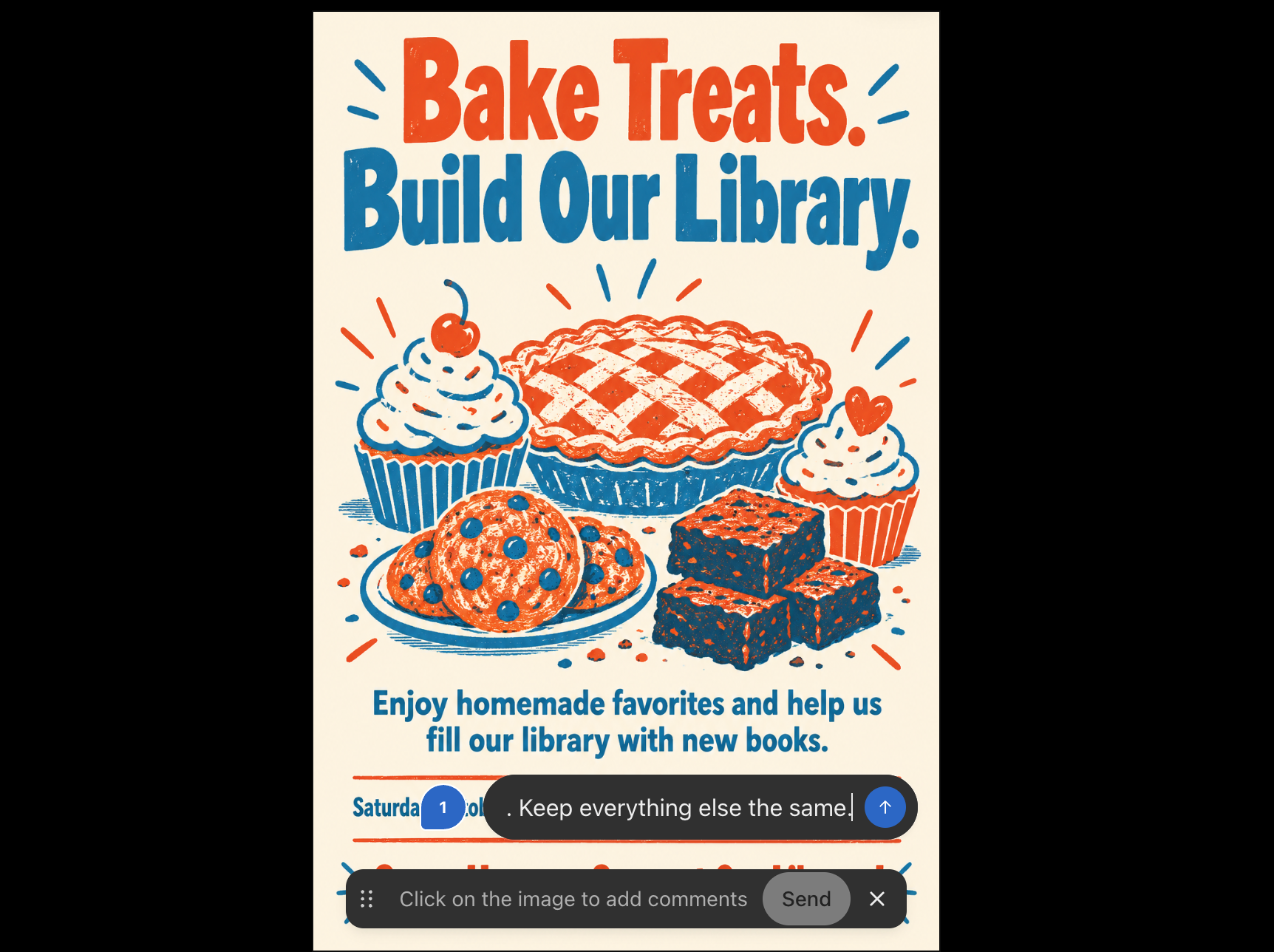
The date edit worked, but it took about a minute to regenerate, and I still had to re-check every other word.
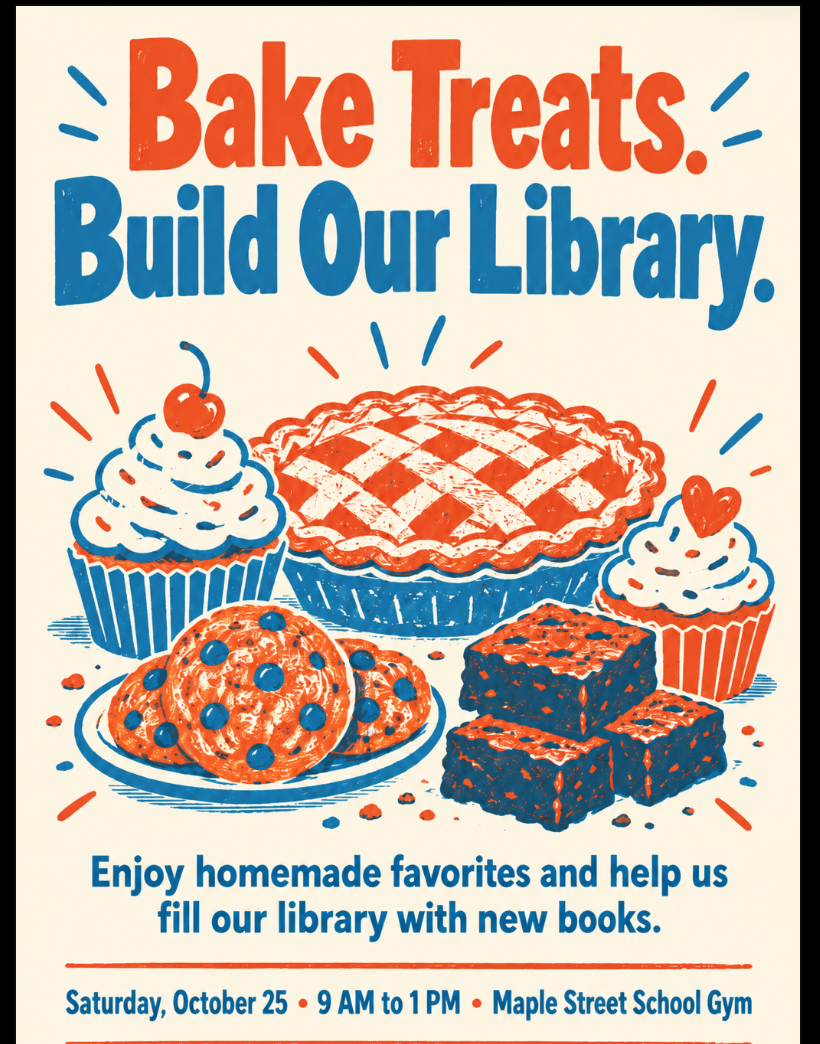
Before you commit to this route, keep these limits in mind:
- The output is a flat image with no editable text layers or fonts, so changing the date next week means another edit or generation, and another proofread, unless you make it editable in Venngage (see Step 5).
- OpenAI lists text rendering as one of the model’s known limitations.
- My portrait poster came out at 1024×1536 pixels, which only prints sharp at about 3.4×5.1 inches at 300 DPI (more on this in Step 6).
Option B: Paste it into Venngage’s AI poster generator
- Open Venngage’s AI poster generator.
- Paste in your copy from Step 2 and your prompt from Step 3. You can also upload a file, such as the document from Step 1, or remix a template.
- Click Generate. You’ll need a free Venngage account, so sign up or log in when it asks.
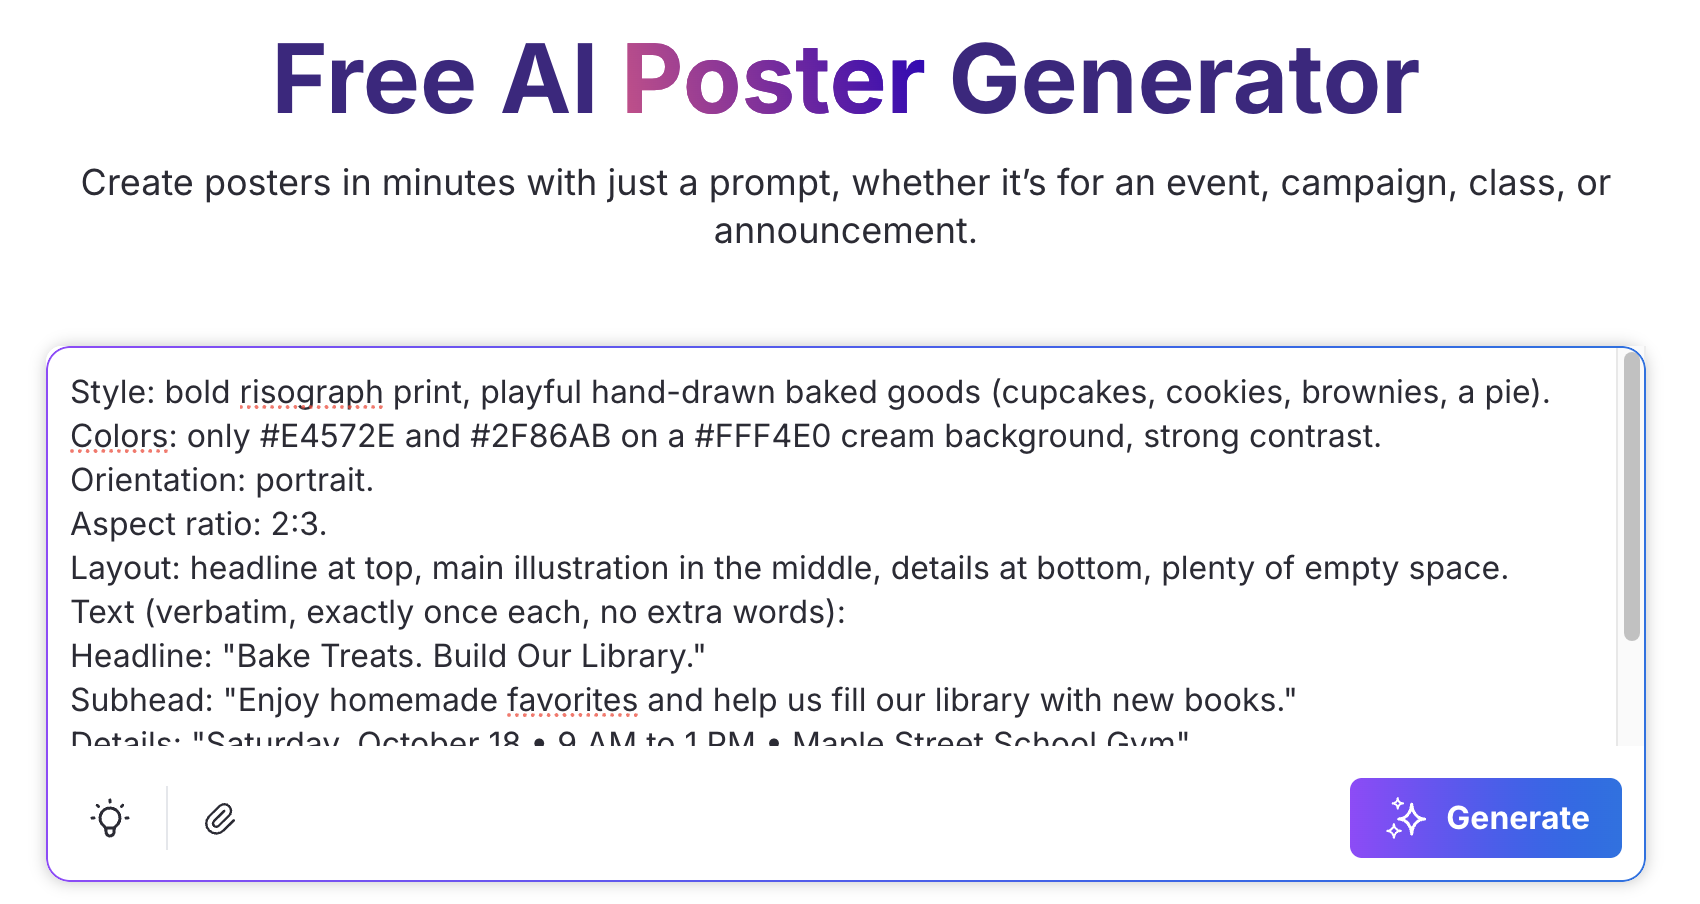
Venngage describes its process as “Define Your Goal, Write a Prompt, Generate, Edit, Export or Share,” which matches the work you’ve already done in Steps 1 to 3. What you get back is a poster layout with text and visuals, and because the text stays live and editable, fixing a typo only means retyping the word. There’s also a free plan if you want to try the AI features before you commit, though it’s limited to 5 designs and a set number of AI credits.
Check the first draft as carefully as you would check ChatGPT’s. Mine came out in landscape, with pale text sitting over a busy illustration. I fixed the structure with two requests in the AI Designer chat panel. The first asked for solid panels behind the text, and the second read like a design brief: portrait 1200×1800 px, a large two-line headline, the illustration in a framed block, the date in a solid blue band and the call to action at the bottom.
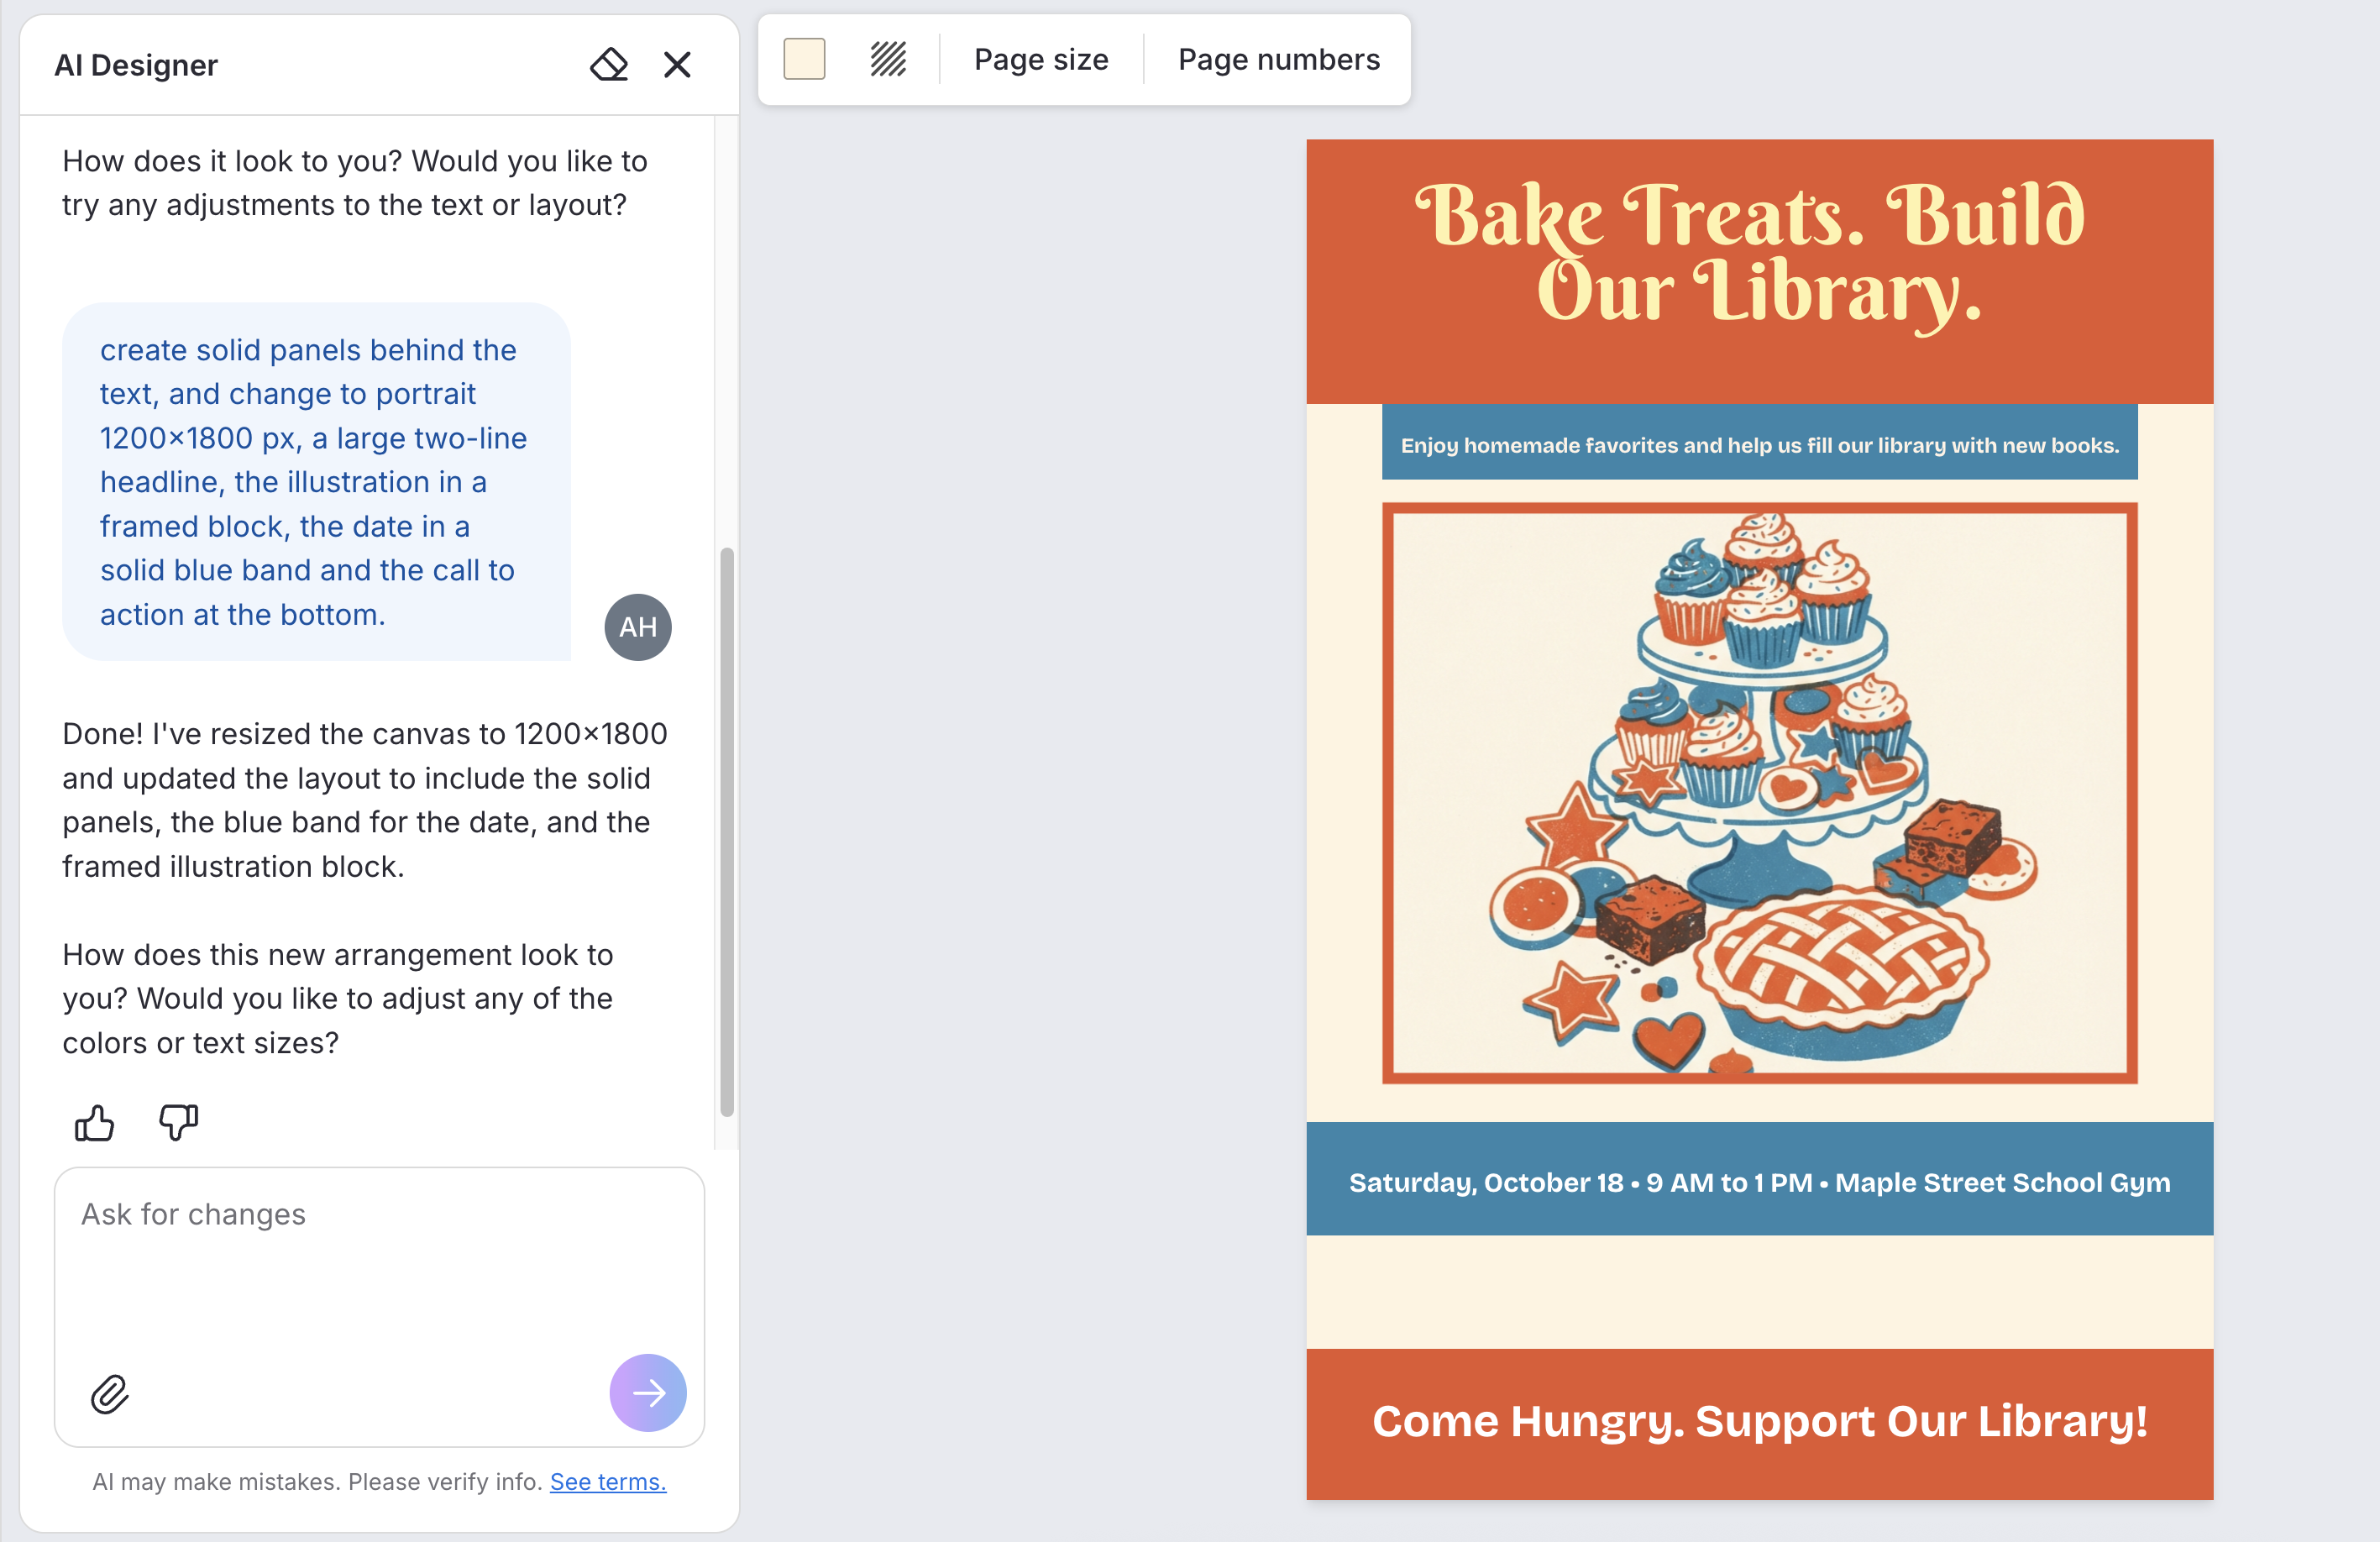
Write AI Designer requests like a brief to a designer: format, hierarchy, colors and where each block goes.
The more specific your request, the closer the result will be to what you pictured, while a vague request like “make it better” tends to get vague changes.
By now you should have a first draft, either as an image in ChatGPT or as an editable design in Venngage.
Quick comparison: ChatGPT works well for a quick one-off image you won’t need to change, like a social graphic or mood board. Venngage is the better fit when the poster includes dates, prices or branding, or when it’s going to a printer. If you start in ChatGPT and later need changes, you can still upload the image to Venngage and make it editable.
Step 5: Edit and Brand Your Poster in Venngage
Plans change, and if your event moves to Saturday, an editable poster only needs one click into a text box. With a ChatGPT image, the same change means another edit or generation, followed by another round of checking for typos.
Staying in ChatGPT? If your image is already right and won’t need changes, skip ahead to Step 6 to check the size before you print.
If you went with Option A and still have tweaks to make, you don’t have to keep prompting ChatGPT and risk it changing parts of the design you already like. Instead, upload your ChatGPT image to Venngage, where it becomes an editable design with the same layout, so you can fix only what needs fixing.
- Download your finished poster from ChatGPT as a PNG.
- Sign up for a free Venngage account or log in, which takes you to your dashboard. Click Upload image at the top of the dashboard, under ‘How would you like to create?’.
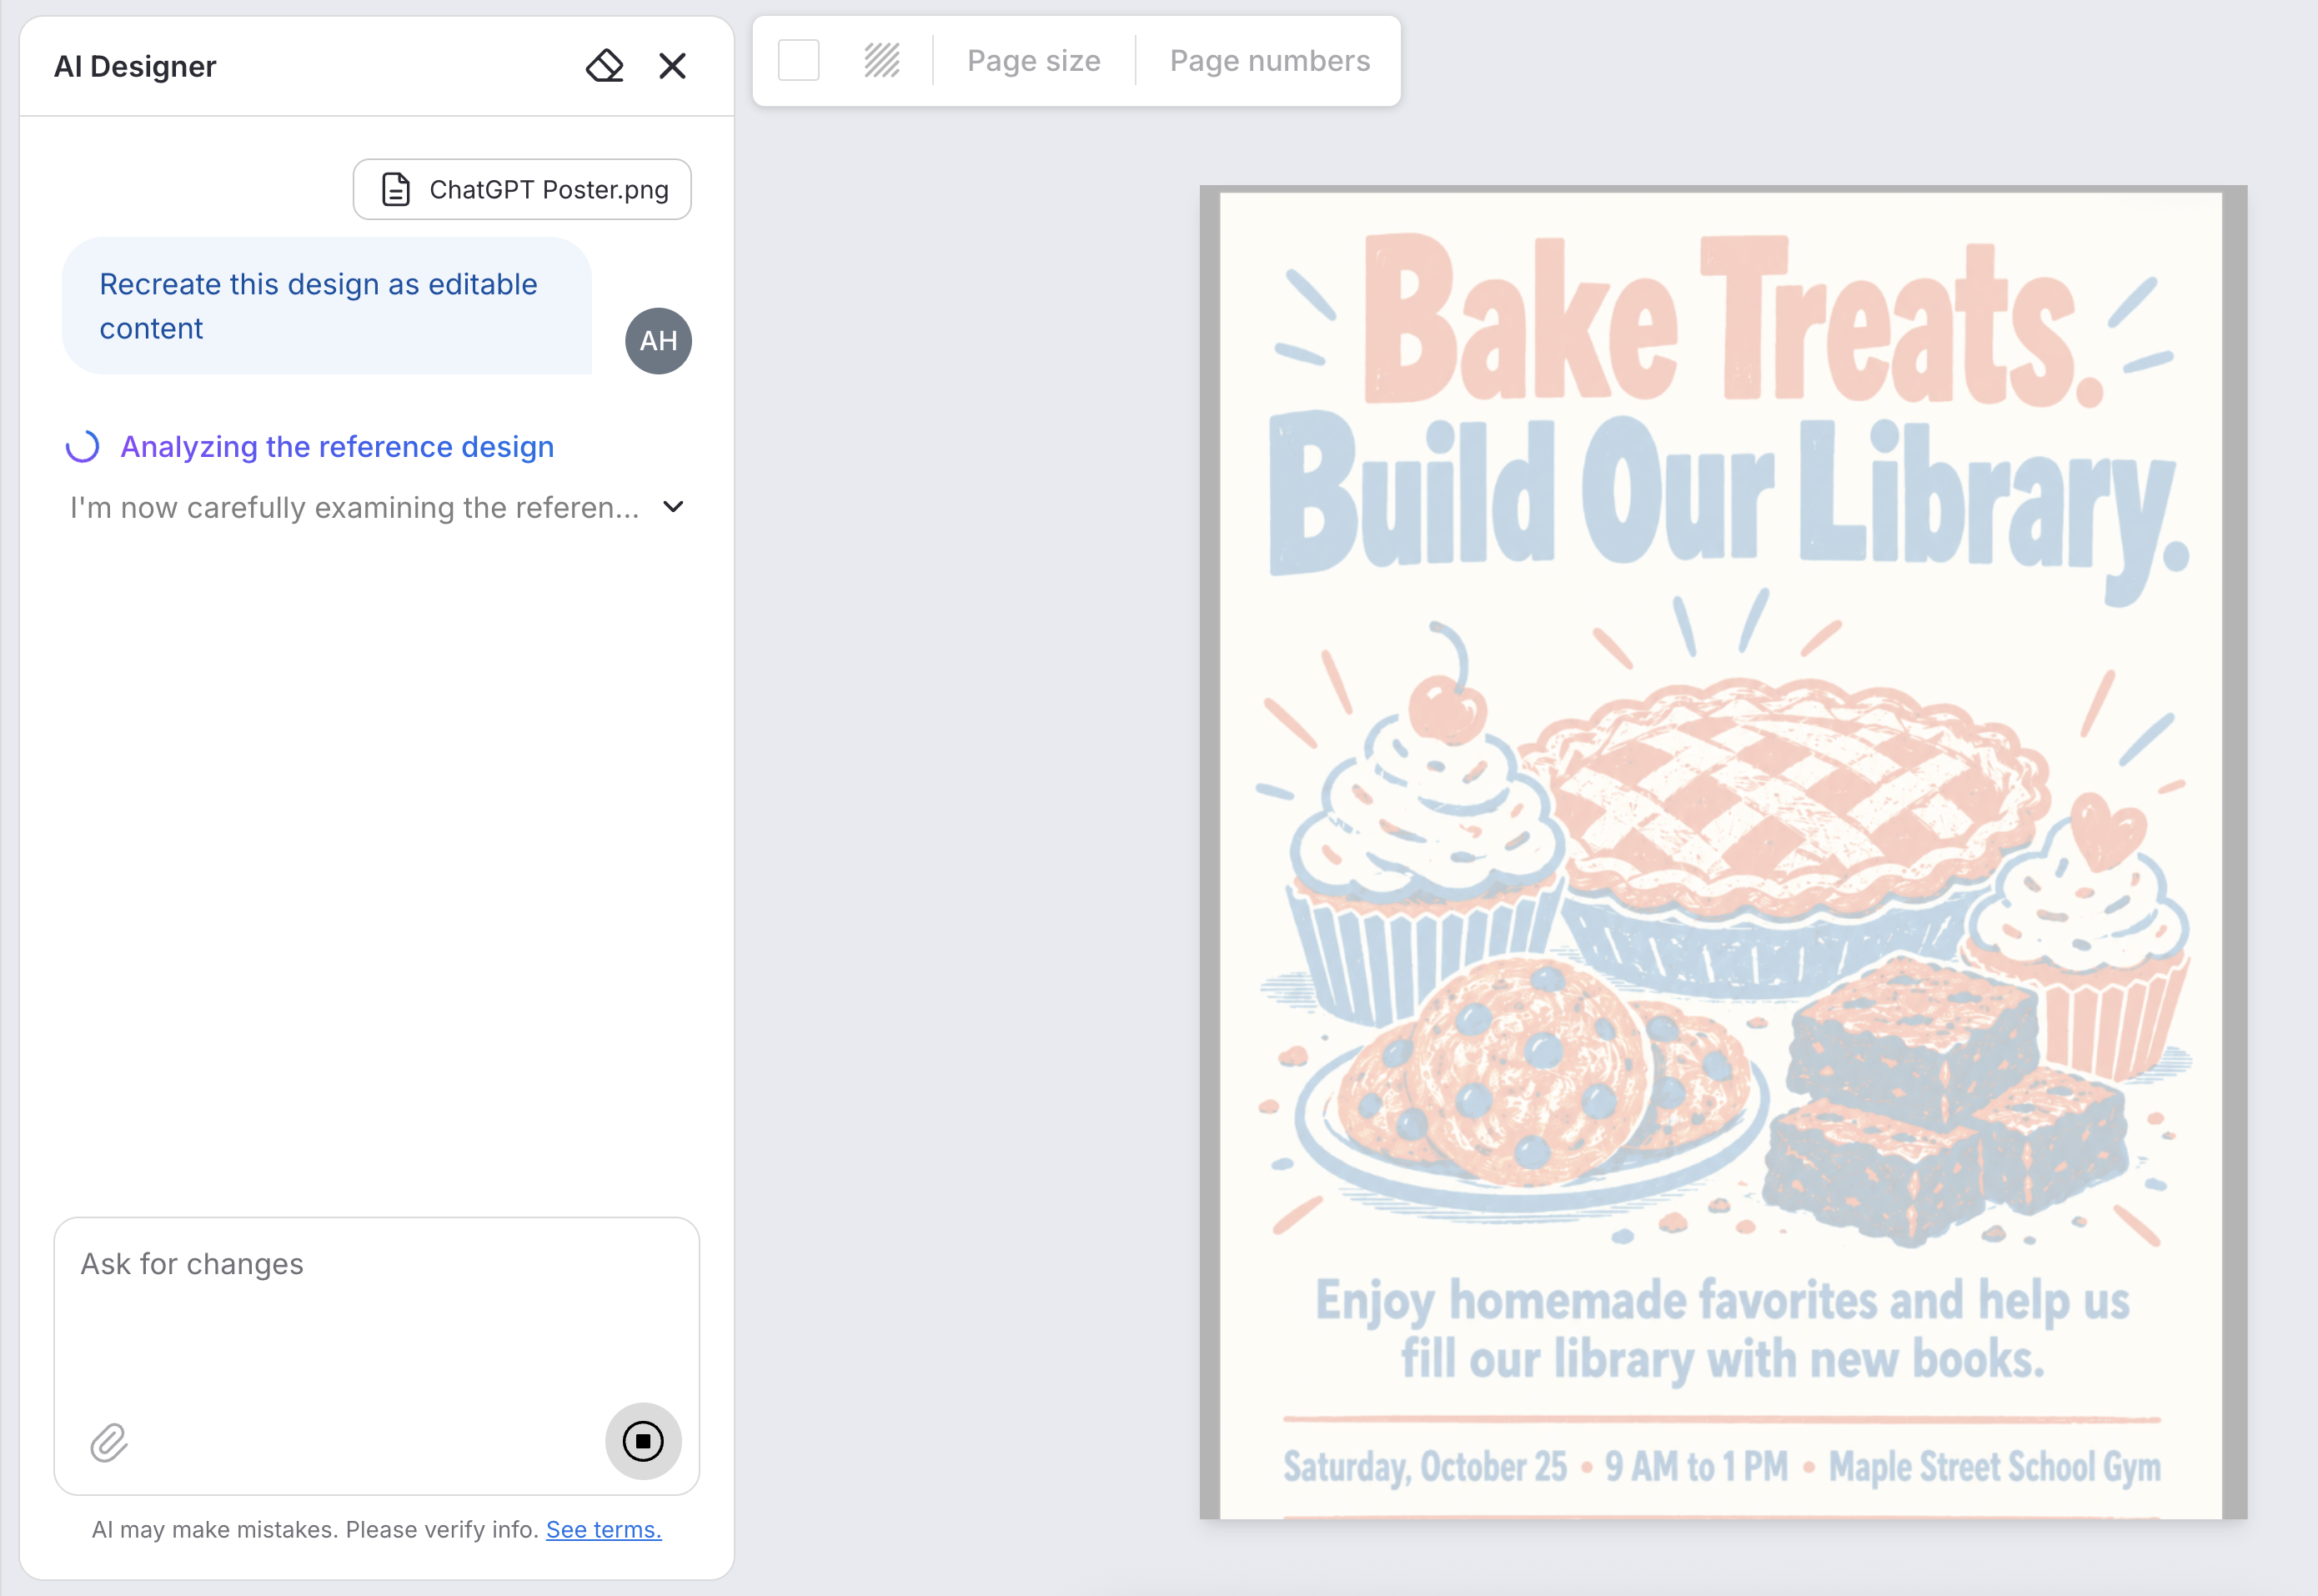
- Select your ChatGPT poster. It opens in the AI Designer with the request “Recreate this design as editable content.”
- Give it a moment while it studies the layout. It rebuilds the poster with the same headline, colors and structure, and every line of text comes back as a text box you can click into.
Good to know: Upload image is available on Venngage’s free plan, but it uses AI credits, and free accounts are limited to 5 designs in total. If you’re planning several posters, check your remaining designs and credits first.
On my bake sale poster, the recreated version kept the two-color headline, the illustration, the subhead and the date line in the same places, with every line of text now live. You can also change the illustration itself by clicking “Modify” and describe what you want in a prompt, like swapping the pie for a stack of books or matching it to your brand colors.
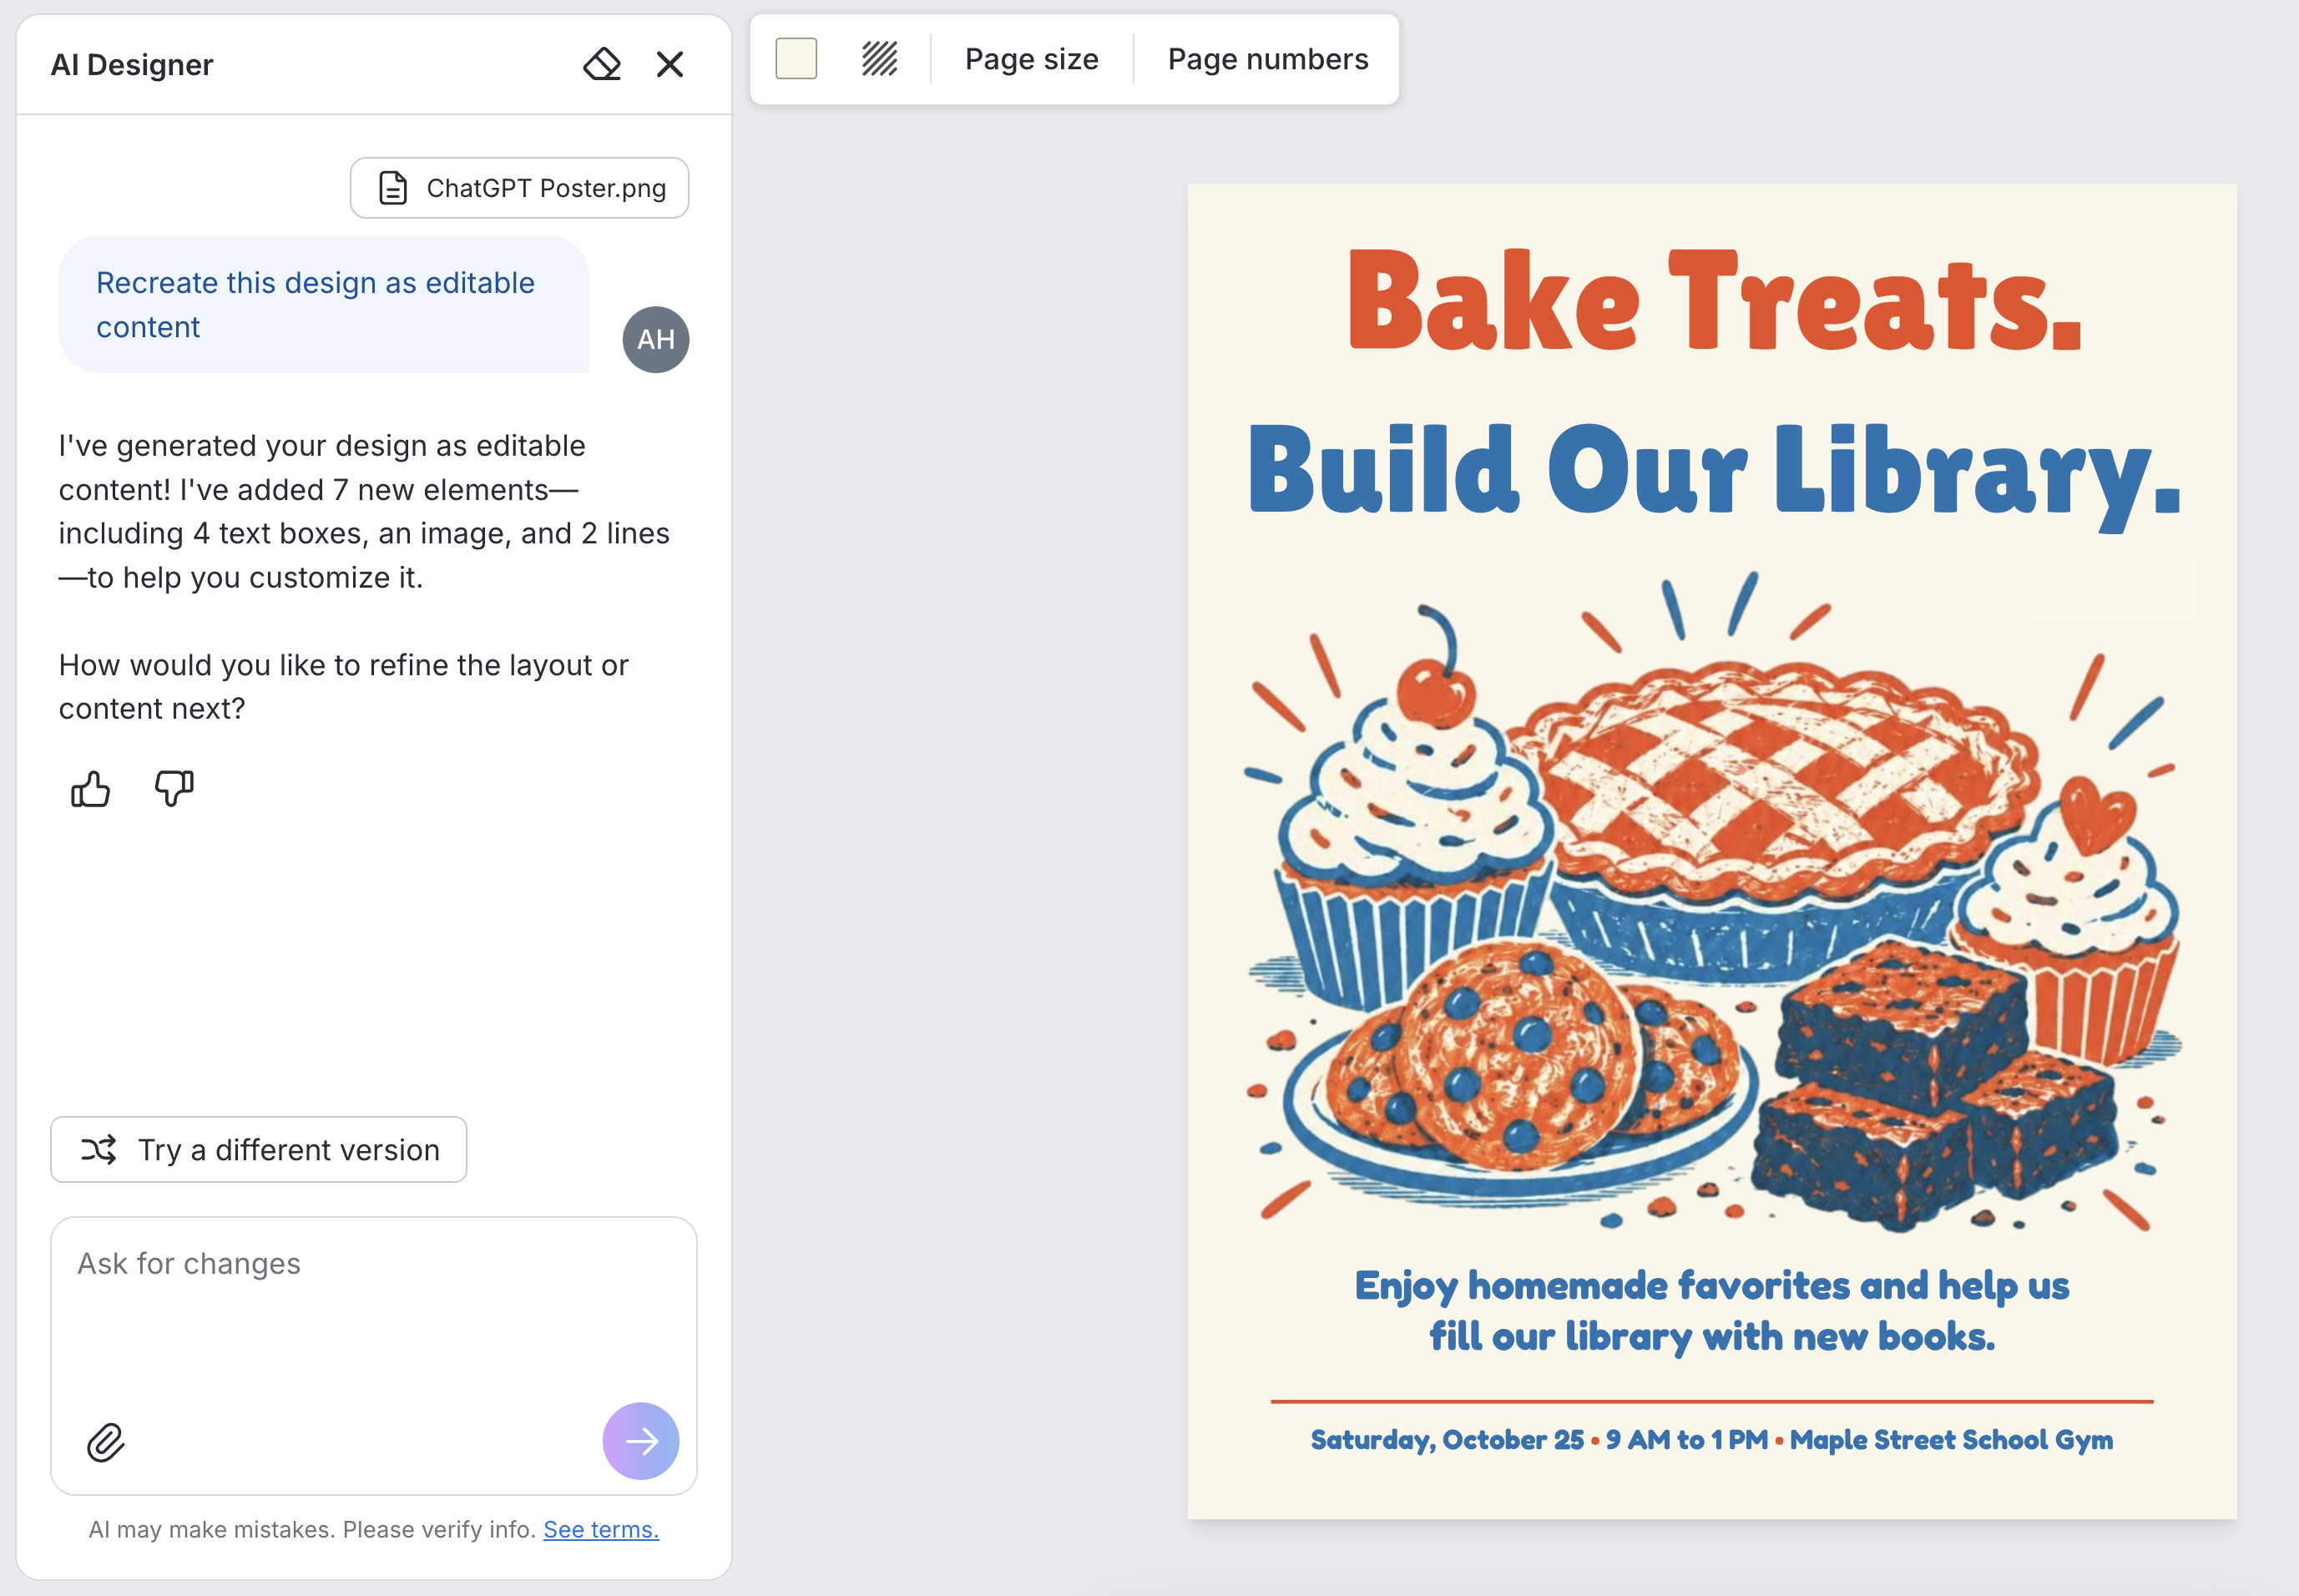
Expect a close replica of your original poster. Venngage rebuilds the text and layout to match it as closely as it can and uses similar fonts, while the illustration and color palette stay exactly as they were. Compare the result with your ChatGPT version before you go further, and if you’re printing large, check the resolution too, since the illustration still comes from ChatGPT’s image (see Step 6).
If you went with Option B, your design is already open in the Venngage editor, so you can go straight to the edits below.
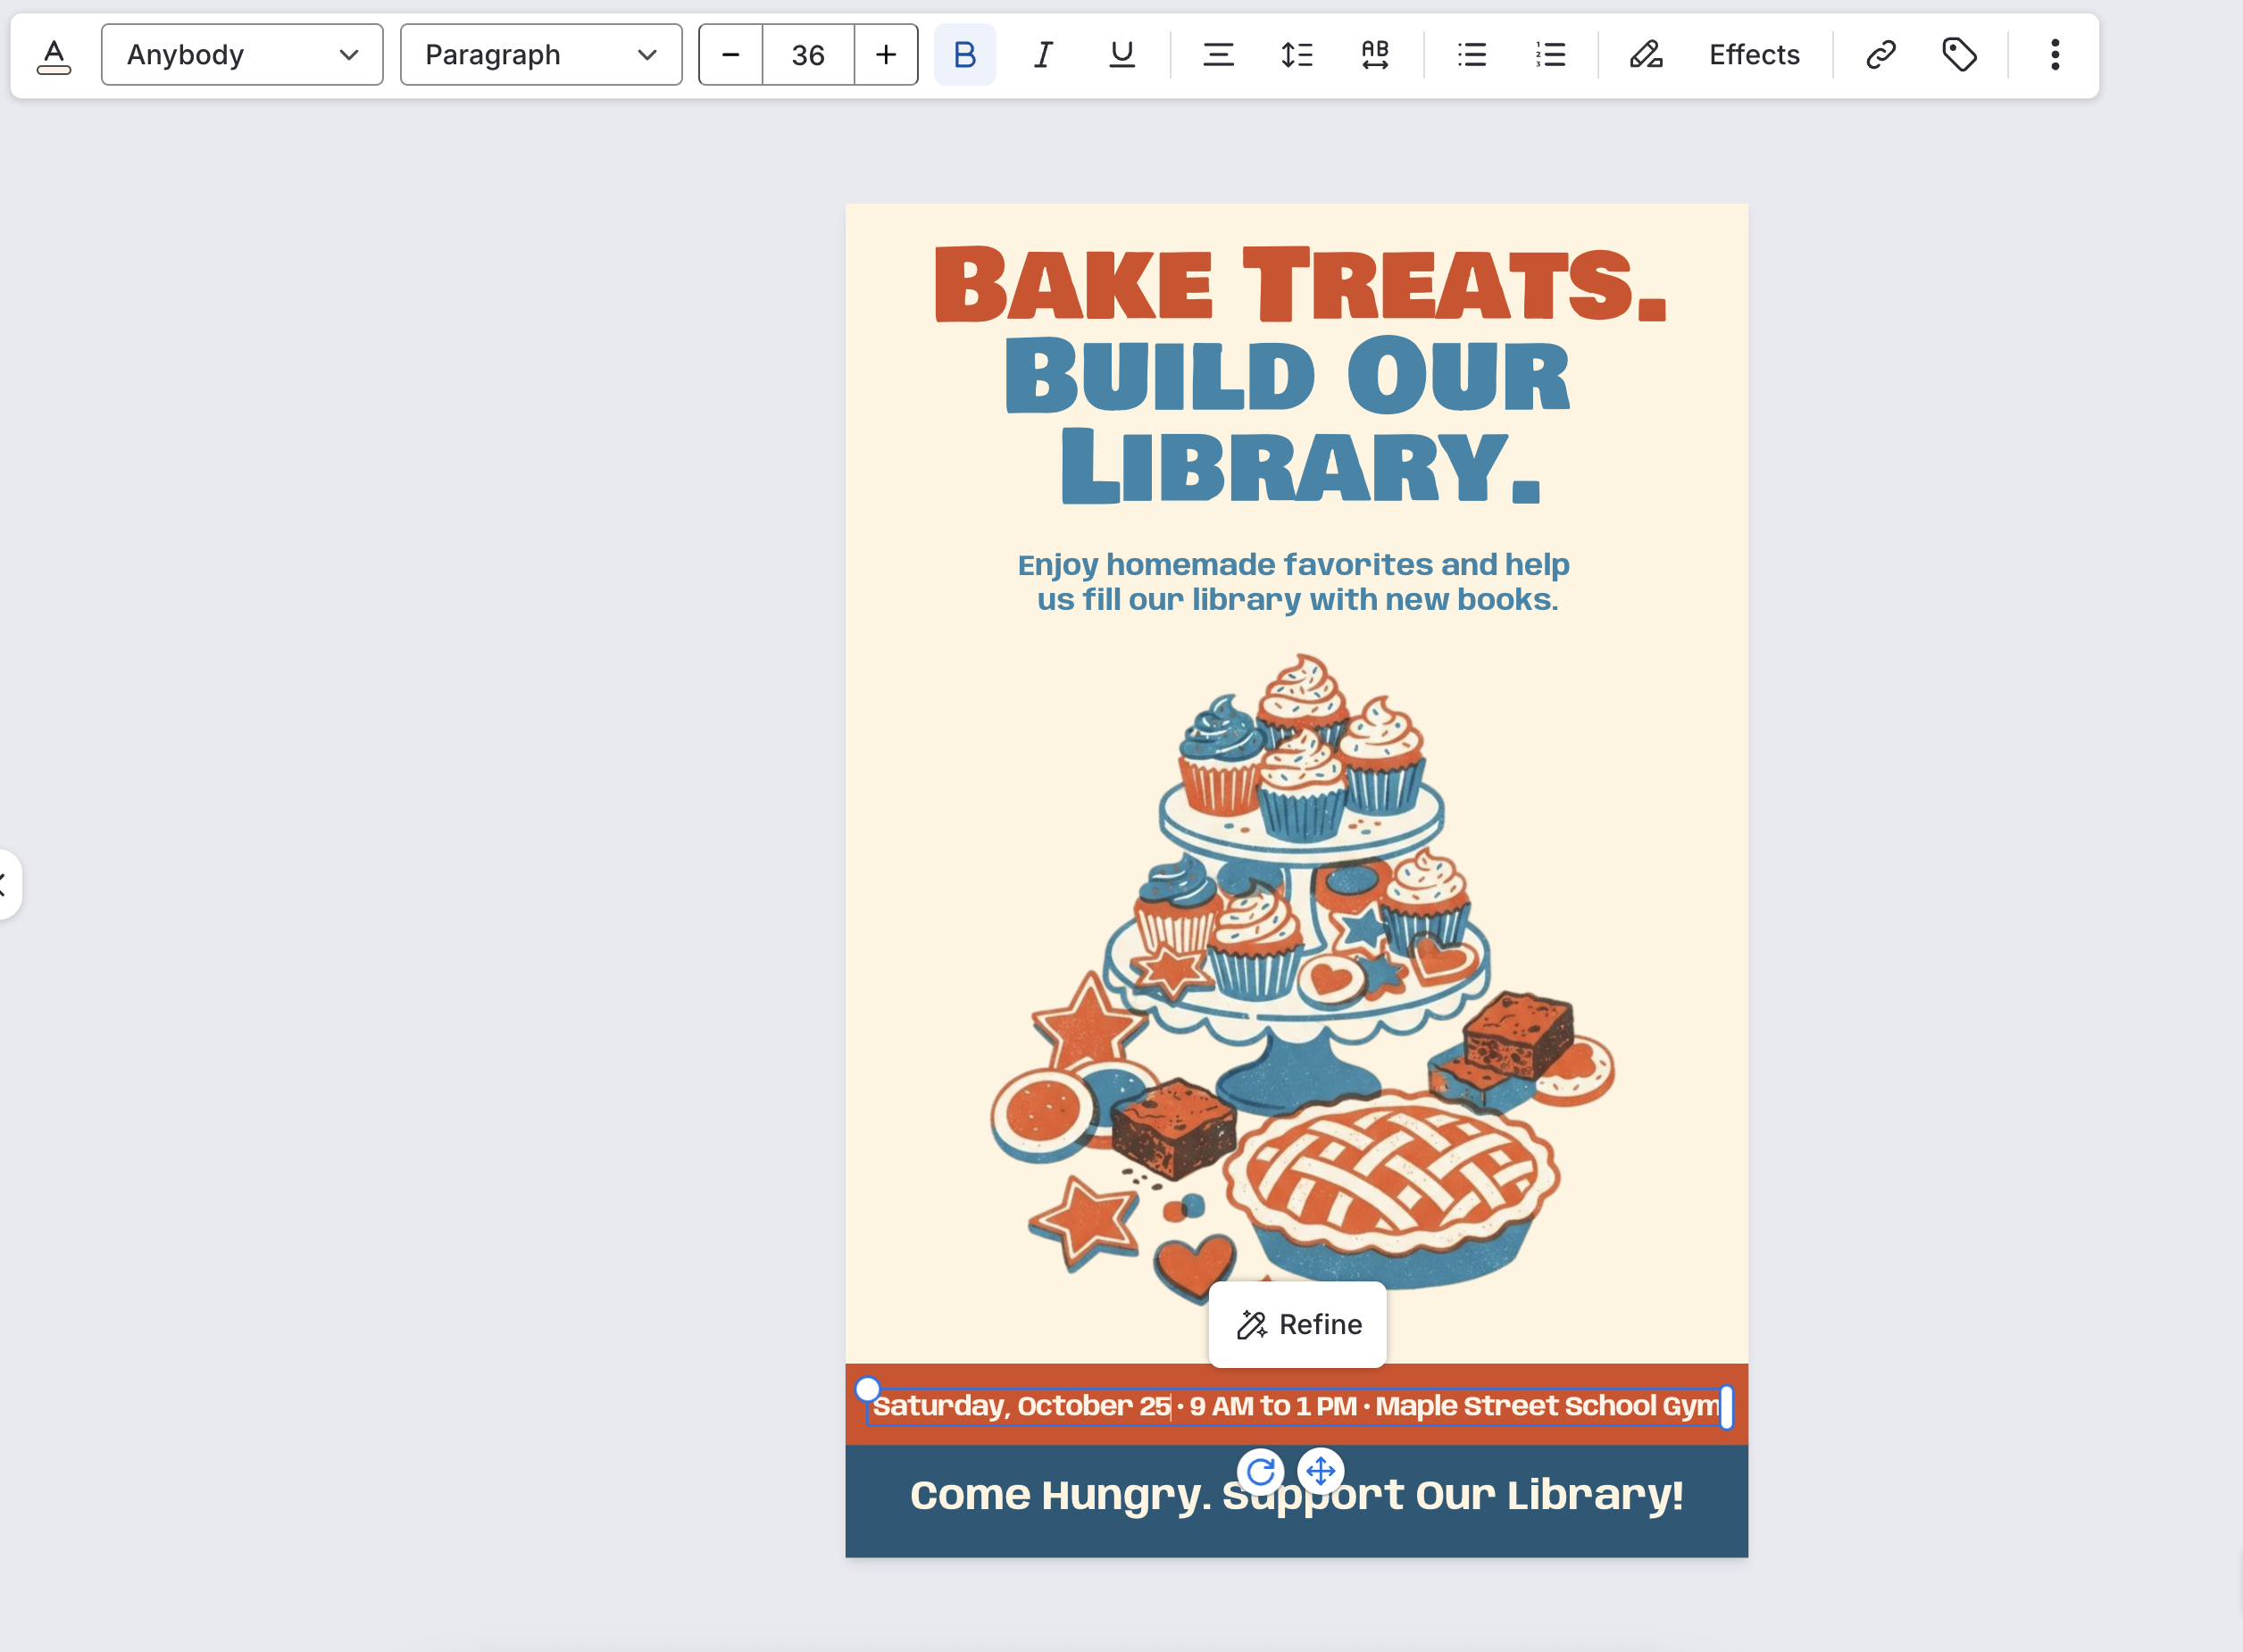
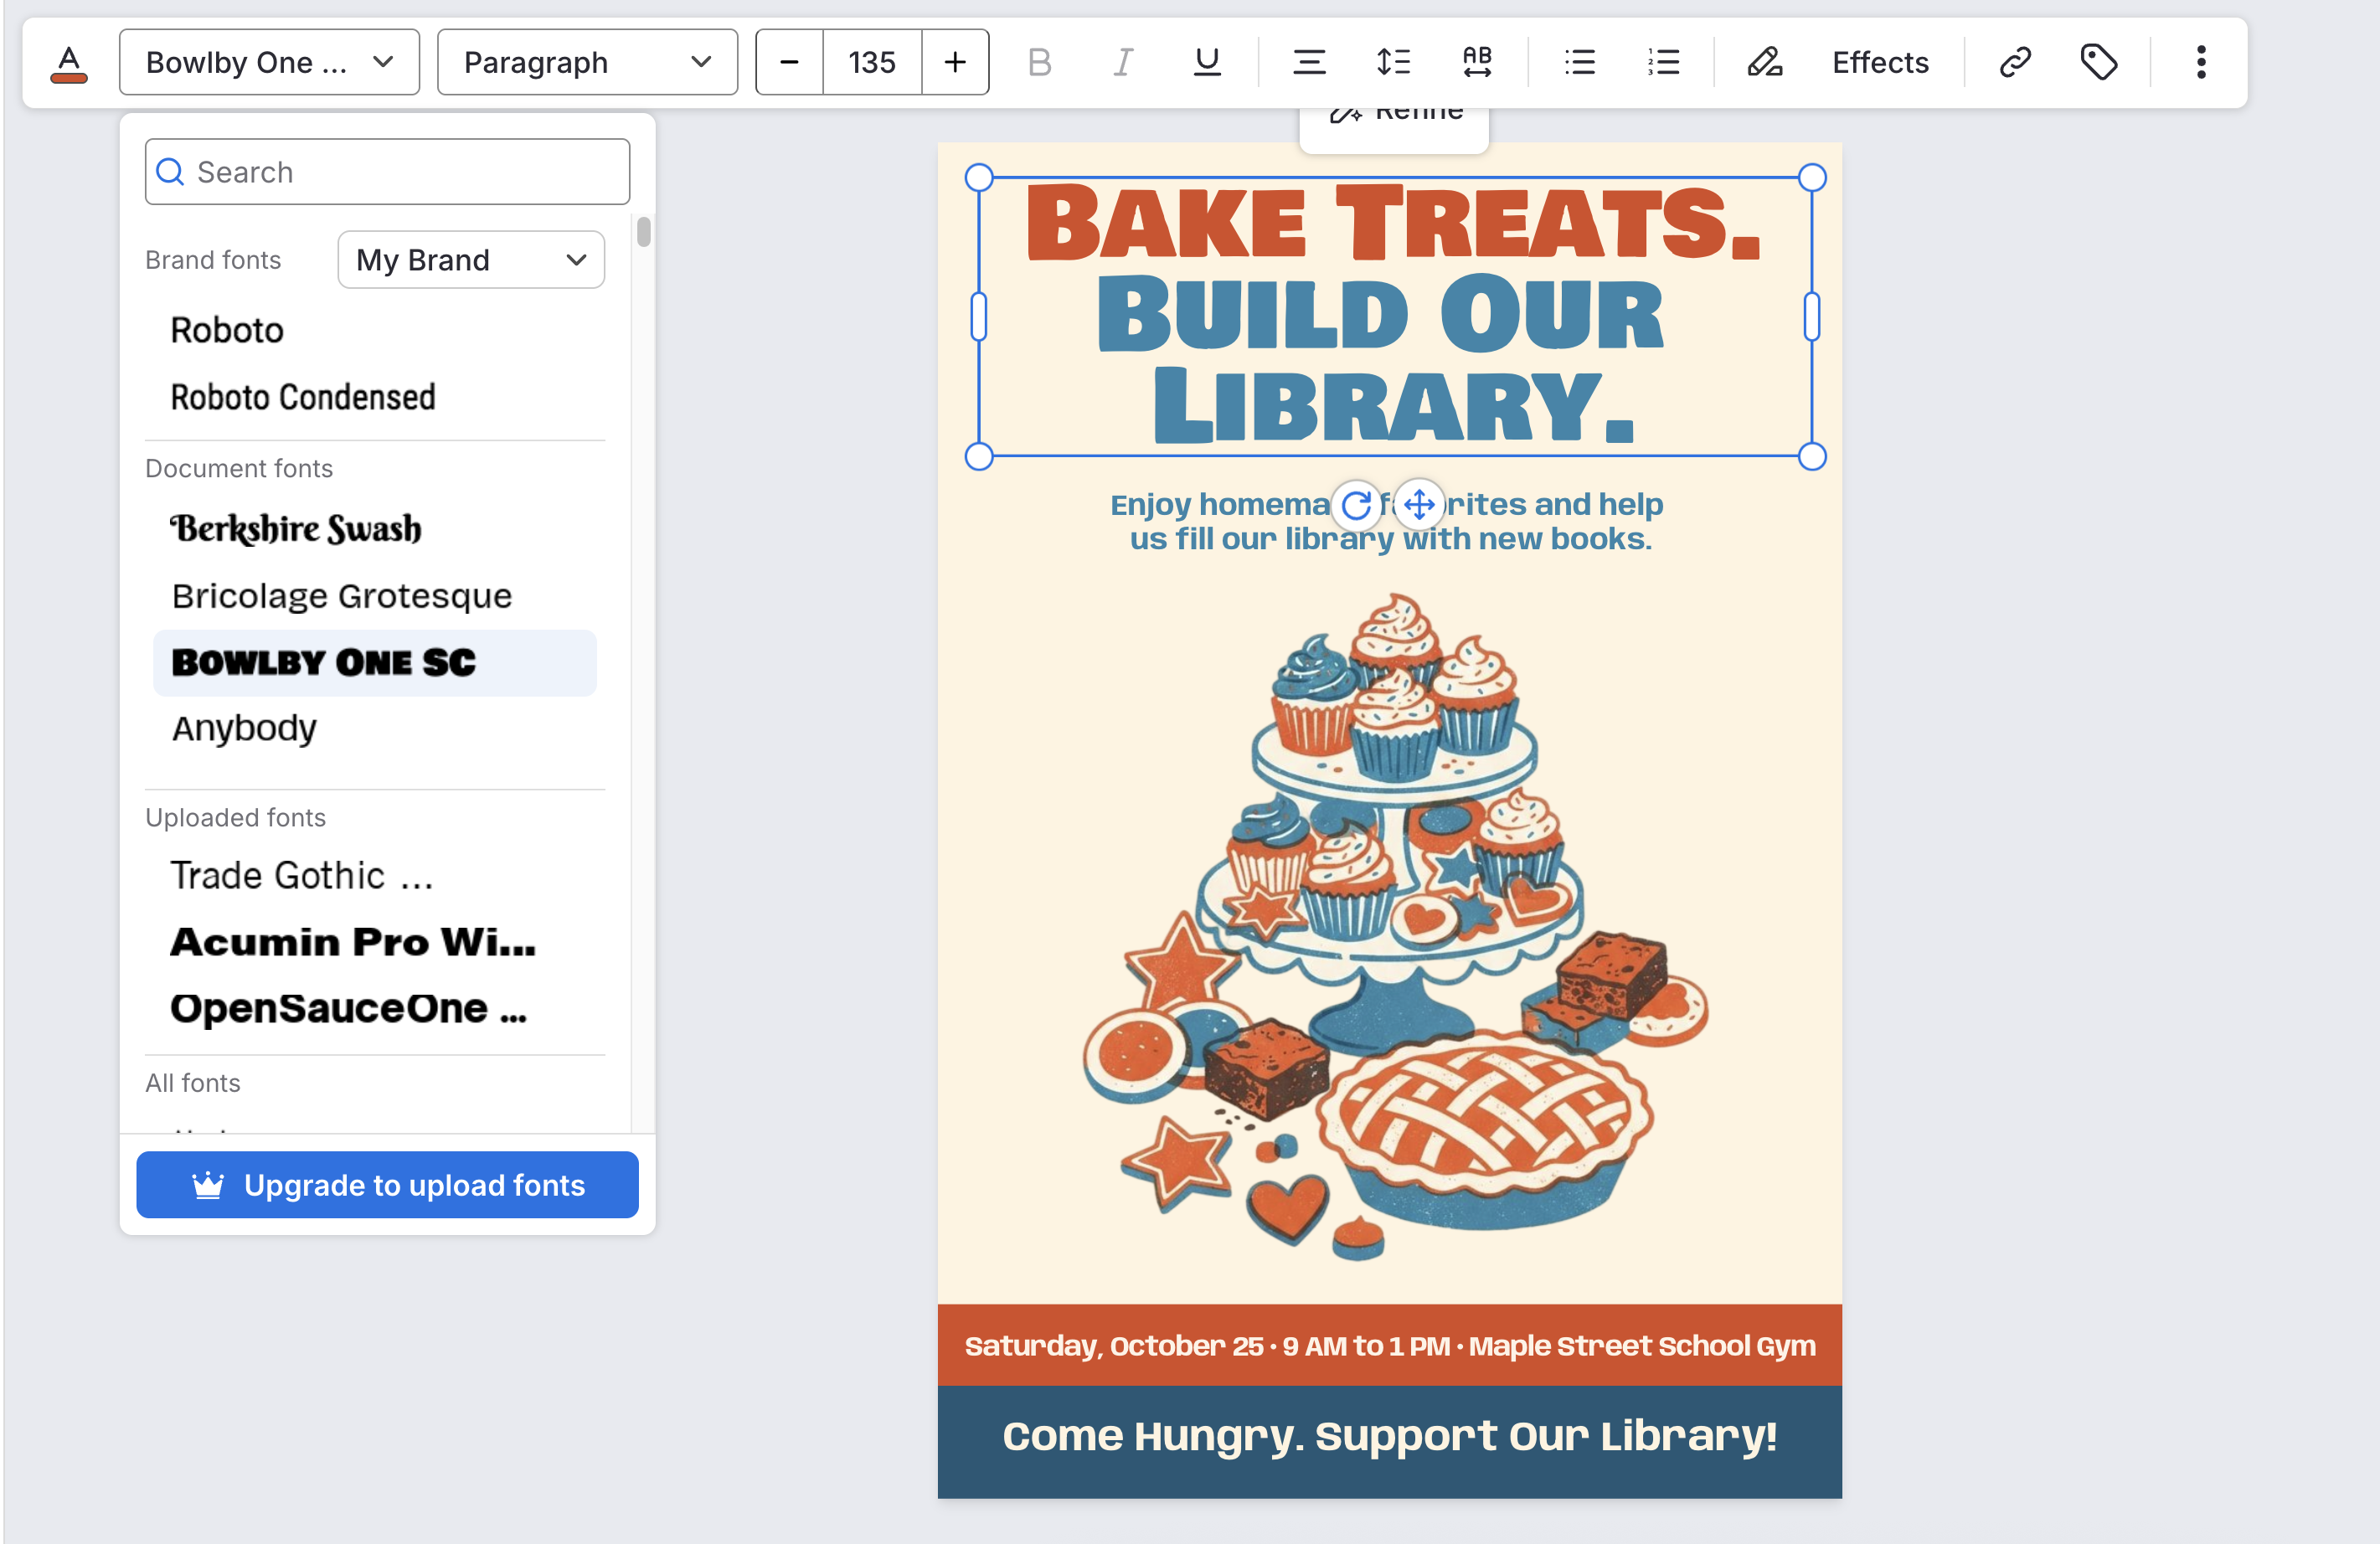
- Fix text and layout. Use the drag-and-drop editor to adjust text, fonts, colors and spacing, or rework the layout entirely. On my poster, I switched to a heavy sans-serif, made “Bake Treats.” orange and “Build Our Library.” blue, and strengthened the visual hierarchy by increasing the headline from 110 px to 135 px and the subhead from 28 px to 38 px. I also simplified the layout with full-width color bands at the bottom to make the event details and CTA stand out more clearly.
- Apply your brand. Venngage’s Brand Kit can extract your brand colors, fonts and styles and auto-apply your logo. This keeps a poster series consistent, which is something OpenAI lists as a weak spot for its image model.
- Add your own visuals. Upload your own photos, icons or data instead of relying on generated ones.
- Add a real QR code. ChatGPT can draw patterns that look like QR codes, but they won’t scan. Create a working code with any QR code generator, upload it as an image and test it with your phone before you print.
- Use the AI helpers if you need them. The editor includes an AI Writing Assistant, AI Image Generator and AI Icon Generator.
It also helps to keep ChatGPT open in another tab, since it’s still the quickest way to shorten a line that won’t fit.
By now you should have a finished poster with correct details, your brand colors and logo, and a QR code that scans.
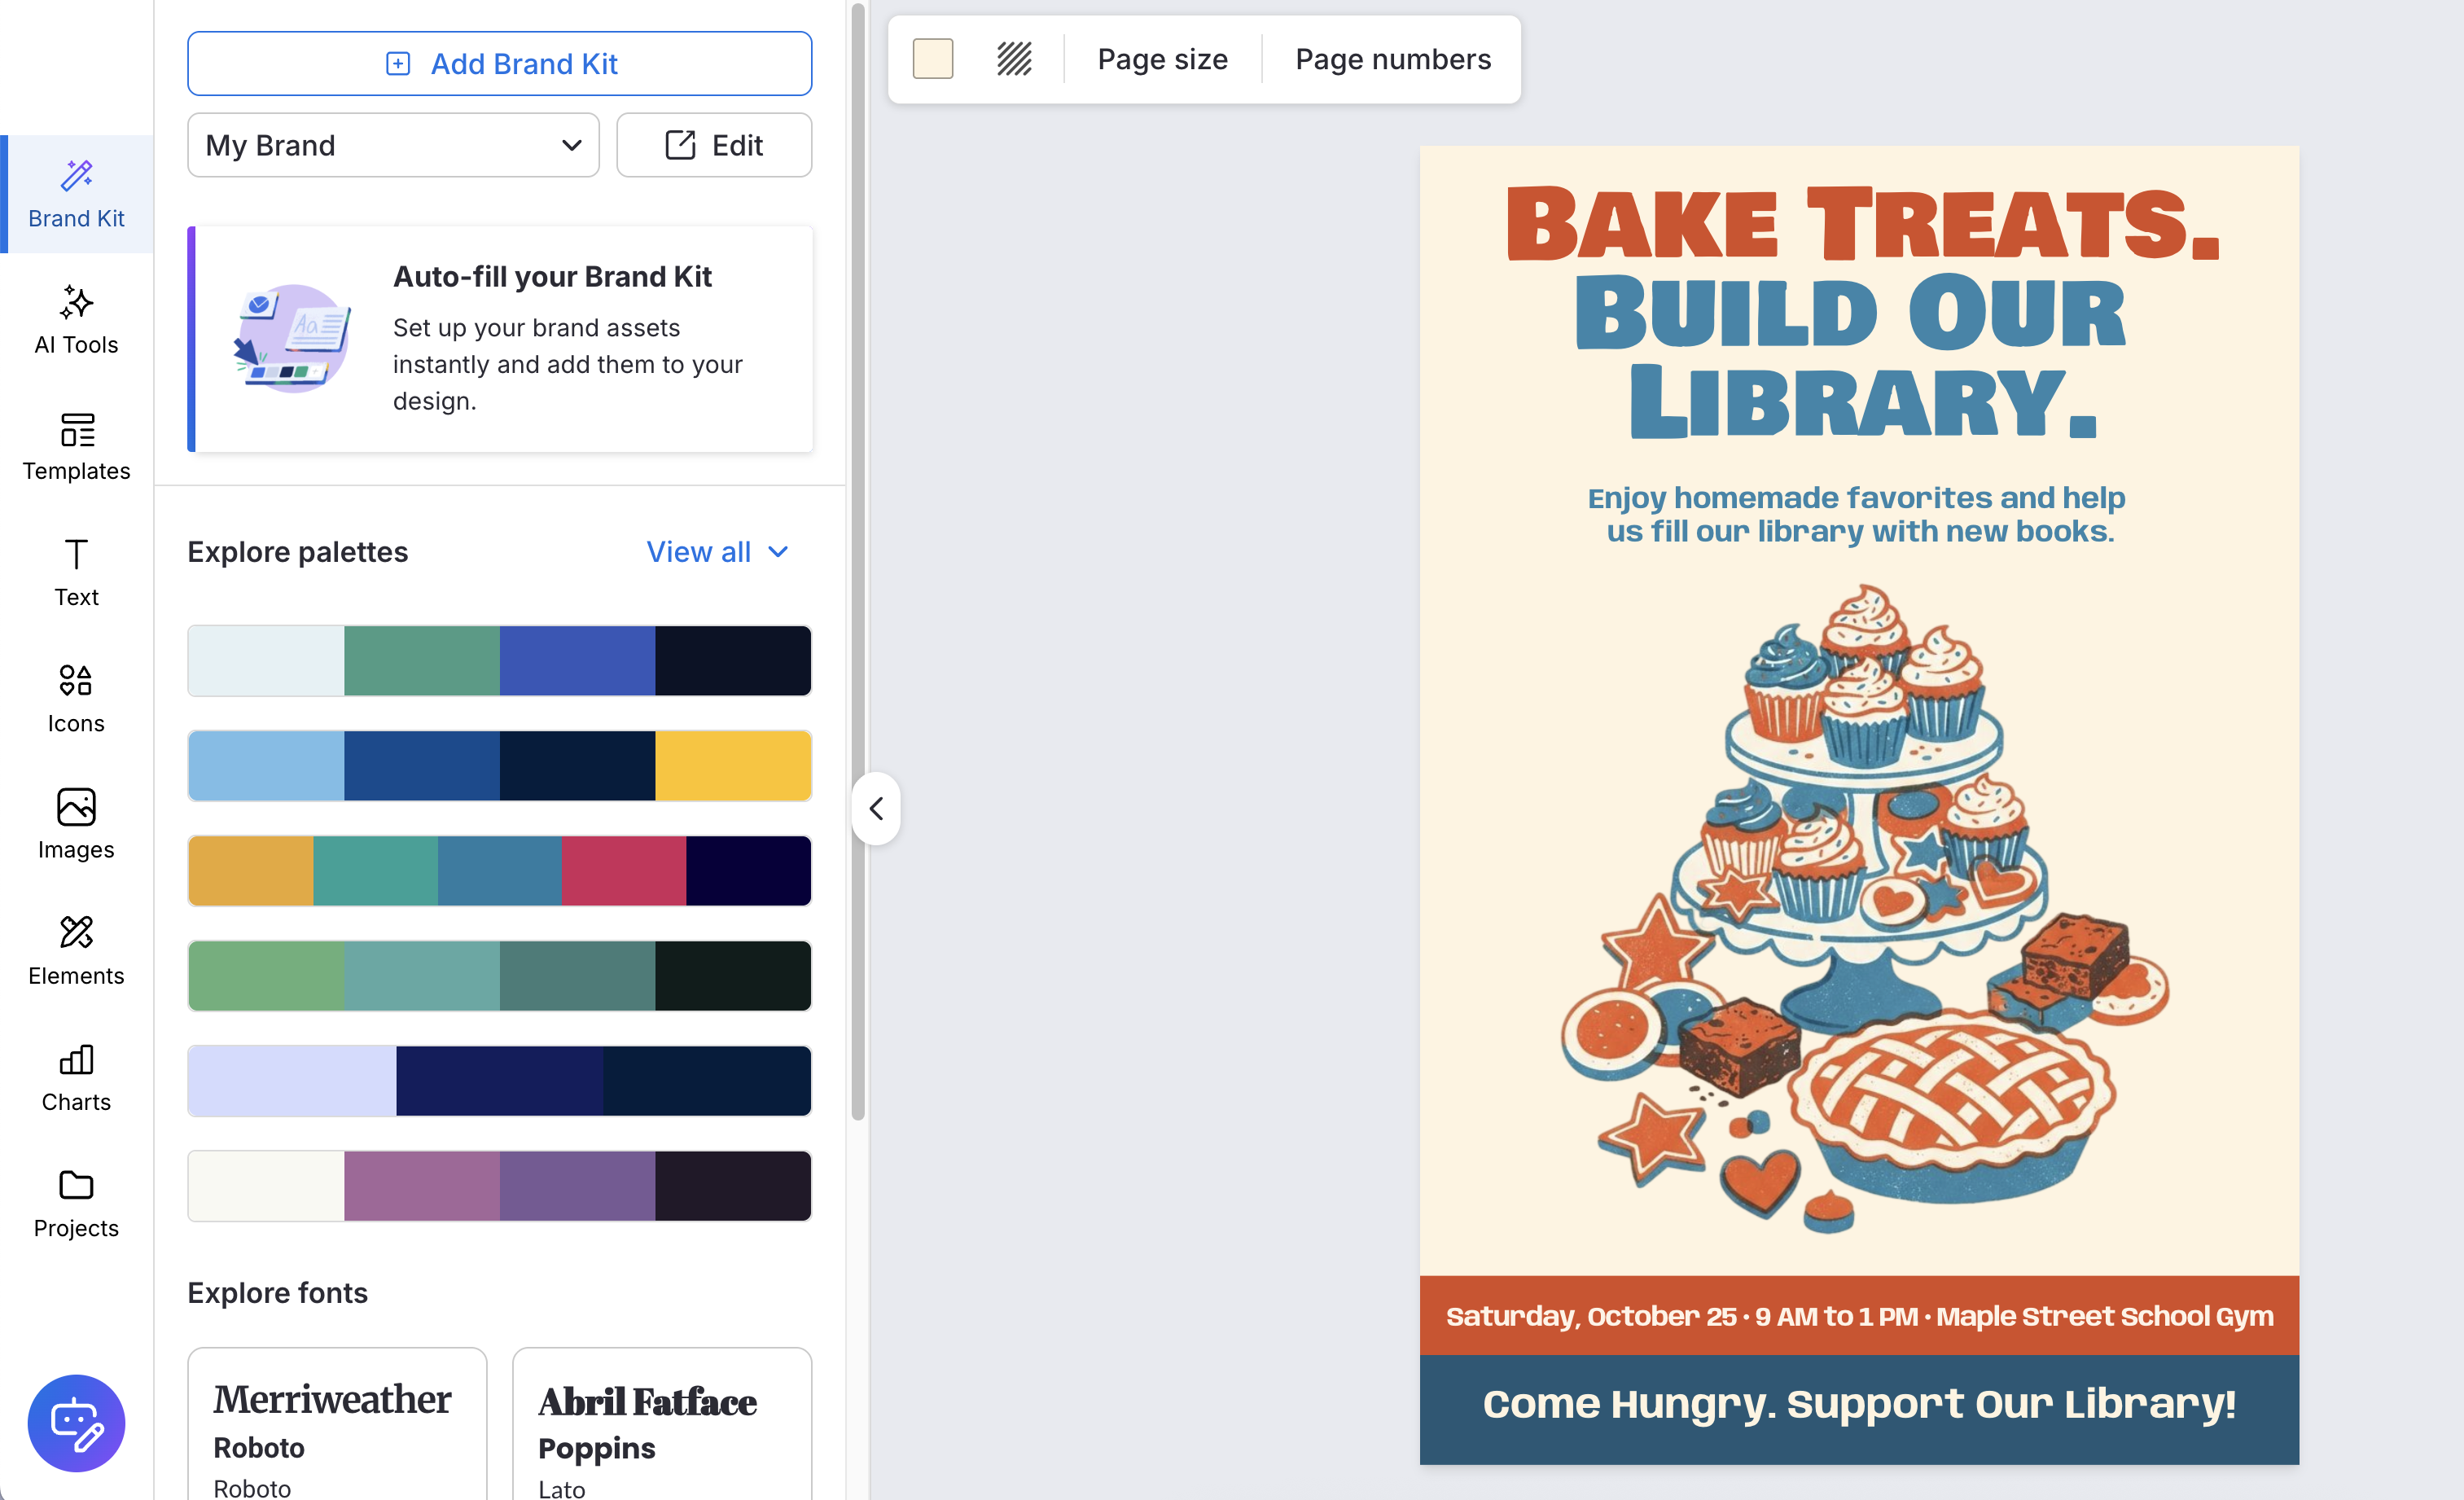
The Brand Kit panel stores your palettes and logos; Apply brand pushes them onto the design.
Step 6: Size and Export Your Poster for Print or Screen
Adding “300 DPI” to a ChatGPT prompt won’t add any pixels to the image. DPI (dots per inch) describes how many pixels fill each printed inch, so print quality depends on how many pixels you have compared with the size you’re printing at.
| Print size | Pixels needed at 300 DPI |
|---|---|
| A5 | about 1748×2480 |
| A4 | about 2480×3508 |
| 24×36 in | 7200×10800 |
- Check your pixels. ChatGPT’s 1024×1536 portrait prints at about 3.4×5.1 inches at 300 DPI, or 6.8×10.2 inches at 150 DPI (my arithmetic, not OpenAI’s).
- Upscale or rebuild. For a small size increase, upscale once at 1.5-2x with a print-tuned upscaler. For large posters, regenerate or rebuild the design in an editable tool, because upscalers can’t recover detail that was never there.
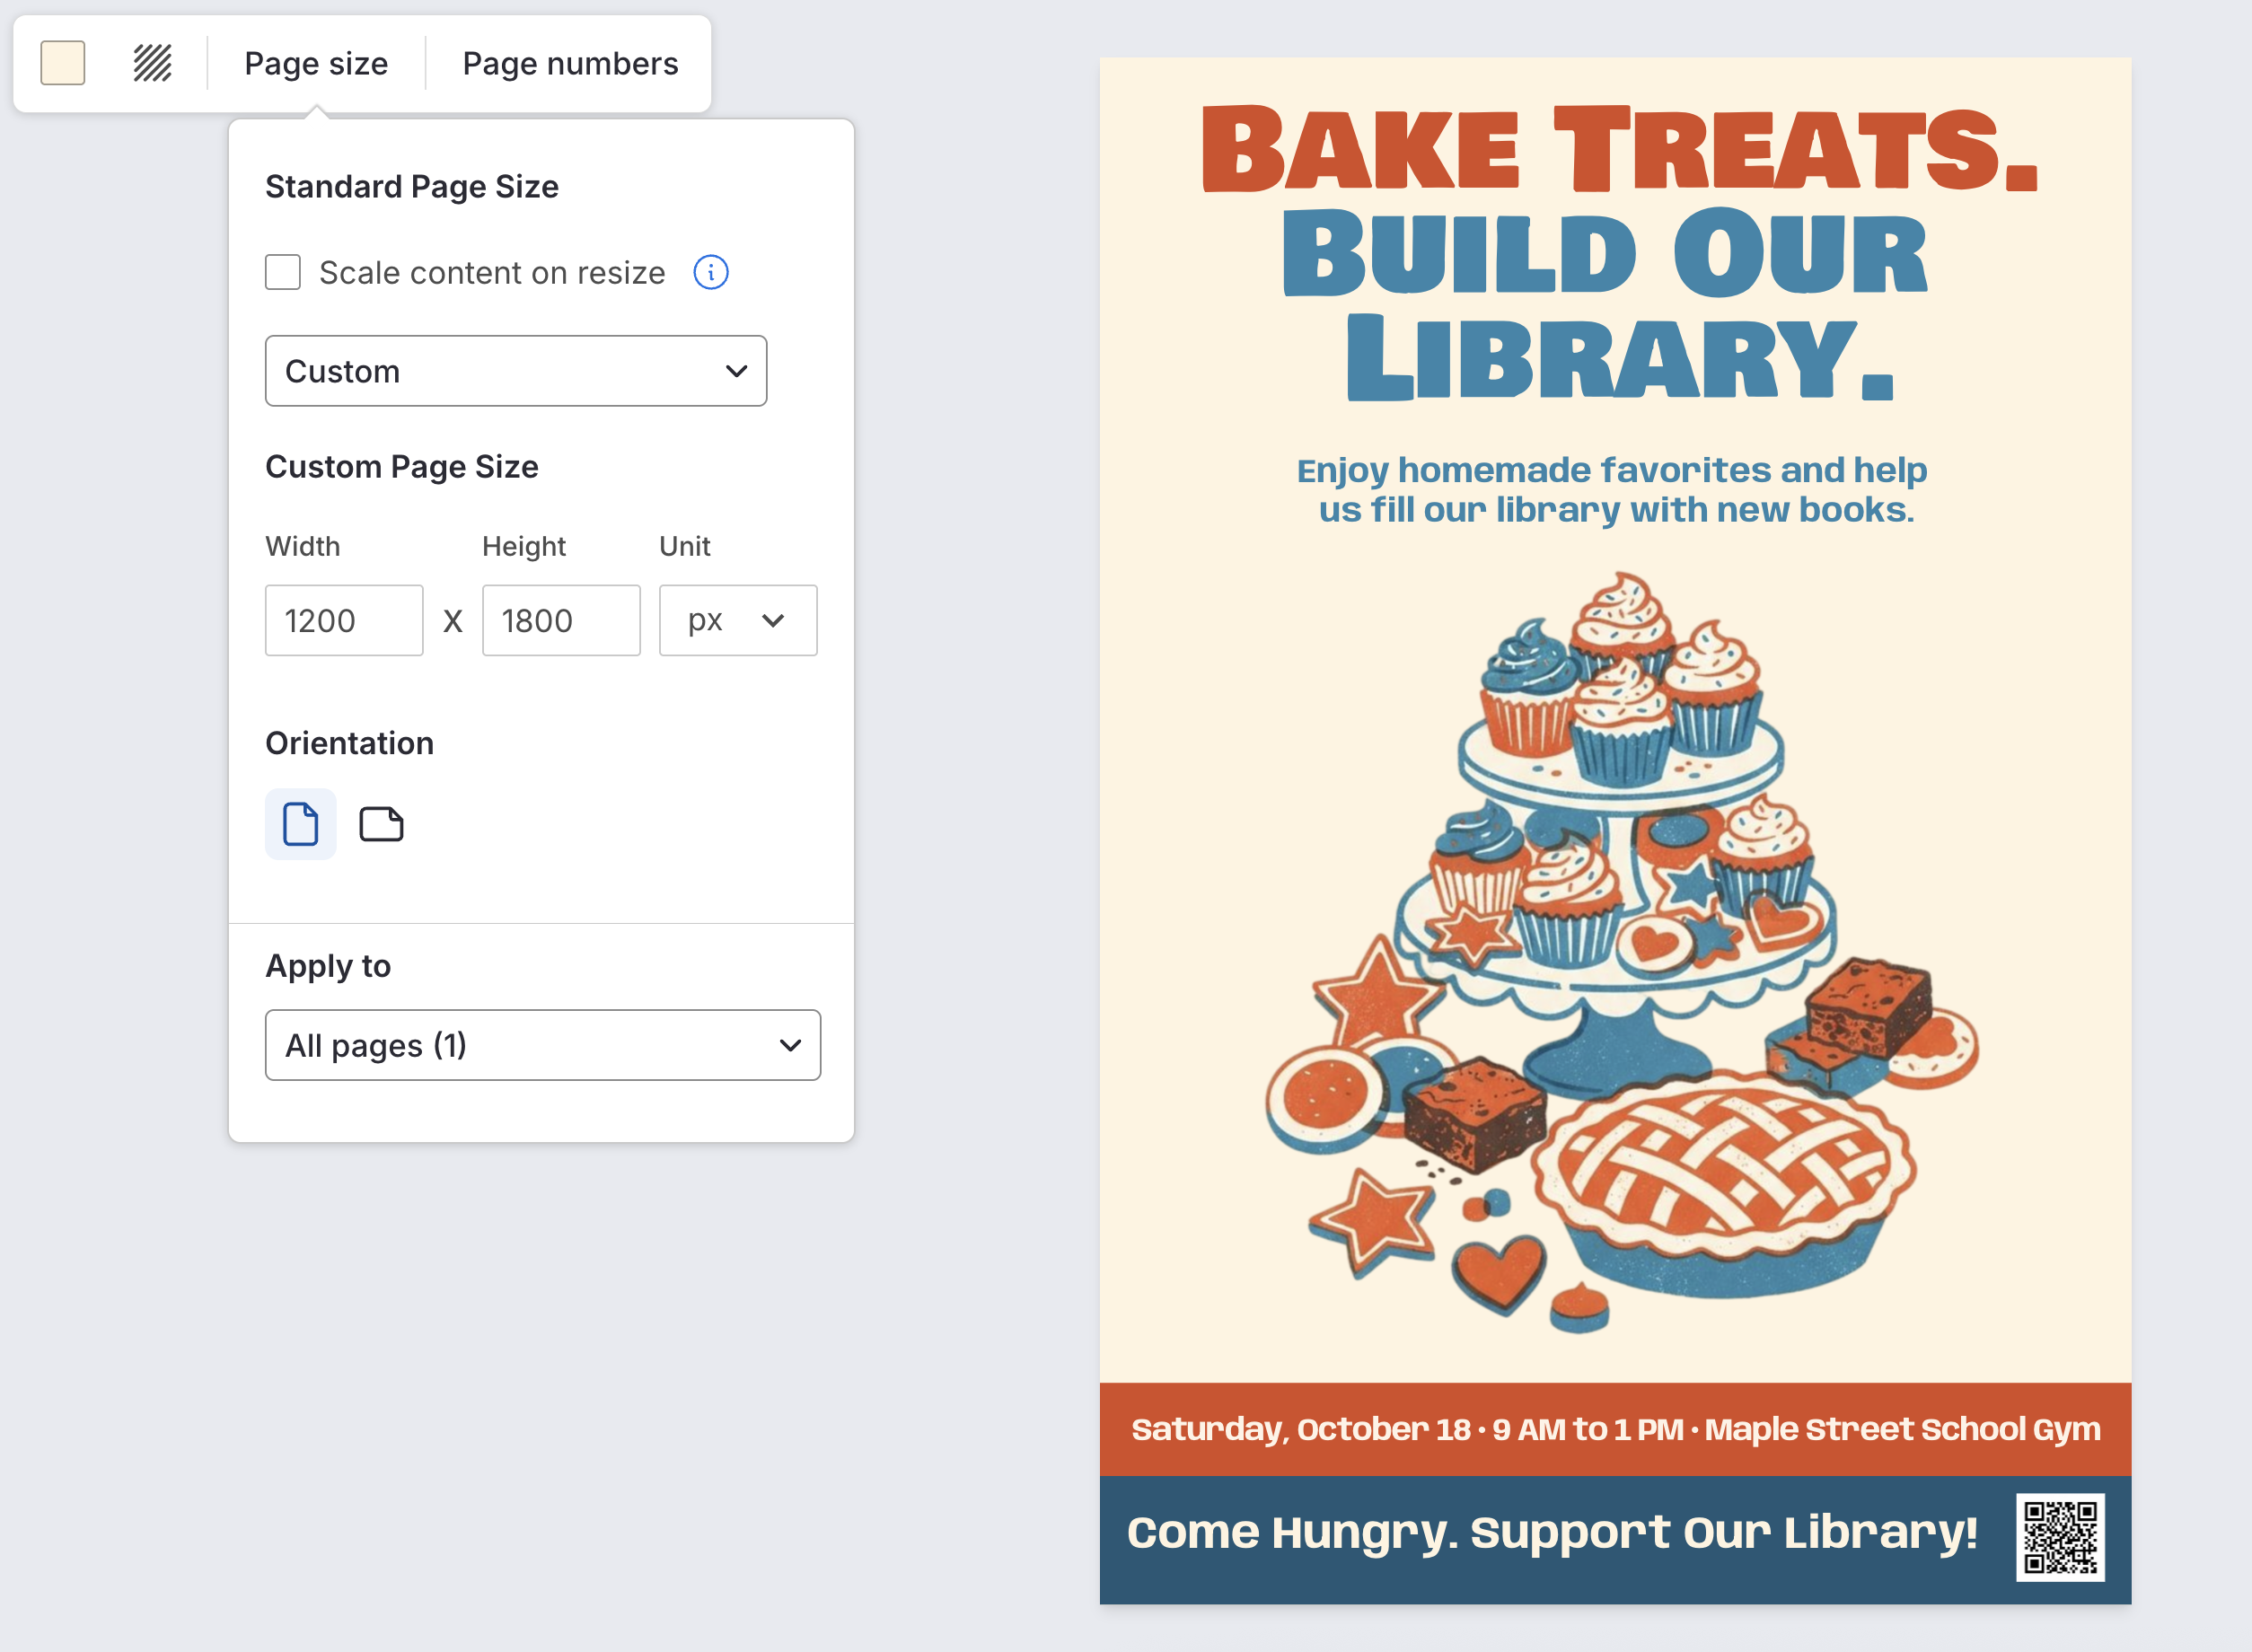
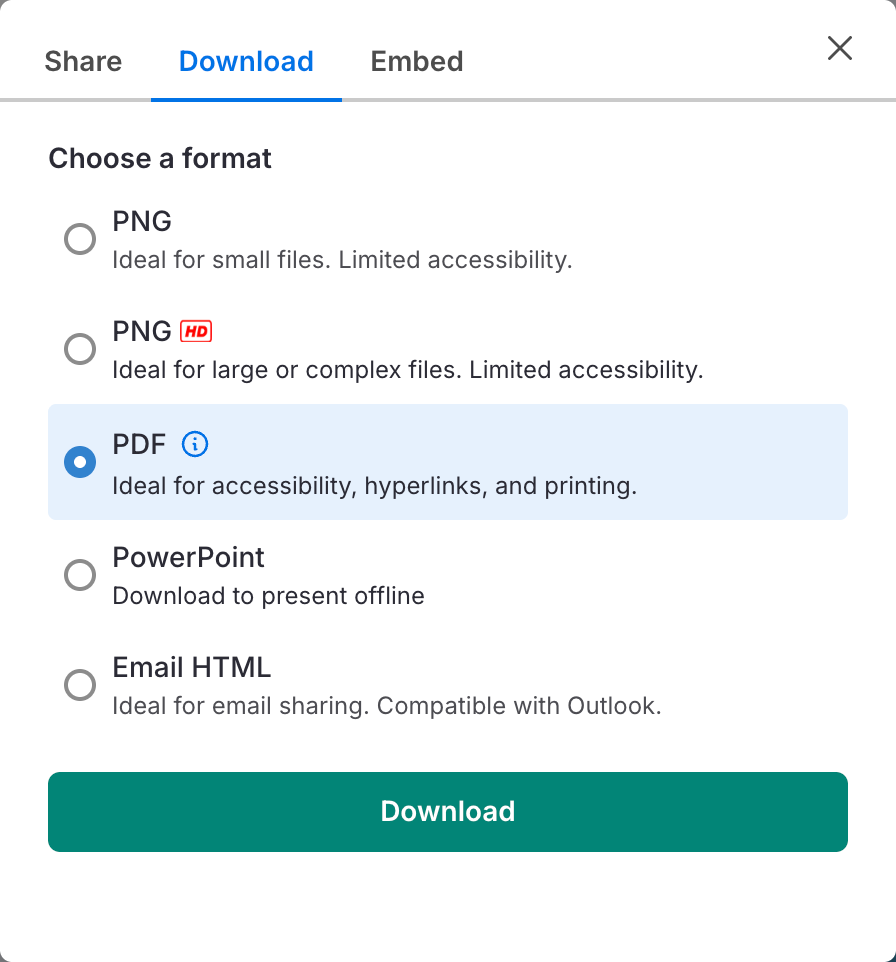
- Export from Venngage at the right size. Open Page size to choose a standard size or enter custom dimensions and an orientation. It’s worth checking this before you export, because my first AI draft came out as a landscape letter (1056×816 px) even though I asked for portrait. My final poster uses a custom 1200×1800 px portrait size (2:3). From there, you can download it as a PNG, PNG HD, PDF, PowerPoint or Email HTML file, or share a link. PDF is the best choice for printing, and since some formats are limited to Premium and Business plans, check what yours includes.
4. Size the headline for distance. Allow 1 inch of letter height per 10 feet of viewing distance, so 30 feet needs a 3-inch headline.
5. Check accessibility. Aim for 4.5:1 contrast for normal text and 3:1 for large text (WCAG 1.4.3). Venngage’s Smart Accessibility AI can check contrast and readability and write alt text.
6. Ask your printer about bleed. Bleed is extra background that extends past the trim line, so the cut leaves no white edge. Our poster design guide covers bleed and other print details in more depth.
If your ChatGPT poster is going on a screen or into a small print, the image will work as it is. Anything printed larger than a flyer will need an upscale or an export from an editable tool at the right dimensions.
FAQ
Can you make a poster with ChatGPT for free?
Yes. ChatGPT Images 2.5 is available on every plan, including Free, with stricter limits. OpenAI doesn’t publish exact caps, but unofficial community reports suggest about 2-3 images a day on Free. The Go plan offers 10x Free’s image creation. Venngage’s AI poster generator and Upload image also work on the free plan, which includes up to 5 designs and a set number of AI credits.
Can ChatGPT make an editable poster?
No. ChatGPT outputs a flat image (PNG by default) with no text layers or fonts. You can make limited area edits with the Comment tool, but to change text freely, upload your ChatGPT image to Venngage and ask the AI Designer to recreate it as editable content, or generate the poster in Venngage’s AI poster generator from the start. Step 4 and Step 5 cover both routes.
Can I use a ChatGPT poster for my business?
Yes, you can generally use a ChatGPT poster for your business, since OpenAI’s terms assign you rights to outputs and allow commercial use, though you should check the live terms. A poster made from a prompt alone probably isn’t copyrightable, according to the US Copyright Office’s January 2025 report. It may not be unique either, and using it doesn’t clear any logos, likenesses or characters that appear in it. This isn’t legal advice.
Do ChatGPT posters have a watermark?
ChatGPT posters don’t carry a visible watermark, but the images include C2PA Content Credentials metadata and an invisible SynthID watermark. You can check an image for these signals at openai.com/verify. Metadata can be stripped when a file is edited or re-saved, while SynthID is built into the image itself and may survive screenshots and some edits.