


I learned this the hard way while helping a college friend map her family history. I searched how to make a family tree in Word, opened SmartArt and assumed it would take 10 minutes.
It worked for the first few generations. Then the tree grew and the layout started acting up.
Since then, I’ve learned how to bend Word to my preferences.
In this guide, you’ll learn two practical methods to build a family tree in Word, along with tips to format, export and fix common layout issues. If you’d rather start with a pre-made layouts, you can also explore family tree templates.
Before you start
Opening Microsoft Word without a quick plan usually leads to layout fixes later. Here’s a quick checklist to keep the structure clear before you start.
1. Choose a layout: Top-down or left-to-right
Family trees often follow one of two structures.
A top-down layout places the oldest generation at the top and younger generations below. This format fits most SmartArt hierarchy diagrams and prints well on a page.
A left-to-right layout places the earliest generation on the left and expands toward the right. This format works better when you build the tree with Shapes and need more horizontal space.
Just as an aside, Venngage has thousands of ready-to-use family tree templates that fit both of these requirements.
2. Decide the number of generations and the scope
Before you start, choose the size of the tree. Word family trees usually become difficult to manage once they grow beyond three to five generations.
At this point, you should also decide the direction of the tree.
- Ancestor tree: You start with yourself and map parents, grandparents and earlier generations.
- Descendant tree: You start with one ancestor and show children, grandchildren and later branches.
If you don’t plan this ahead, your family tree diagram might go in multiple directions and become difficult to manage later.
3. Decide what information each person will include
Consistency matters more than detail. A simple structure keeps the tree readable.
Most family trees include:
- Full name
- Birth and death years
- Birthplace or country
- Optional photo
SmartArt boxes hold about two or three lines of text comfortably. Shapes give you more room if you plan to add photos or extra notes.
Pro-tip: Use the same spelling and date format across the entire tree. Duplicate names and inconsistent dates can be confusing once the tree grows. A quick note list or spreadsheet helps you verify the information before you add it to Word.
Method 1: Use SmartArt hierarchy in Word
Many people ask a simple question before they start: Can you make a family tree in Microsoft Word? Yes, you can.
Word includes hierarchy diagrams that already behave like a tree structure, so you only need to add names and adjust the layout.
This method uses SmartArt hierarchy diagrams, which work well for small and medium trees. You’ll get automatic spacing, clean connectors and a structure that stays organized while you build it.
If you have ever wanted to know how to create hierarchy in Word or how to make a tree structure in Word, this is the feature you might be looking for.
With this method, we’ll build the structure first and add the details later since this approach keeps the diagram from breaking when we edit it.
Step 1: Set up the page
A family tree spreads horizontally because portrait pages run out of space quickly.
Start by switching the page to landscape orientation. Go to:
Page Layout → Orientation → Landscape
If you’re using an old version of MS Word, this is how the menu might look to you:
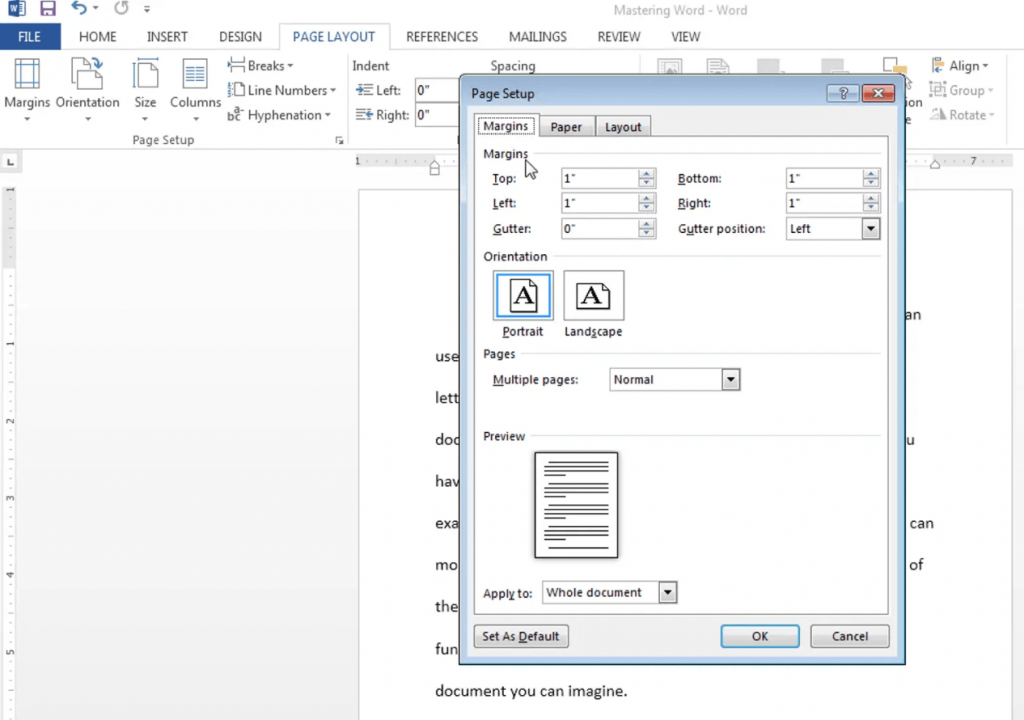
Landscape orientation gives the tree more width and keeps later generations from wrapping awkwardly.
Next, reduce the margins so the diagram has more room. Once again, go to:
Page Layout → Margins → Narrow
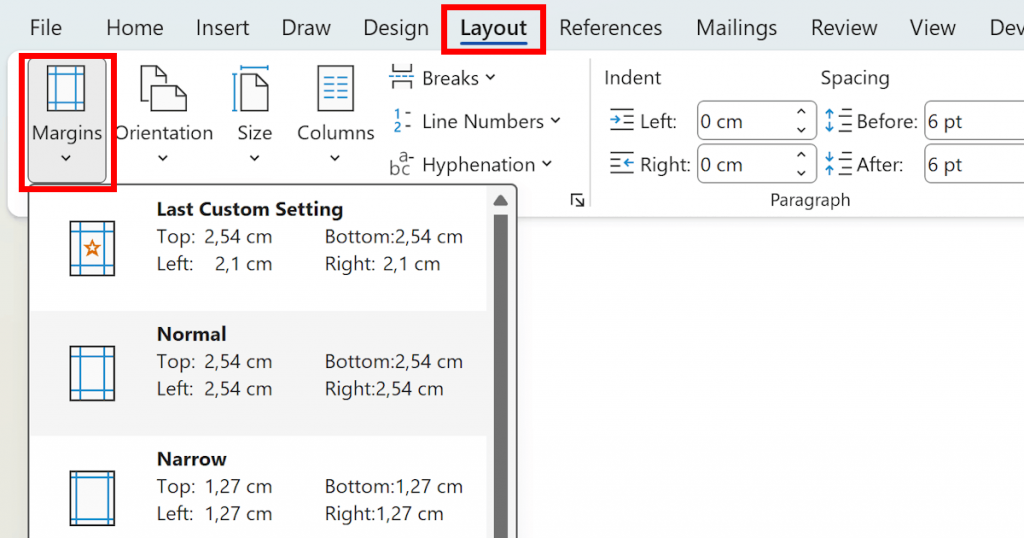
This step is optional, but it helps when the tree expands beyond three generations.
If you want visual guidance while placing elements, turn on gridlines.
View → Gridlines
Gridlines do not appear when you export or print the document. They simply help you keep the boxes aligned while you work.
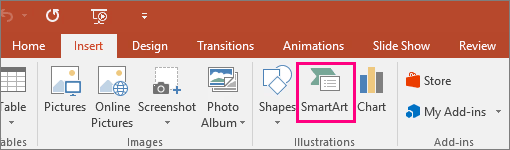
Step 2: Insert a SmartArt hierarchy
Now insert the diagram that will hold the family structure.
Insert → SmartArt → Hierarchy
Word shows several hierarchy layouts. Two options work best for family trees.
Organization chart
This is the most stable option for most trees. It stacks generations vertically and keeps connectors clean. Choose this layout if your tree grows downward across generations.
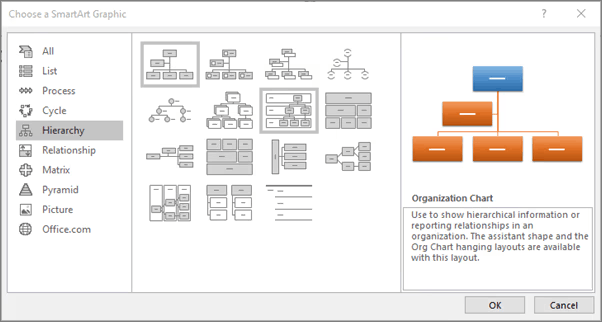
Horizontal hierarchy
This layout spreads nodes across the page. It works well when the tree has many siblings in one generation.
For most beginners, the Organization Chart is the safest choice. It behaves predictably and prints neatly.
These hierarchy diagrams are often called a SmartArt hierarchy family tree, even though Word labels them as organizational charts.
Related: How to Make an Organizational Chart in Microsoft Word
Step 3: Add family members using the text pane
The fastest way to build the structure is through the SmartArt Text Pane.
Open it via:
SmartArt Design → Text Pane (or click the small arrow on the diagram’s left side)
The Text Pane behaves like an outline. Each line becomes a box in the diagram.
A few keyboard shortcuts control the structure.
- Enter adds another person on the same level
- Tab creates a child level below the current person
- Shift + Tab moves the person up one level
Think of it like writing a family outline.
Example:
Grandparent
→ Parent
→ → Child
Add names only at this stage. Details like dates or locations can come later once the diagram feels more structured.
Step 4: Add parents, children and siblings with “Add Shape”
Sometimes the Text Pane feels restrictive. Word also lets you add relatives directly in the diagram.
Right-click any box and choose Add Shape.
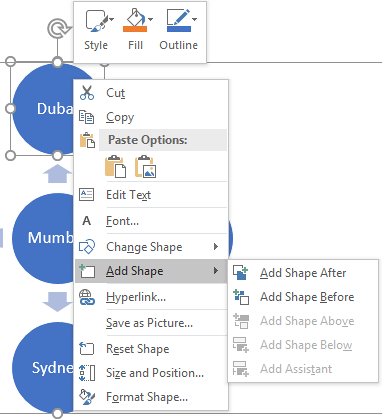
You’ll see four options:
- Add Shape Above → adds a parent
- Add Shape Below → adds a child
- Add Shape After → adds a sibling after the selected person
- Add Shape Before → adds a sibling before the selected person
This feature is the easiest way to expand the tree while you explore family branches. Many beginners use it when they learn how to draw a family tree in Word because it mirrors real family relationships.
Step 5: Format it so it’s readable when printed
A family tree may look perfectly fine on your screen, but the moment you print it, the text can shrink, boxes can crowd together and the whole thing becomes harder to read.
A few small formatting adjustments prevent that. Start with color and style.
SmartArt Design → Change Colors
SmartArt Design → SmartArt Styles

Choose a simple palette and stay consistent. Many people assign one color per generation so the structure becomes easier to follow.
Need help picking readable colors? Try Venngage’s Accessible Color Palette Generator to quickly find combinations that stay clear and easy to read.
Next, check the font size. A printed family tree should rarely drop below 10–11 pt text. Smaller text becomes difficult to read once the page is printed or exported.
Finally, keep the text concise. Long descriptions make your tree look crammed and can mess up the layout, so just keeping names and dates often works best.
If you plan to create a family tree in Word with pictures, leave extra space in each box before inserting images.
Step 6: Convert SmartArt to Shapes
SmartArt works well for basic diagramming. But it becomes limiting when the tree grows or when you need custom spacing.
Word offers a simple escape route.
SmartArt Design → Convert → Convert To Shapes
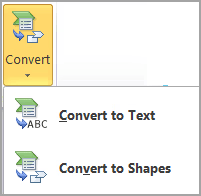
This action turns every SmartArt box into a normal shape.
You lose automatic layout, but you gain full control over position, spacing and connectors. That flexibility helps when you build more complex diagrams.
You can now resize boxes, insert photos, adjust connectors and create irregular branches that SmartArt usually resists.
Later in the guide, you’ll also see how to export the document and how to print a family tree from Word once the layout is complete.
The steps work the same whether you use Windows or Word for Mac family tree SmartArt, since the SmartArt tools remain almost identical across versions.
Method 2: Build with Shapes + Connectors
While SmartArt works well for structured trees, Shapes give you more control once the family structure becomes irregular.
For instance, you can use Shapes to place spouses side by side, adjust spacing manually and add custom notes that SmartArt usually resists.
Many people switch to this method when they ask how to draw a family tree in Word that does not follow a strict hierarchy.
Shapes also work great when you want a family tree in Word with pictures or when the structure begins to resemble a genogram rather than a simple lineage.
Below is the simplest workflow.
Step 1: Create person boxes
Start by creating the boxes that represent each person.
Insert → Shapes → Rounded Rectangle(or choose a standard rectangle)
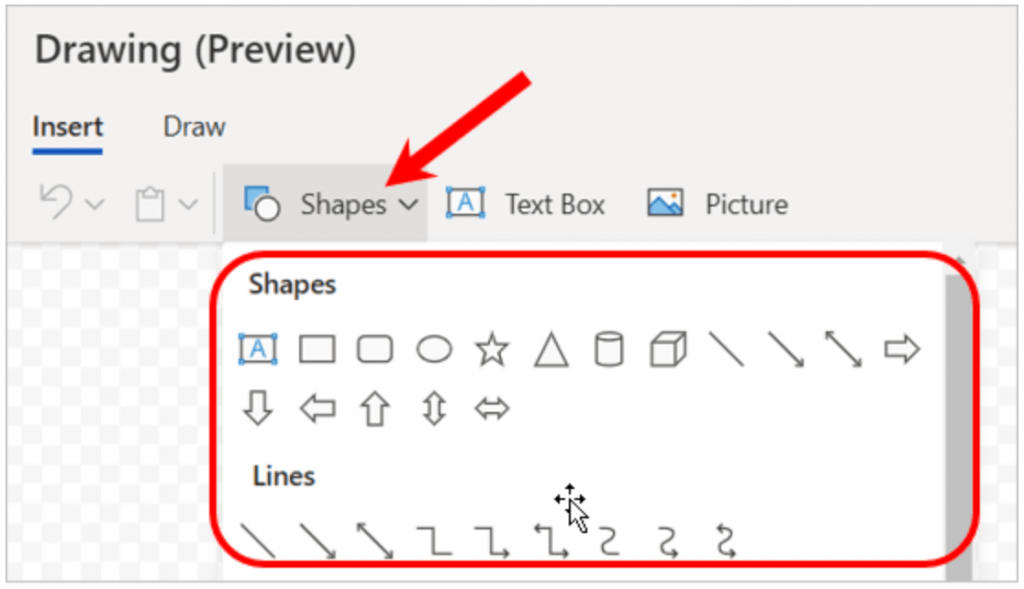
Draw one box and type the person’s name inside it. Add birth and death years, if needed.
Instead of inserting a new shape each time, copy and paste the first box.
Copy → Paste
This method keeps the box size consistent across the entire tree. If you adjust the formatting of one box, apply it to the others with Format Painter.
Home → Format Painter
A consistent box style keeps the diagram readable once the tree grows.
Step 2: Connect relationships with Connectors
Avoid using normal lines. They drift out of place when shapes move.
Use connectors that attach to shapes and remain connected during edits.
Insert → Shapes → Lines → Connector
Choose a straight or elbow connector. Hover near a shape until small connection points appear. Click a point and drag the connector to the related person.
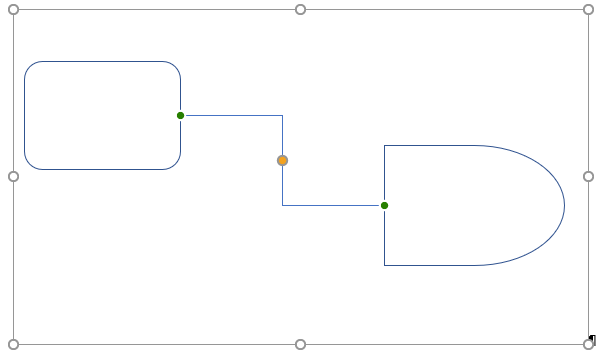
The line will snap into place and remain attached if you move either box. This approach keeps relationships intact even if you make major layout changes in the family tree.
Step 3: Clean up spacing with align and distribute
Manually placing boxes often creates uneven spacing. Word includes alignment tools that fix this quickly.
Select several shapes and open:
Shape Format → Align
The menu options include:
- Align Top / Align Middle for rows of siblings
- Align Center for parent-child stacks
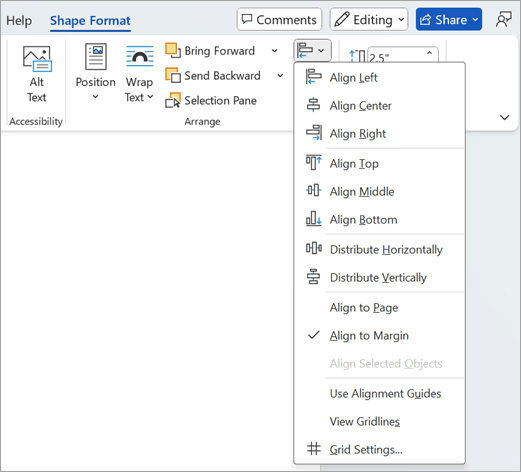
Apply the following formatting:
Shape Format → Distribute
- Distribute Horizontally evens out spacing across siblings
- Distribute Vertically evens out spacing across generations
Once a family unit looks correct, group it.
Select the parent boxes, connectors and children.
Shape Format → Group
You can now move the entire branch without breaking the structure.
Step 4: Add pictures without breaking the layout
Photos add personality to a family tree, but inconsistent sizing quickly ruins the layout. Insert images first.
Insert → Pictures
Then adjust them.
Picture Format → Crop
Square or circular crops usually work best for family trees.
Keep all photo sizes identical. Large images push other elements out of alignment. If the document becomes heavy with images, compress them.
Picture Format → Compress Pictures
This step keeps the file manageable and prevents printing issues later.
Best family tree formats
Microsoft Word handles some family tree formats better than others. Choosing the right structure saves a lot of editing (and headache) later.
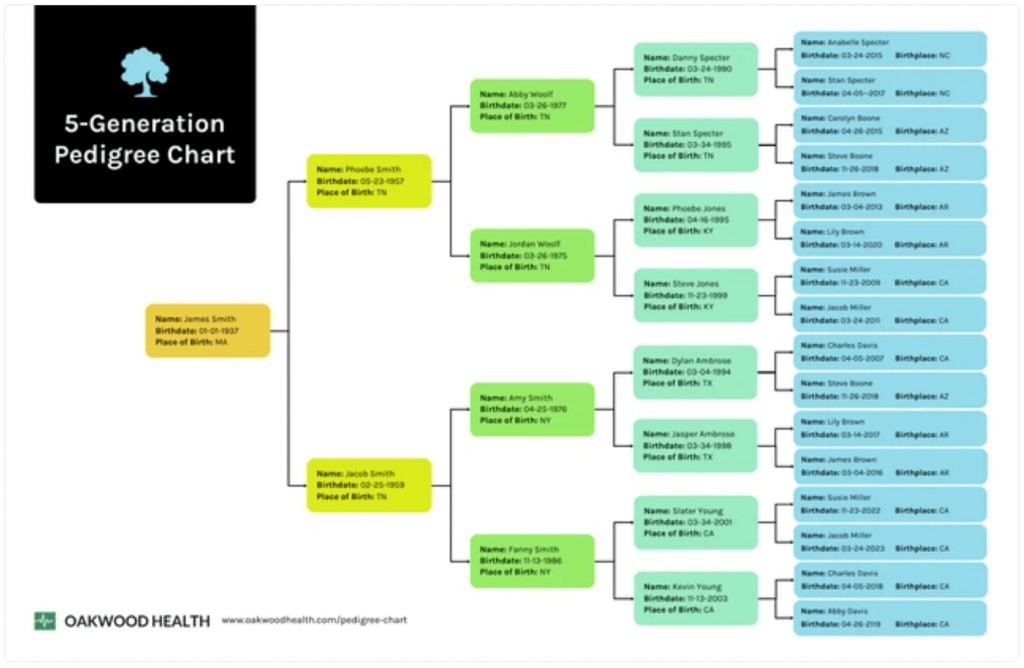
1. Pedigree chart
This format starts with one person and moves upward through parents and grandparents. It works well with SmartArt because the structure follows a clean hierarchy.
Here’s an example template from Venngage. It shows a clear five-generation pedigree layout that mirrors Word’s hierarchy structure, which makes it easy to replicate with SmartArt.
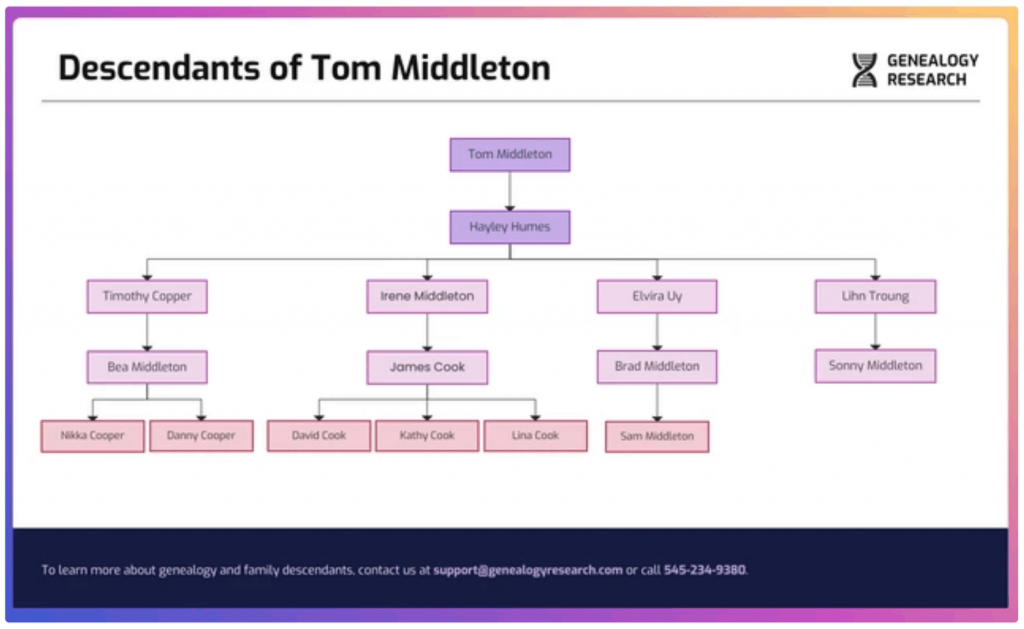
2. Descendant chart
This format begins with one ancestor and expands downward across children and grandchildren. The tree often becomes wide, which makes the Shapes method easier to manage.
The template below shows how a descendant tree expands outward across multiple generations, which explains why the Shapes method works better for managing the wider layout.
3. Horizontal vs vertical trees
A vertical tree works best when each generation has only a few siblings. Horizontal layouts work better when families have many children.
This template is an example of a horizontal family tree and it’s great for families with many children in the same generation.
4. Fan and hourglass trees
These formats appear in genealogy books. They are difficult to build in Word because they require curved layouts. Dedicated genealogy tools usually handle these formats better.
This fan chart spreads generations in curved layers around a central ancestor. But although it’s visually powerful, it’s extremely difficult to recreate in Word’s box-based layout tools.

Troubleshooting common family tree problems in Word
Even simple trees can become messy once the diagram grows. These quick fixes solve the issues people ask about most often.
1. Lines won’t stay connected when I move boxes
Problem: Lines disconnect whenever you reposition shapes.
Fix:
Use connectors instead of normal lines. Connectors attach to shapes and move with them.
If you built the tree with SmartArt, convert it to shapes first and then reconnect the lines. After positioning the boxes, group related elements so they move together.
2. SmartArt won’t place spouses where I want
Problem: SmartArt forces strict parent-child hierarchies.
Fix options:
- Place spouses in two boxes on the same row and add children below them.
- Convert SmartArt to shapes and reposition the spouse boxes manually.
- Add a small text box between spouses for notes such as marriage dates.
This workaround often appears when people search for how to make a genogram in Word, since genograms require more relationship detail.
3. The tree doesn’t fit on one page
Problem: The diagram grows beyond the page size.
Fix:
- Switch to Landscape orientation
- Use Narrow margins
- Shorten labels to names and years only
- Split large trees across multiple pages with clear continuation labels
When you finish the layout, export the document as a PDF and preview it before printing. Print scaling options, such as Fit To Page, help when you print a family tree from Word.
4. Spacing looks uneven or messy
Problem: Boxes appear misaligned or crowded.
Fix:
- Turn on View → Gridlines for visual guidance
- Use Align and Distribute tools for spacing
- Build one clean “family unit” and duplicate it for other branches
This approach keeps the structure consistent across the tree.
5. I need to show adopted, step or unknown relationships
Family structures are rarely simple.
Use dashed connectors or labeled lines to represent adopted or step relationships. Unknown parents can appear as blank or labeled boxes.
Add a small legend or key in one corner of the page to explain the symbols.
Also consider privacy. Many genealogy projects avoid full birth dates for living relatives. Names and birth years usually provide enough context without exposing sensitive information.
Pro-tip: If you want to create a family tree with the help of a tool, check out our guide on best family tree software. If you need one for clinical or academic purposes, you are better off choosing from the best genogram software.
Save, export and print
A finished family tree can shift during printing or sharing, so it helps to lock the layout before exporting.
First, save your working file in Word’s native format.
File → Save As → .DOCX
This version keeps yuor family tree editable. You can return later to add relatives, fix spelling or expand the tree to new generations.
Next, create a stable version for sharing.
File → Export → PDF(or File → Save As → PDF)
PDF files retain the layout and formatting. Boxes, connectors and images stay exactly where you placed them. This prevents the diagram from rearranging itself when someone opens it on another computer.
Before printing, always check the layout preview.
File → Print → Print Preview
Look for three common issues:
- Boxes touching the page edge
- Text shrinking too small to read
- Branches spilling onto a second page
If the diagram looks crowded, adjust the scaling or margins. Word’s print settings allow options like Fit To Page, which can shrink the diagram slightly so the entire tree fits on one sheet.
Pro tip: Before exporting or printing, select each family unit and choose Shape Format → Group. Grouping locks boxes and connectors together so nothing shifts and your layout stays intact when you share or archive the document.
Word for Mac vs Windows
If you switch between devices, a few menu differences in Word can slow you down.
The good news: the core tools work almost the same across platforms. Microsoft keeps the diagram features consistent, so the same workflow usually applies whether you use Windows or macOS.
1. SmartArt works on both platforms
Mac users often ask whether the same hierarchy diagrams exist in their version of Word. The answer is yes. The Word for Mac family tree SmartArt tools support the same hierarchy layouts used on Windows.
You can still insert a hierarchy diagram through the Insert → SmartArt menu and choose a hierarchy layout.
The editing tools, including the Text Pane, behave the same way. You can add parents, children and siblings using the same structure rules.
The main difference is the location of controls in the ribbon. Menu labels and tab placement can vary slightly depending on your Word version or macOS update.
2. If SmartArt feels limited, use Shapes
Some Mac versions show fewer SmartArt style variations than Windows. That limitation becomes noticeable when the tree grows or when you want unusual layouts.
In that situation, switch to the Shapes + Connectors method. Shapes behave the same on both operating systems and give you complete control over placement.
Many people prefer this method when the diagram begins to resemble a more detailed family study instead of a simple hierarchy.
Mac and Windows tutorials often list exact ribbon steps. Those instructions sometimes break across different versions of Word.
Instead of memorizing menu paths, focus on the feature names:
- SmartArt
- Hierarchy
- Text Pane
- Shapes
- Connectors
If you search those names inside Word’s interface, you’ll usually find the correct tool quickly, even when the ribbon layout changes.
FAQs
Here are quick answers to two of the most common questions people ask when building family trees in Microsoft Word.
How do you create your own hierarchy in Word?
Insert a hierarchy diagram from Insert → SmartArt → Hierarchy, then add people using the Text Pane. Press Enter for siblings and Tab for children. You can also convert SmartArt to Shapes for full manual control.
How do I make a genogram in Word?
Use Shapes and connectors, then add symbols for gender, relationships and events such as marriage or divorce. Include a small legend to explain the symbols. For step-by-step instructions, see our detailed guide on how to make a genogram in Word.
When Word isn’t enough
Word works well for small trees, but larger families outgrow its limits. In those cases, dedicated tools such as Ancestry, MyHeritage and FamilySearch are more helpful. If you want to compare tools beyond Word, read our guide on the best family tree software.
If you mainly want a clean visual diagram, you can start with ready-to-use family tree templates or try Venngage’s family tree maker for free.


