
Ever felt overwhelmed by a jumble of ideas? Mind mapping might just be the solution you’re looking for. Visualizing your thoughts can help you see how they connect and spark new insights. And the best part? You can do it right in Google Docs!
Google Docs isn’t just for writing essays and reports. It’s also a surprisingly versatile tool for brainstorming and organizing your thoughts. With its built-in formatting options and easy-to-use interface, creating a mind map is a breeze.
Before we dive into the steps for making a mind map, here’s a quick tip: if you want a more efficient way to create mind maps, consider customizing one of the mind map templates from Venngage’s extensive templates library!
Now, let’s get started!
Click to jump ahead:
- Step-by-step guide for creating a mind map on Google Docs
- How to make a mind map on Venngage?
- Mind mapping made easy with Venngage
Step-by-step guide for creating a mind map on Google Docs
To create a mind map in Google Docs , you can follow these steps:
Step 1: Open Google Docs and create a new document
Step 2: Insert a central idea
Step 3: Add main branches
Step 4: Add sub-branches and details
Step 5: Customize your mind map
Step 6: Save and share
Let’s dive deeper with a step-by-step explanation to help you create a mind map easily on Google Docs.
Step 1: Open Google Docs
To start creating your mind map, the first step is to access Google Docs. Here are two ways to do it:
Access Google Docs:
- Launch your preferred web browser (e.g., Chrome, Firefox, Safari).
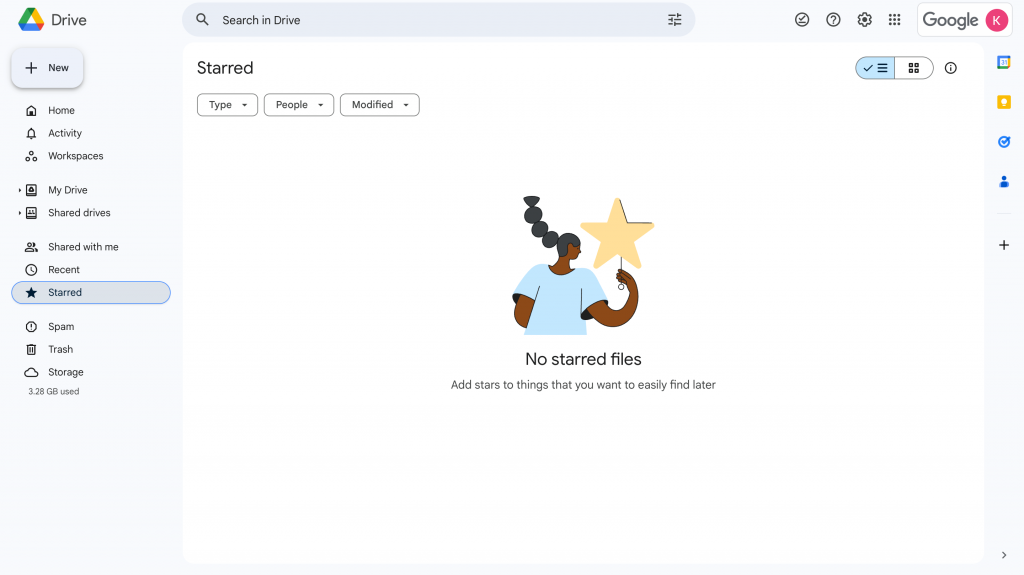
- Go to drive.google.com and click on the “New” button, then select “Google Docs”, which will directly start a new blank document.
- Enter your Google account credentials (email address and password) if sign-in is prompted.
Create a new document:
- Go to docs.google.com and click the “+” button on the top left corner of the Google Docs interface.
- A blank document will then open, ready for you to begin creating your mind map.

Tip: For quick access, you can add the Google Docs shortcut to your browser’s bookmarks bar.
Step 2: Insert a central idea
Ready to put your ideas into pictures? This next step will help you visualize your thoughts.
Insert a drawing:
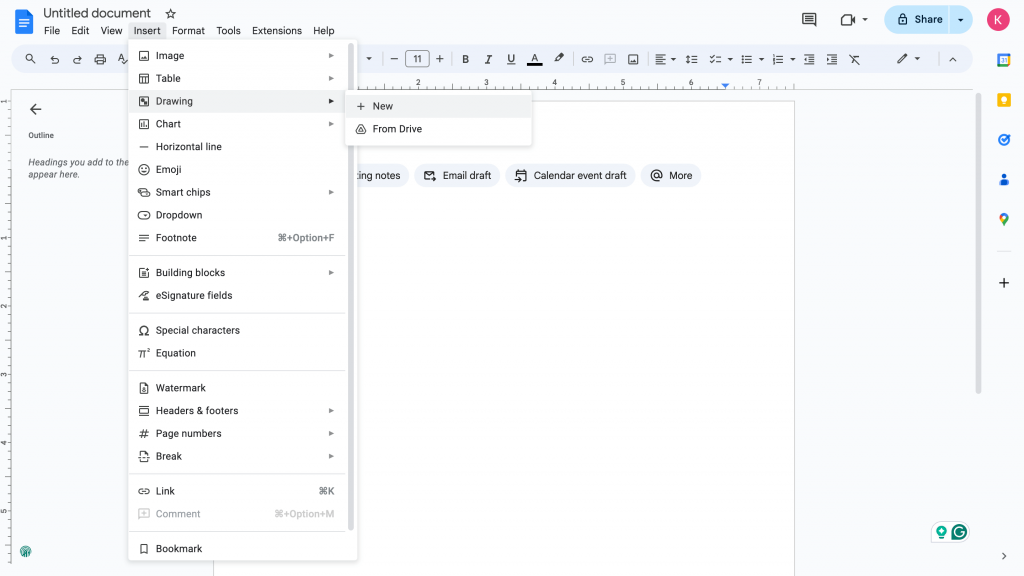
- Once you’re on your blank canvas, click on the “Insert” tab located at the top of your Google Docs document.
- Then, select “Drawing” > “+ New”. This will open a new drawing window within your document.
- The Drawing tool in Google Docs is like a mini-art studio for your documents – it’s super handy for creating all kinds of visual stuff.
Add a shape for the central idea:
- In the Drawing window, click on the “Shape” icon and select a shape that visually represents your main idea. Common choices include ovals, rectangles or stars.
- Click and drag on the canvas to create the shape. The size and position can be adjusted later.
- A clear and central shape is important for the main idea in a mind map because it visually represents the core concept so be sure to pick the right one!
Add text to the shape:
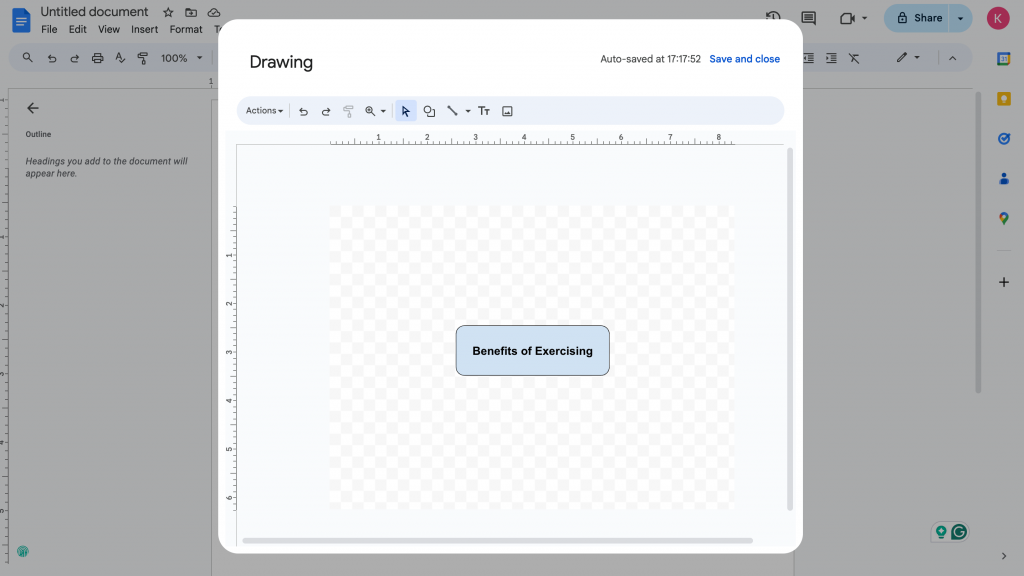
- To add text to your mind map, double-click inside the shape and it will allow you to edit the text.
- Enter the main topic or concept that your mind map will be about into the central shape.
- Make the text stand out by using bold, a larger font or a different color.
Save and close the drawing:
- Once you’re done drawing and editing your central shape, click on “Save and Close”. This will put the drawing with your big idea into your Google Doc.
Beyond idea sharing, mind mapping is a valuable tool for business brainstorming and growth. Here are six ways to use mind maps to boost your business.
Step 3: Add main branches
Next up, let’s add the main branches to your mind map. These are key because they represent the big ideas or categories connected to your main concept, breaking down more complex ideas info into smaller, manageable chunks.
Reopen the drawing:
- To reopen and continue editing your mind map, simply click on the drawing to select it and then click the “Edit” button.
Insert shapes for branches:
- To insert shapes for your main branches, click on the “Shape” icon and select lines or arrows from the dropdown menu.
- Click and drag from the central shape outward to create branches.
- Consider using straight lines for a formal look, curved lines for a more organic feel or arrows to indicate direction or flow.
- You can also choose from different arrowhead styles to visually represent relationships or hierarchy.
Add shapes for subtopics:
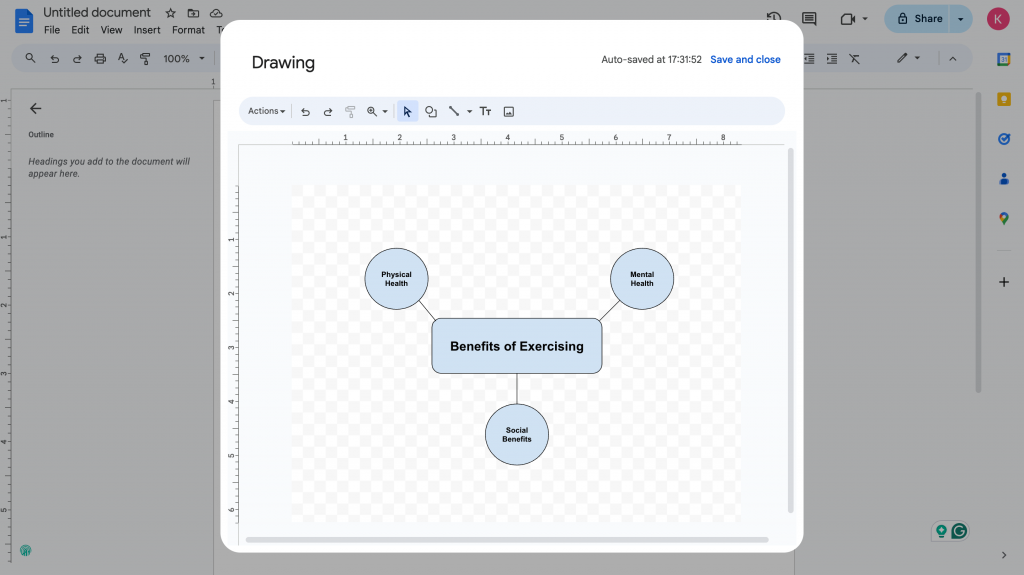
- At the end of each branch, insert shapes (e.g., circles, rectangles) to represent subtopics.
- Click and drag to create the shapes.
Add text to branches and subtopics:
- Double-click inside each shape to add text, this is the same as what we did when drawing your central idea.
- Type the main subtopics related to the central idea.
Tips:
- Examples: If your central idea is “Climate Change,” subtopics might include “Causes,” “Effects” and “Solutions.”
- Formatting: Use consistent formatting for subtopics (e.g., same font, size, color) to maintain a clear structure.
Save and close the drawing:
- Once you’re done, click on “Save and Close” to update the drawing in your document. This will incorporate the newly added branches and subtopics into your mind map.
Step 4: Add sub-branches and details
Expanding your mind map is like digging deeper into your ideas. It’s where you add more details and connections to your main points. By going deeper into your mind map, you might find new relationships between ideas that you overlooked.
To add sub-branches and go deeper into your mind map:
Reopen the drawing:
- Click on the drawing to select it, then click on “Edit” to reopen the Drawing tool.
Insert shapes for branches:
- Use the “Shape” tool to add more shapes branching out from your main points. Choose shapes that fit different levels of detail.
When creating a mind map, the shapes you use can visually represent different levels of detail or importance. Here are some guidelines to help you select the right shapes:
- Central idea: Use a larger, more prominent shape to emphasize the main concept. This could be a circle, square or a custom shape that represents the topic.
- Primary branches: Use slightly smaller shapes for the primary branches that stem from the central idea. These shapes should be distinct but still visually connected to the central shape.
- Sub-branches: Use even smaller shapes for sub-branches that further elaborate on the primary branches. These shapes can be more varied in size and shape to indicate different levels of detail.
- Sub-sub-branches: For the most detailed level, use the smallest shapes. These could be simple circles, squares or even triangles.
Connect with lines:
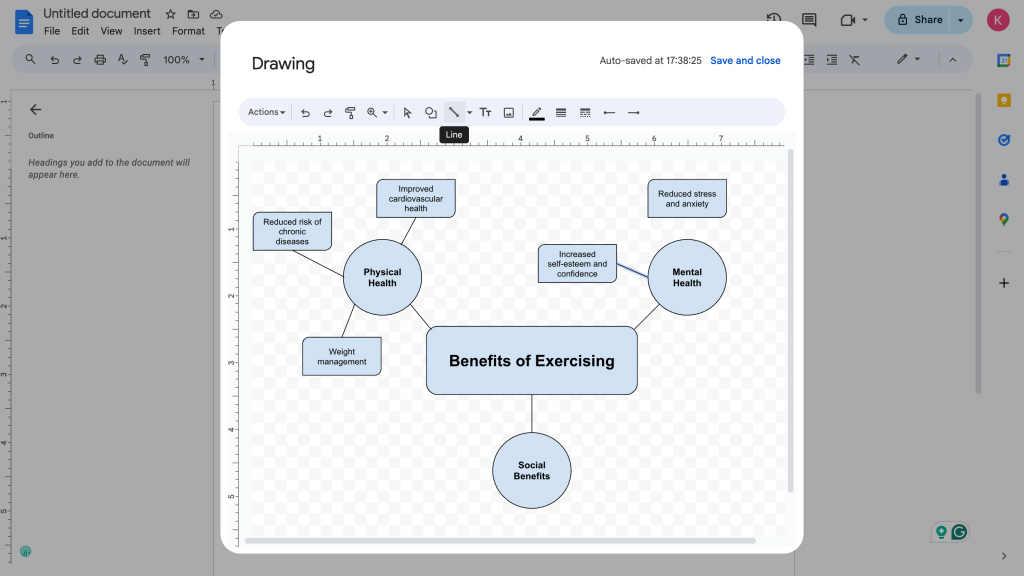
- Select the “Line” tool to draw lines connecting the new shapes to their respective main subtopics.
- Ensure that the lines are clear and don’t overlap too much to avoid confusion.
Add text to sub-branches:
- Double-click inside the new shapes to add text (you’ve done this before!).
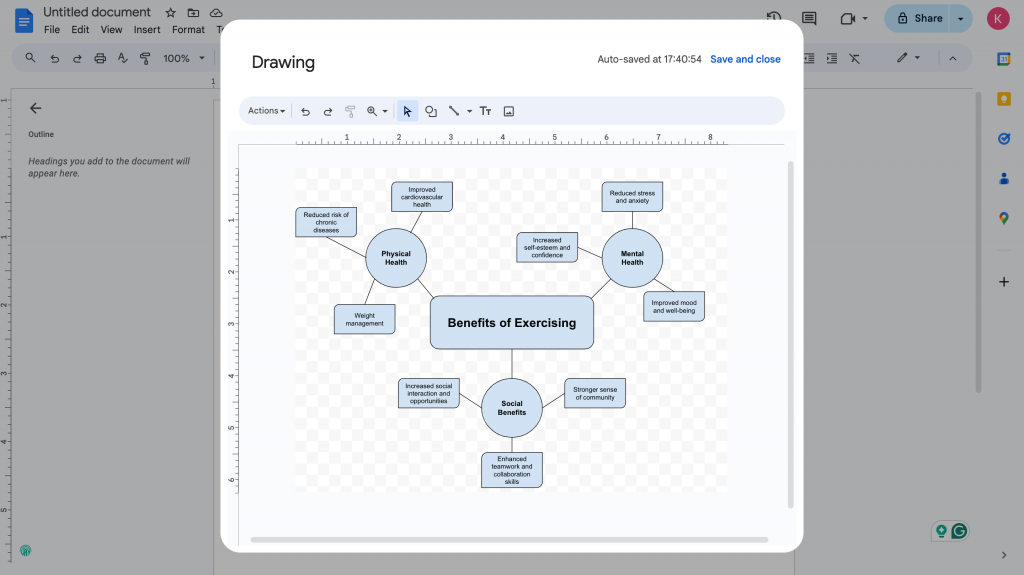
- Type specific details or smaller ideas related to the main subtopics.
- When expanding your mind map, consider adding specific details that provide more context and depth to your main subtopics.
- Be sure to use consistent formatting (e.g., font, size, color) for sub-branches to maintain a clear structure.
Save and close the drawing:
- Once you’re happy with how it looks, click on “Save and Close” to update your mind map.
Step 5: Customize your mind map
Personalizing your mind map can help you better understand and remember your ideas. When you use elements that are meaningful to you, you create a stronger connection between the visual representation and the underlying concepts.
To personalize your mind map:
Reopen the drawing:
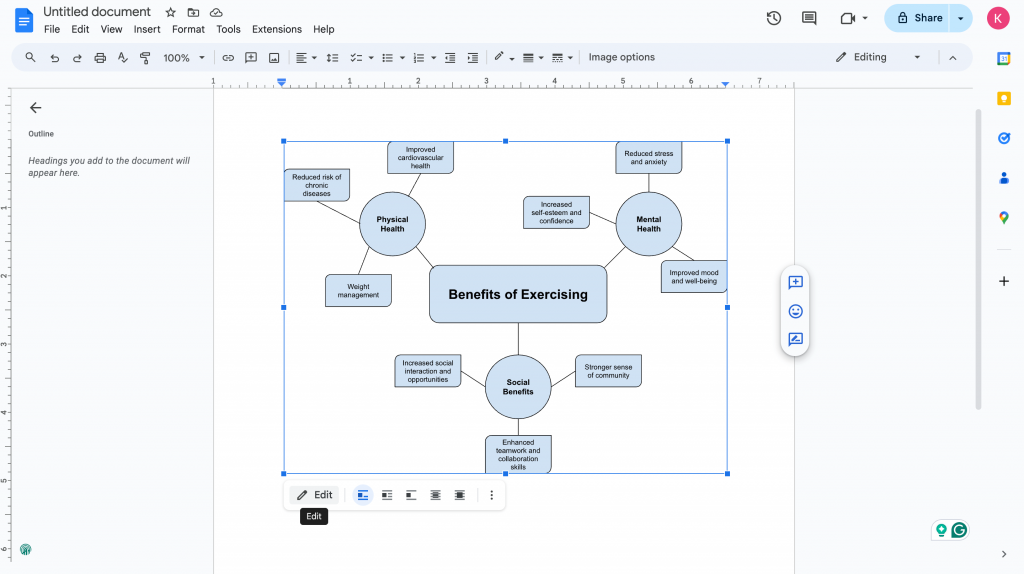
- Click on the drawing to select it, then click on “Edit” to reopen the Drawing tool.
Change shape styles:
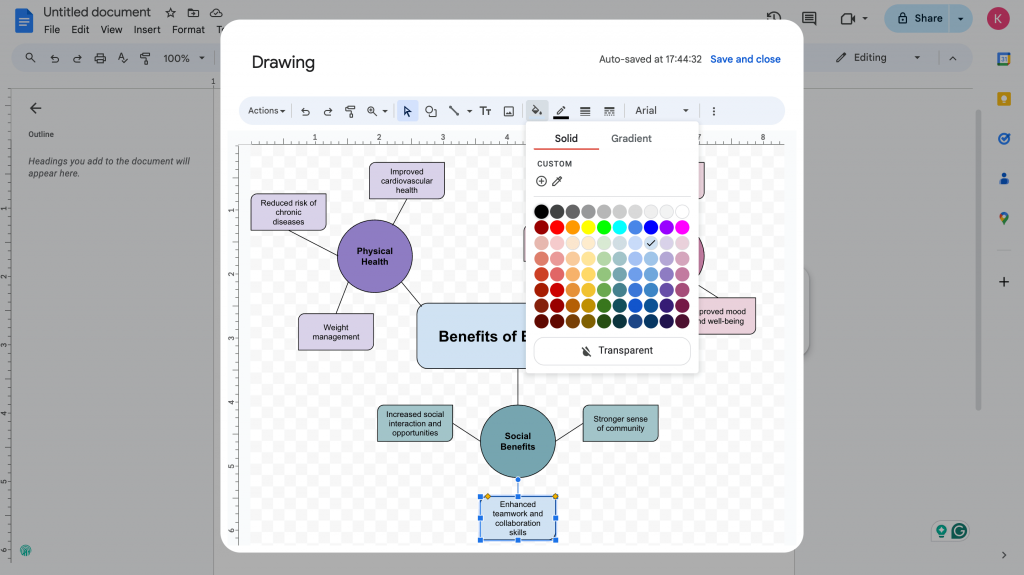
- Click on a shape to select it.
- Use the toolbar options to change the shape’s fill color, outline color, thickness and effects (e.g., shadows, glows).
Tips:
- Color palette: Choose colors that complement each other and create a visually pleasing aesthetic.
- Contrast: Ensure that the colors you choose have enough contrast to be easily distinguishable.
- Consistency: Use consistent colors and styles for similar elements in your mind map.
Adjust text formatting:
- Click to highlight the text inside a shape.
- Use the toolbar options to change the font, font size, color, alignment and other text attributes.
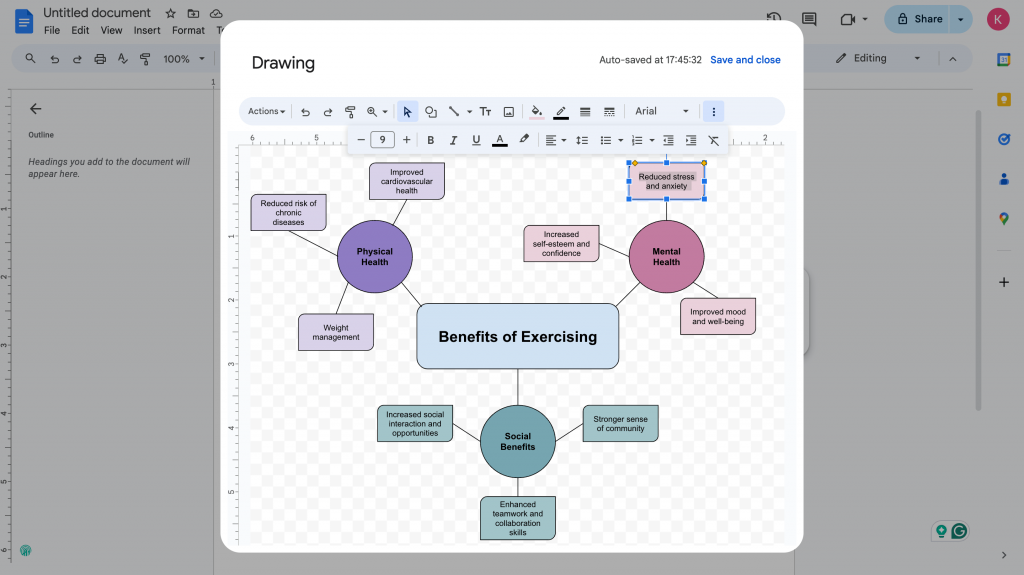
Tips:
- Font choice: Select a font that is easy to read and visually appealing.
- Font size: Use larger fonts for the central idea and main branches and smaller fonts for sub-branches and details.
- Color contrast: Ensure that the text color contrasts well with the background color of the shape.
Rearrange shapes and lines:
- Click and drag shapes and lines to reposition them.
- Arrange elements in a way that is visually balanced and easy to follow. Avoid clutter by spacing elements appropriately.
Tips:
- Visual hierarchy: Use spacing and positioning to emphasize the most important ideas.
- Flow: Arrange elements in a logical flow that guides the viewer through the mind map.
Save and close the drawing:
- Click on “Save and Close” to update the drawing in your document – you’re familiar with this step!
No clue how to customize and design your mind map? Here are 40+ mind map examples to help you visualize ideas.
Step 6: Save and share
Download your document:
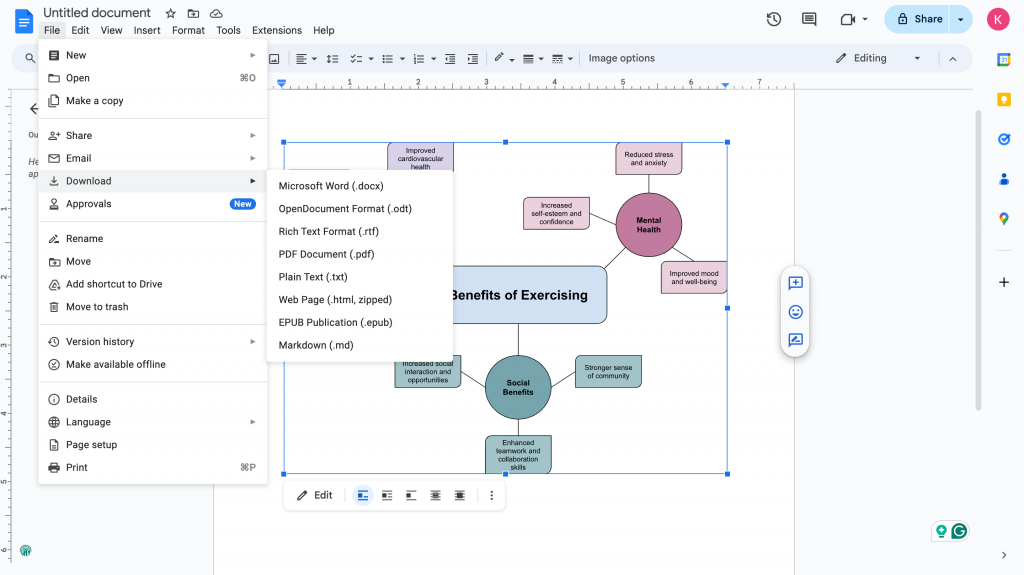
- To download your mind map on Google Docs, click on “File” located on the top-left corner of your Google Docs document.
- Go to “Download” and choose the desired file format (e.g., .docx, .pdf, .txt) to save your mind map.
Share your document:
- To share your document on Google Docs, click on “Share” – this button is usually located in the top-right corner of your Google Docs document.
- Then, Type the email addresses of the people you want to share the mind map with.
- Select the appropriate permission level for each recipient:
- Viewer: Can view the mind map but cannot edit it.
- Commenter: Can view and comment on the mind map but cannot edit it.
- Editor: Can view, comment on and edit the mind map.
- Once that’s done, click on “Share” and the mind map will be shared with the specified recipients.
Additional tip:
- Use templates: There are many mind map templates available online specifically designed for Google Docs. You can search for these templates and download them to use as a starting point for your own mind map. Templates can save you time and provide inspiration for different layouts and designs.
How to make a mind map on Venngage?
While you can make mind maps in Google Docs, it can be a bit tedious and the design options are pretty limited since Google Docs isn’t really made for visual tools like mind maps.
A much easier option is to use Venngage’s free mind map maker, where you can quickly customize templates that look great and help you organize ideas better.
Here’s how to create a mind map on Venngage:
- Pick a template from Venngage’s wide selection of mind map designs.
- Sign up for a free account or login using your email, Gmail or Facebook.
- Use the drag-and-drop editor to add your main idea, branch out topics and tweak colors and fonts to your liking.
- Spruce up your mind map by adding icons and illustrations from Venngage’s collection of 40,000+ options.
- Download your mind map or share it with your team via a private link.
Venngage has a variety of templates including business mind maps, brainstorm mind maps and more you can customize in minutes—perfect for brainstorming, project planning and more!
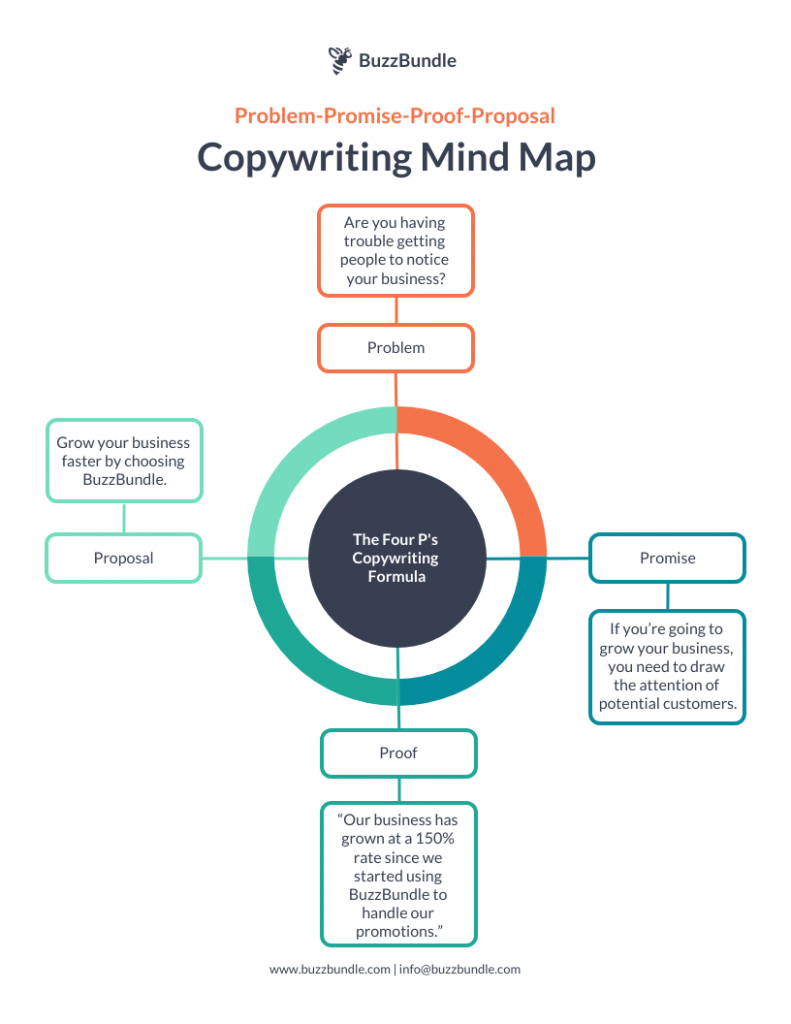
Here’s a copywriting mind map template that can help organize your thoughts and ideas when creating written content.
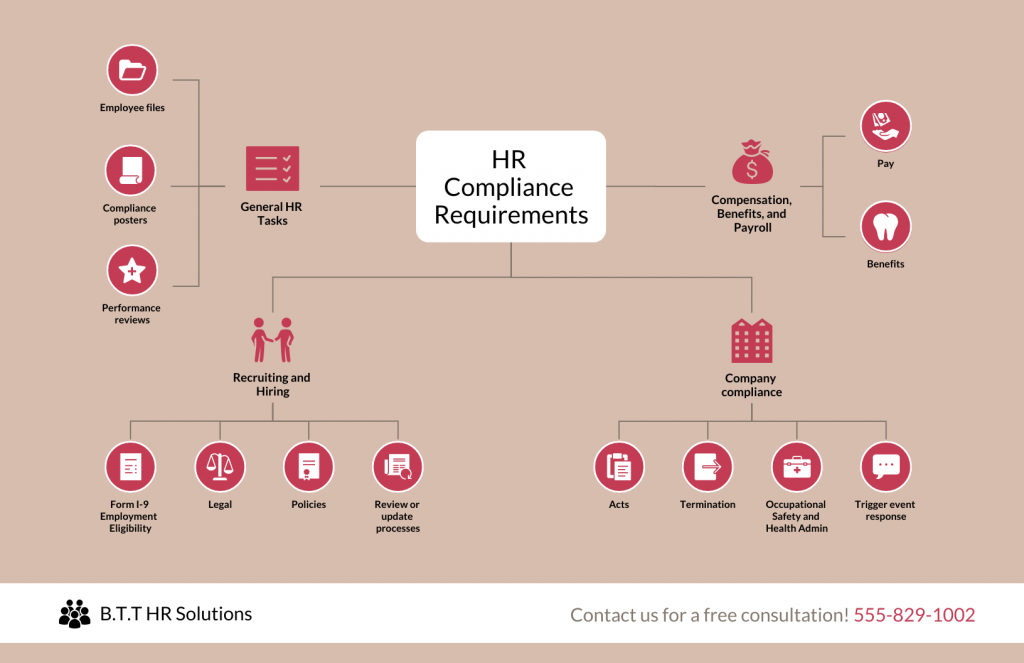
If you’re an HR professional, you might want to check out this HR compliance mind map template. It simplifies the complex rules and regulations of human resources by mapping out key areas and their requirements, helping ensure your company stays compliant with all the laws.
New to mind mapping? Start with one of these simple mind map templates and let your ideas branch out.
Related: 6 Best Mind Mapping Software in 2024
Mind mapping made easy with Venngage
While Google Docs is a decent option for basic mind maps, it’s kind of limited when you want to create something really cool and professional. That’s where Venngage comes in.
Venngage’s free online Mind Map Maker has tons of templates, icons and design tools specifically for mind maps. It’s super easy to use and lets you create mind maps that really get your ideas across. Try Venngage today to make mind maps that impress people and take your ideas to the next level!


