


Construction and facilities teams use a site inspection report to document risks, prove compliance and assign corrective actions. It supports audits, reduces liability and keeps projects on track.
But if you’ve reviewed or been handed a site inspection report, you’ve likely seen the gap. Most reports list issues but skip corrective actions and follow-ups, which regulators often flag during inspections.
As a curator and analyst, I reviewed 20+ real inspection templates and mapped them against frameworks such as the EPA Construction General Permit and WHS audit standards. And the pattern is clear: strong reports connect observations to actions and accountability.
In this guide, you’ll see what goes into a report that stands up to audits and scrutiny, without having to piece it together yourself.
The site inspection report format structure
A site inspection report format gives you a repeatable way to record what you saw, what went wrong and what needs fixing.
Site managers, safety officers, contractors and auditors use it across construction, manufacturing, facilities and safety audits to prove compliance and reduce risk exposure.
However, most construction or infrastructure teams get this wrong in two ways. They:
- Treat the report as a place to dump a regulatory checklist
- Skip critical details that auditors expect
Both issues weaken traceability and delay corrective action. Standards like the U.S. Environmental Protection Agency Construction General Permit and WHS audit framework require structured documentation that links observations to actions and timelines.
Below is the standard structure that holds up in audits and real-world inspections.
1. Report header and inspection overview
Start with the basics, such as project name, site location, inspection date, inspection type and report ID.
Some inspections follow a fixed schedule while others follow events like rainfall or incidents. The EPA requires inspectors to document timing, location and triggering conditions for each inspection. Site auditors check whether inspections happened when required. Missing context here can hurt the credibility of the entire report.
2. Inspector and responsible parties
Make sure to include the inspector’s name, role, company and contact details. Also, mention the contractor, the site supervisor and key stakeholders.
Most teams might mention the inspector, but they often overlook accountability. However, a complete report shows who owns the site and who must act on findings.
3. Project and site details
Include project scope, type of work, phase, site conditions, weather, active work areas and site layout references.
Inspection findings make sense only when you tie them to site conditions. For instance, a drainage issue during heavy rain is not the same as one during dry conditions.
EPA templates require weather conditions, construction phase and site-specific details for every inspection.
4. Inspection criteria and checklist
This is the core of your report. Break this down into categories such as safety, environmental controls, equipment and compliance. Each category should include:
- Criteria or standard
- Observation
- Rating or status
- Evidence or notes
Most teams include checks, but forget to link them to standards. But auditors expect each observation to map back to a regulation or internal policy.
In real-world practice, WHS-based templates often classify findings into conformance, non-conformance or not applicable.
5. Observations and findings
Next, summarize key issues found during the inspection. Group them either by severity or risk category. For example:
- High risk: Immediate hazard
- Medium risk: Potential issue
- Low risk: Administrative gap
Some WHS frameworks follow this norm and assign issues based on severity to quantify risk. This is important because decision-makers scan this section first. Grouping issues based on risks or severity helps them speed up their review process.
6. Non-compliance and corrective actions
As an industry standard, the EPA often requires documentation of corrective actions when controls fail or compliance gaps appear.
Therefore, document each issue with:
- Description of non-compliance
- Root cause
- Required corrective action
- Responsible person
- Deadline
A lot of facilities teams might document problems, but skip follow-through. However, a report without recommended actions has little to no operational value.
7. Supporting evidence
EPA guidance recommends referencing site maps to visually show where issues occurred. That means you should attach photos, videos, site maps and documents to mark the exact locations of issues.
Pinpointing visual proof reduces disputes and improves audit review time significantly.
8. Summary and overall assessment
This is the part most people scroll to first, so don’t make them hunt for it. You’re expected to state the outcome clearly. Is the site compliant or not? Some teams also add a risk rating or score to make the decision easier to interpret at a glance.
Include the basics. State the overall compliance status, note how many issues you found and mention whether a re-inspection is required. Keep it direct and easy to scan.
If you’ve ever reviewed inspection reports, you’ve probably seen this section buried under pages of notes. That defeats the purpose. This section should read like a decision snapshot. Anyone should understand the situation in a few seconds.
9. Sign-off and certification
Every inspection report needs a clear endpoint and that comes with a sign-off. Add names, signatures and dates. Include a short declaration that confirms the report is accurate and complete.
This is not just formality. Regulatory frameworks like EPA inspection templates require certification statements tied to legal accountability. Once signed, the report becomes an official record.
An unsigned report feels incomplete. It also raises questions during audits. If no one takes responsibility for the report, the document loses credibility.
10. Recordkeeping and distribution
Once the report is done, the job isn’t over. You need to decide who receives it and how long you keep it.
Inspection reports are not one-off documents. They form part of your compliance history. Regulators like the EPA require you to retain these records for at least three years after permit coverage ends.
This is where many teams slip. Reports get created, shared once and then lost in folders. That creates problems later when audits require historical records.
Treat every report as part of a larger system. Store it properly, share it with the right people and make sure you can retrieve it when it matters.
Use this copy-paste site inspection report template
If you don’t have a standardized format yet, use this copy-paste site inspection report template. It follows real inspection structures used in compliance frameworks like EPA CGP and WHS audits.
Just copy it, adapt it to your site and reuse it across projects.
Site Inspection Report
Project Name: [Enter project name]
Location: [Enter site location]
Inspection Date: [DD/MM/YYYY]
Inspection Time: [Start – End]
Inspection Type: [Routine / Incident / Follow-up]
1. Inspector Details
Name: [Inspector name]
Role: [Inspector role]
Company: [Company name]
Contact: [Email / Phone]
2. Site Conditions
Weather Conditions: [Sunny / Rain / Windy / etc.]
Current Work Phase: [Excavation / Foundation / etc.]
Areas Inspected: [List areas]
3. Inspection Checklist
| Category | Criteria | Status | Remarks |
|---|---|---|---|
| Safety | PPE compliance | [OK / Issue] | [Notes] |
| Environmental | Waste handling | [OK / Issue] | [Notes] |
4. Key Observations
[Summarize major findings. Group by severity if needed.]
5. Non-Compliance And Corrective Actions
| Issue | Action Required | Responsible | Deadline |
|---|---|---|---|
| [Describe issue] | [Fix required] | [Name] | [Date] |
6. Supporting Evidence
[Attach photos, videos, or reference site maps]
7. Inspection Summary
Overall Status: [Compliant / Non-Compliant]
Total Issues Identified: [Number]
Re-Inspection Required: [Yes / No]
8. Sign-Off
Inspector Signature: ________________________
Date: ________________________
Authorized Representative: ________________________
Venngage site inspection report templates
Venngage site inspection and other construction-related report templates are great for turning dry site inspection data into structured, scannable reports.
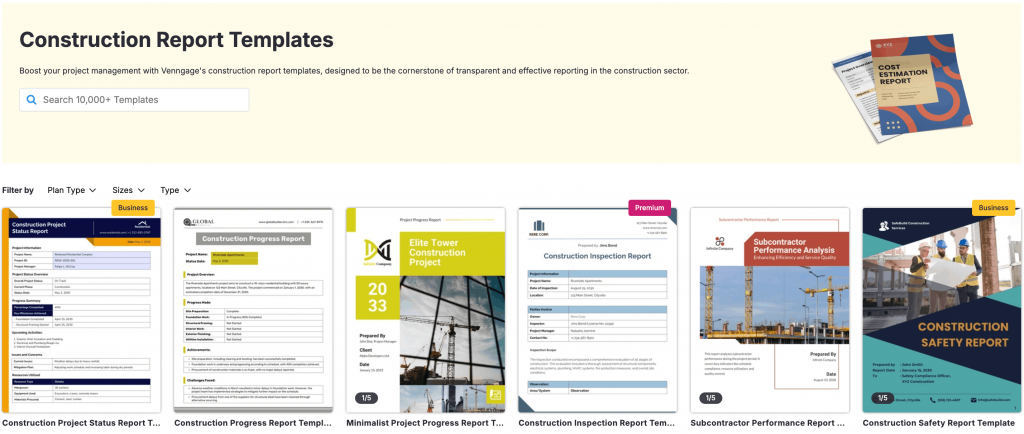
You can use these ready-to-use templates to highlight risks, group findings and recommend actions without forcing stakeholders to read everything line by line.
This matters when decisions depend on speed and clarity. Take the Venngage site inspection report template below, for example.
It follows the same structure you’d expect from a real inspection report, but maintains visual hierarchy so everything feels easier to navigate.
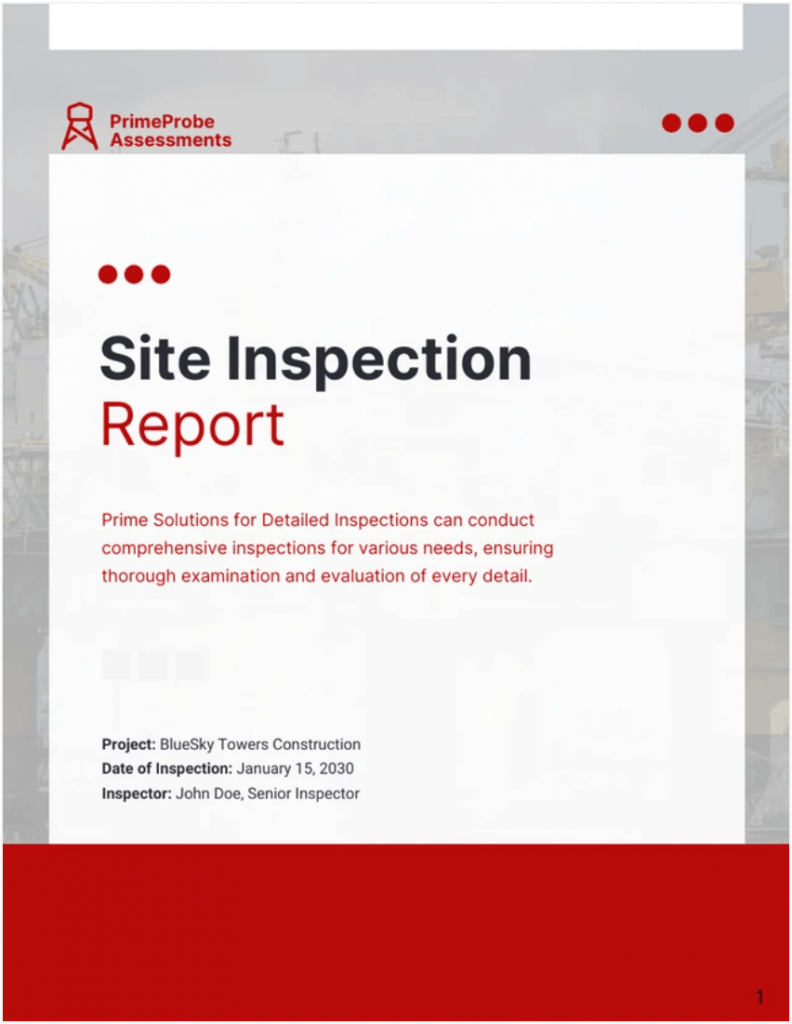
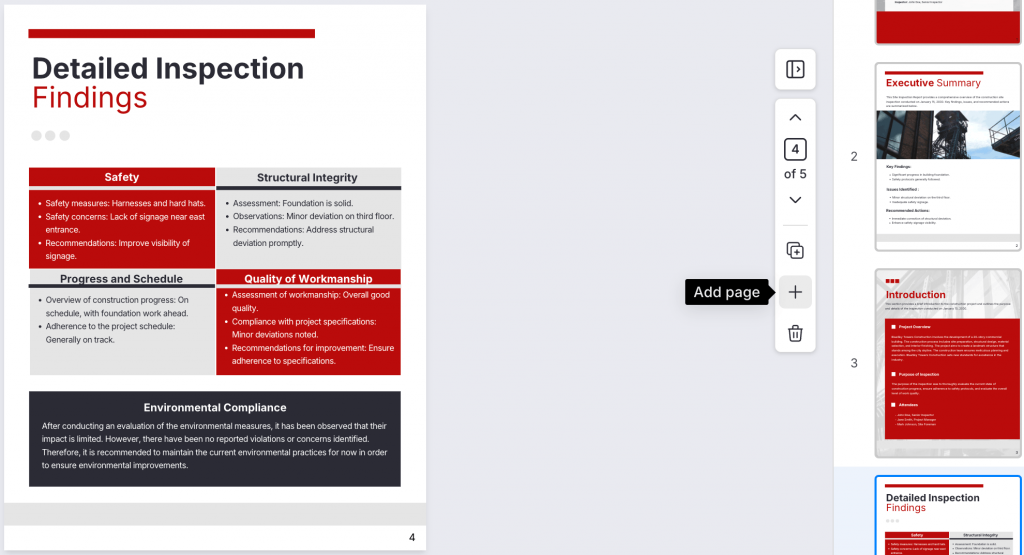
The template uses status indicators that catch your eye right away, so you don’t have to hunt for what matters. It also places key observations upfront, which makes the report easy to skim and quick to understand. The same logic applies to quality and construction inspections.
Venngage templates use:
- Color-coded sections to flag high-risk issues immediately
- Pre-built layouts that match compliance-style reporting structures
- Visual grouping for observations, actions and responsibilities
- Space for evidence like photos and notes without clutter
You can also Venngage’s AI Report Generator to create a site inspection report. Upload your data as a Word doc or PDF, and the tool will automatically compile it into a polished report.
Venngage also helps you keep reports visually consistent across teams. You can use its Brand Kit to preset colors, fonts and logos, so every inspection report looks on-brand without any manual effort.
If you’re handling multiple inspections across teams, this becomes even more important. A standardized visual format keeps reporting clean, repeatable and easy to review.
Why this site inspection report structure works
Most inspection reports don’t make an impression because they overload the reader or bury the action.
This site inspection format follows how people scan risk, process evidence and make decisions under time pressure.
1. Sets the context first
The report opens with the inspection overview because your audience need to know where, when and under what conditions before they reach a conclusion.
Templates based on industry standards always capture context first. They map the findings to a specific inspection event to build accountability.
2. Uses structured checks to reduce cognitive load
A template like this enforces a good structure. The checklist section in this format breaks the inspection into categories like safety, environment and quality.
When these checks appear as grouped visual blocks with clear status indicators, you can review them faster and spot gaps without second-guessing.
3. Places findings before actions
An inspection report exists to identify risks and push appropriate action.
The report starts with observations before flagging non-compliance issues and suggesting corrective steps.
This sequence lays out the problems first, then recommends a response and assign responsibility and deadlines. This way, the report drives action instead of just documenting issues.
4. Visual evidence builds trust
A thought-through inspection workflow relies on visual documentation to support decisions and reduce disputes.
And this template doesn’t exactly that, by presenting photos, notes and site references after findings or along with it. This format doesn’t bury critical evidences in appendices.
The Venngage site inspection report template we discussed earlier reflects this. It leaves room for visuals alongside observations. You can also add new pages or sections to highlight problem areas visually.
5. Summary and sign-off close the loop
The report ends with a summary and sign-off because every site inspection needs a clear conclusion.
For a regulatory paperwork like a site inspection report, this isn’t just cosmetic necessity or pretty formatting. It’s a great way to close the report formally and with legal nuances in mind.
Pro tips to write an effective site inspection report
No matter how great your template is, your site inspection will appear fall apart if it’s written poorly.
Here are six practical tips to help you write credible reports that look great and grab attention.
1. Write the report within 24 hours
Complete your inspection report on the same day or within 24 hours. The U.S. Environmental Protection Agency Construction General Permit requires timely documentation for accuracy and compliance.
Try this: Block 15–20 minutes after every inspection. Don’t rely on memory later.
2. Tie every observation to a location
Vague notes often tend to slow down fixes. Use site maps or specific zone names for every issue.
EPA guidance recommends linking findings to site maps to improve documentation and follow-up actions.
Example: Add a simple “Location” column in your checklist or mark zones like “Zone A – Drainage.”
3. Separate “observation” from “action”
Don’t mix what you saw with what needs to be done. Keep them in separate fields.
This removes confusion and lets the review team know exactly what happened and what they must fix.
How to apply this in practice: Write one line for the “issues” and one line for the “recommended actions” and label them specifically. Don’t group them together in a single sentence or paragraph.
4. Use photos as primary evidence
Text helps you describe what happened, but photos make it real. When you attach visual evidence to critical issues, you remove doubt and make your findings easier to trust.
Visual documentation reduces disputes and speeds up audits across inspection workflows.
Try this: Take photos during inspection, not after. Add short captions like “Sediment overflow near drain.”
5. Assign one owner per issue
This is a trap many construction teams fall for. When you assign responsibility to everyone, no one takes action. Assign each issue to one owner and set a clear deadline.
Example: Avoid “team” or “contractor.” Instead, write a specific person’s or team’s name and a date.
6. Reuse the same format every time
Use a consistent format every time. It reduces reporting errors and helps people review reports faster.
How to apply this in practice: Select a template or a set of construction report templates so that you don’t have to redesign an inspection report from scratch.
Use Venngage’s Brand Kit to lock in your brand colors, fonts and logos upfront withso every report stays on-brand without any manual work.
FAQs: Site inspection report format
Here are four of the most commonly asked questions about site inspection report formats, especially around audits, compliance and accountability.
1. How do you write a site inspection report that passes an audit?
Use a structured format with inspection details, checklist findings, evidence and corrective actions. Include dates, locations and signatures. Follow standards like EPA CGP to ensure traceability, compliance and legal defensibility.
2. How do you document issues without taking blame?
Stick to facts. Describe what you observed, where it occurred and when. Avoid opinions. Add evidence like photos and link each issue to a required corrective action. This keeps the report objective and audit-safe.
3. What should a site inspection report always include?
Include inspection overview, site conditions, checklist results, observations, non-compliance, corrective actions, evidence, summary and sign-off. Missing any of these weakens compliance and delays follow-up actions.
4. How do you make a site inspection report easy to review?
Use clear sections, tables and visual hierarchy. Group findings by category and highlight high-risk issues. Keep observations and actions separate. A structured layout helps stakeholders scan and act faster.
Related reporting formats
If you regularly handle inspections, audits or compliance reports, Venngage offers a wide range of ready-to-use formats. Most of them are free and easy to customize.
Below are a few formats closely related to site inspection reports:
- Inspection Form Templates
- Construction Report Templates
- Consulting Report Templates
- Survey Results Report Templates
If you want a faster way to create consistent inspection reports, start with Venngage’s templates. They give you a structured layout, so you don’t have to build reports from scratch every time.


