


In a world where things seem to move at breakneck speed, businesses constantly battle for attention. The struggle to get your audience to notice you and be interested has never been bigger.
But what if you could capture eyes and convey key messages with a single glance?
Yes, I’m talking about posters: powerful, versatile and when designed well, can stop viewers in their tracks. Posters are ideal strategic tools to deliver important messages in a clear, compelling way.
They grab attention, give information quickly and easily, and reach a wide audience.
No, you don’t have to be a design wizard to make your own poster. Poster-making is simple and quick with the right tools ( check out the free online poster maker from Venngage and the range of customizable poster templates).
Posters are commonly used for:
- Advertising events, sales, or new products.
- Providing information about services or promotions.
- Creating awareness about brands and campaigns.
- Enhancing branding and visibility in high-traffic areas.
Click to jump ahead:
- Step-wise guide to create a poster on Google Docs
- How to make a poster on Venngage
- Create posters that WOW
From announcing exciting new products to promoting upcoming events, this step-wise guide will show you how to harness the power of posters using Google Docs – a program you already have at your fingertips. But you probably didn’t consider for poster creation.
Design elements of effective posters:
Increase the impact of your posters by adding the following design elements:
- Bold Headlines: Use large, clear fonts to grab attention.
- Engaging Images: Include high-quality images or graphics that highlight your message. You can use tools to edit images for better clarity and impact, ensuring they effectively convey your intended message.
- Concise Text: Keep the text short and crisp.
- Consistent Branding: Use your brand’s colors, logos, and fonts.
- Call to Action: Inspire audiences to take a specific action, such as visiting your website or attending an event.
What’s a good place to start creating posters?
Google Docs is a versatile and accessible tool for creating posters. It has the flexibility and functionality to offer even beginners the option to create professional posters.
The best part? It won’t overwhelm you with the advanced features that come with specialized design software.
Bonus: It’s free and easy to use!
Step-by-step guide for creating a poster on Google Docs
Follow these easy steps to create your first poster on Google Docs.
Step 1: Open Google Docs and create a new document.
Step 2: Set up the page orientation, size, and margins.
Step 3: Add a background or image.
Step 4: Add content, images, text boxes, shapes, and lines.
Step 5: Customize the design by changing fonts and colors, and arranging elements.
Step 6: Review and finalize the document.
Step 7: Print or share the document.
Let’s dive deeper into each step. You can open Google Docs to follow along as you’re reading too.
Step 1: Open Google Docs
Here’s how to get started:
- Open your web browser and go to Google Docs.
- Make sure you’re signed in with your Google account.
- To create a new document: Click on the “+” icon.
- Rename your document to keep it organized.
Step 2: Set up the page
Setting up the page right ensures your poster looks great and is easy to read.
To enhance the visual appeal of your poster, pay attention to your page format and page alignment.
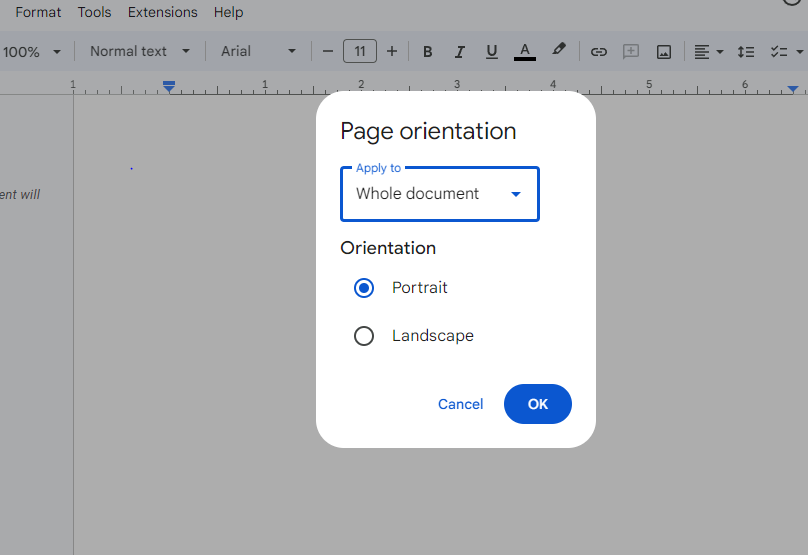
Change page orientation:
- Click on Format > Page Orientation.
- Choose Landscape for a horizontal poster or keep it as Portrait for a vertical poster.
- Click OK.
Set page size:
- In the same Page Orientation menu, you can adjust the paper size if needed (e.g., A3, A4, etc.).
- Click OK.
Set margins:
- Adjust margins to add or reduce space in your design from the Page Orientation menu. Set the margins to “0.5 inches” or less to maximize your design space.
- Click OK.
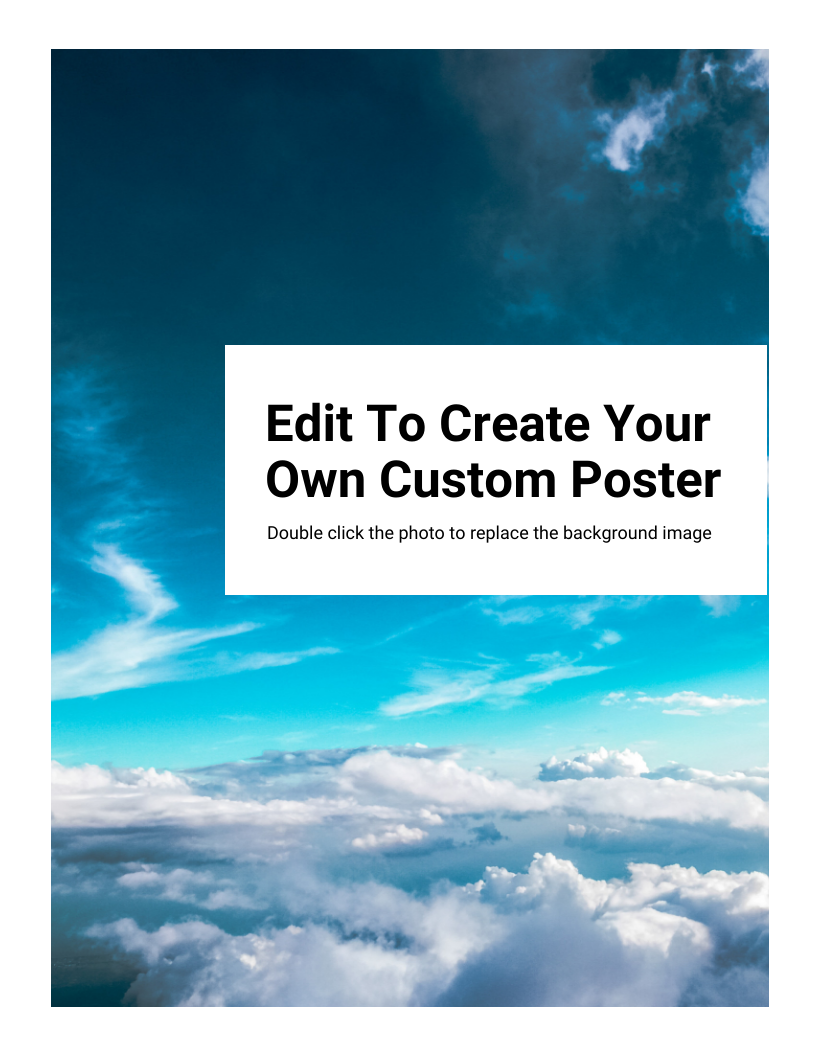
Step 3: Add a background
With the right background, you can set the tone for your poster, making it visually interesting and engaging for the audience.
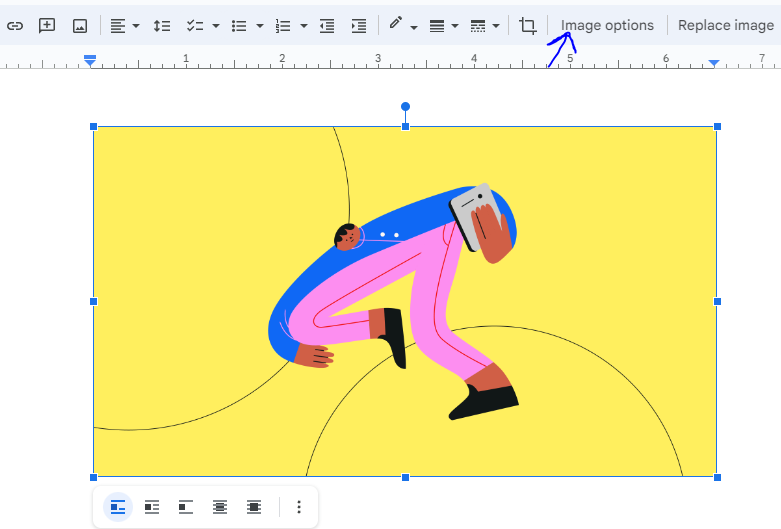
Insert a background image:
- Click on Insert > Image > Upload from your computer or choose another source.
- Resize and position the image to cover the entire page for a background.
- Right-click on the image and select Image Options and adjust transparency if needed.
Step 4: Add content
This is the meat of your poster. Make your poster easy to understand and visually appealing by inserting text boxes for content, adding relevant images and using shapes to enhance your design.
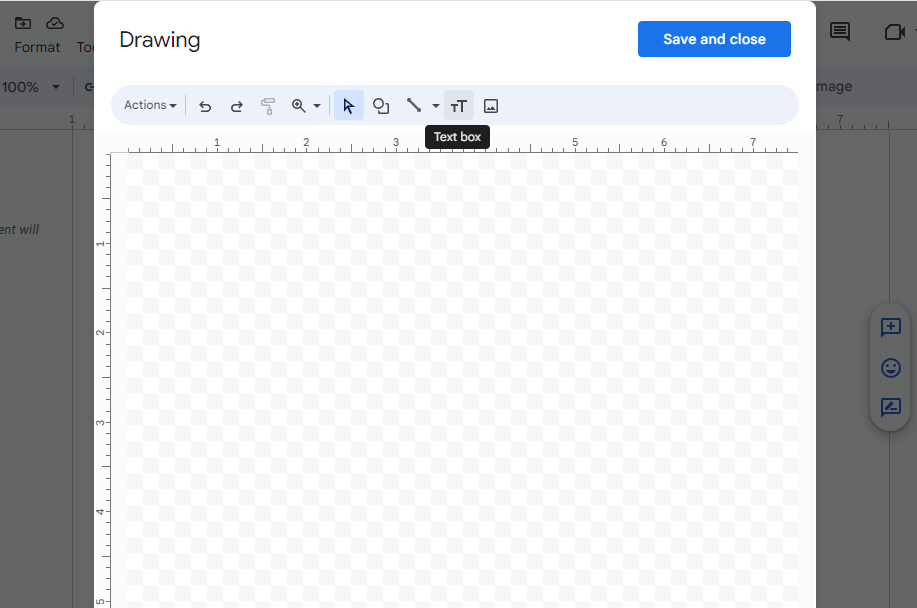
Insert text boxes:
- Click on Insert > Drawing > + New.
- Click on the Text box icon and draw a text box. Add your text.
- Resize and position each element to create a balanced layout.
- Click Save and Close.
Add images:
- Click on Insert > Image.
- Choose the source of the image (e.g., upload from computer, search the web).
- Insert and resize the image. Move it to the desired position on the poster.
3. Add shapes and lines
- Click on Insert > Drawing > + New.
- Use the shape and line tools to add design elements.
- Customize color and size.
- Click Save and Close.
Step 5: Customize your design
Experiment and try different fonts, colors, and change up how you arrange things to create a design that’s both eye-catching and easy to understand.
Pick fonts that are big enough to read from a distance and use colors that contrast well so your message pops.
Use alignment tools to line things up neatly and keep your design balanced.
Think about who you’re trying to reach and choose design elements they’ll connect with.
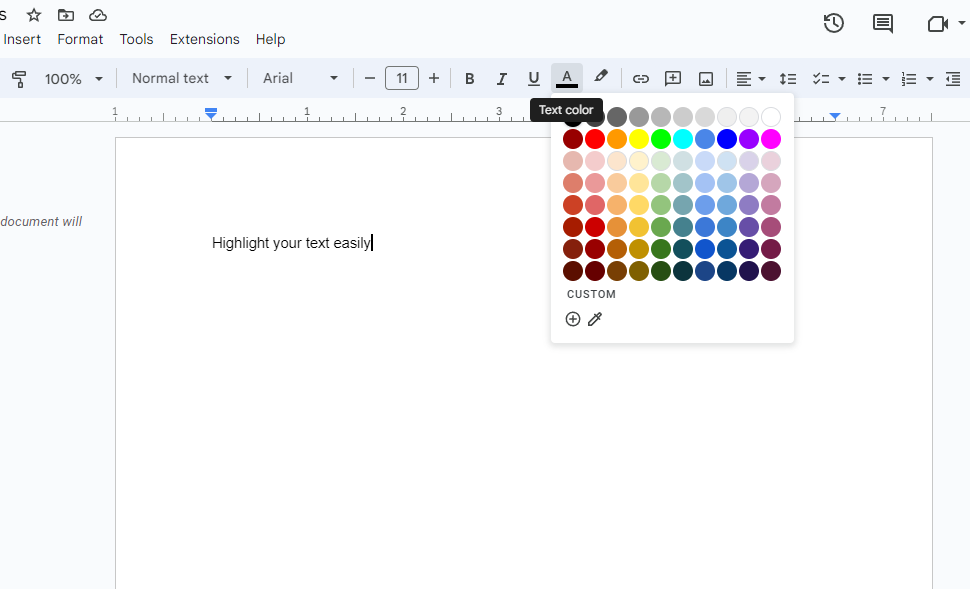
Change fonts and colors:
- Use the toolbar to change font, size, and color.
Arrange elements:
- Arrange images, text boxes, and shapes by clicking and dragging them into place.
- Use the alignment guides to help with positioning.
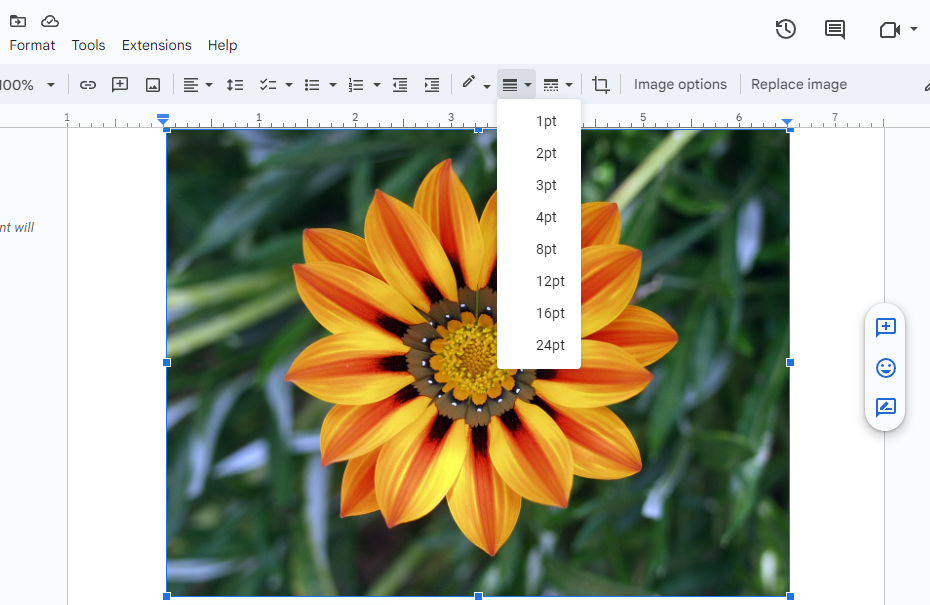
Add borders and shading:
- Select a text box or shape.
- Right-click and select Border weight, Border color, or Background color to customize.
Step 6: Review and finalize the document
To make sure your poster is polished and complete, give it some final checks.
This step is crucial for catching any missable errors, like spelling errors or format misalignments.
Check your layout to ensure all design elements are in place and easy to view by your readers.
Review the clarity of your text, you don’t want your main message being missed out!
Add finishing touches to improve the overall design to confirm it’s ready for printing or sharing, without any last-minute surprises.
Check alignment:
- Double-check for alignment and formatting of all images and text.
Proofread:
- Check for any spelling or grammatical errors.
- Ensure that your contact information and call to action are clear.
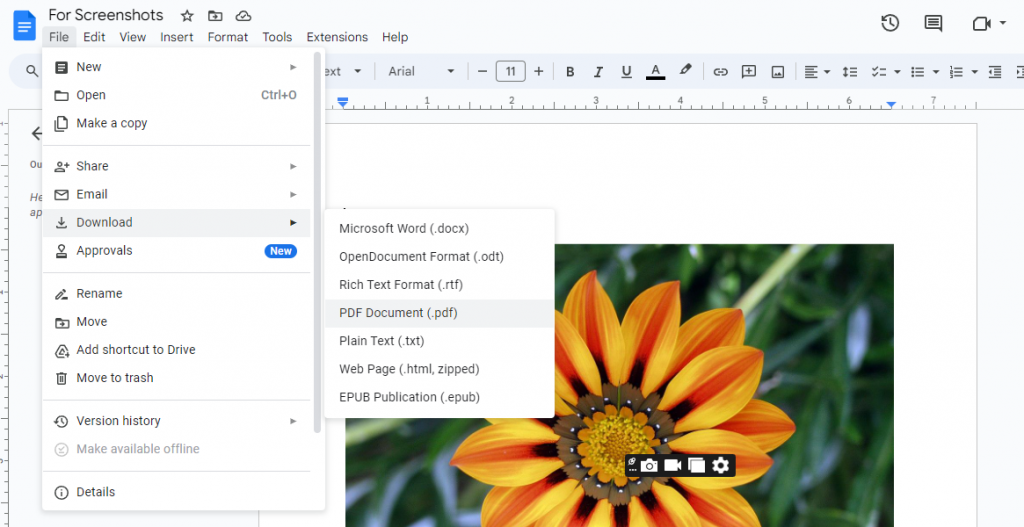
Save and download:
- Click on File > Download > PDF Document or another format if you need a high-quality printable version.
Step 7: Print or Share
Now that you’ve completed the final checks and your poster is ready, on to your final step.
Download the finished poster, or get a shareable link to send it via email or other digital channels.
Choose how you want to share your poster, based on where your audience is most active.
Print:
- If you need a physical copy, print your poster using your printer settings.
- Click on File and select Download to save your poster as a PDF (.pdf) or JPEG (.jpg) file.
Share:
- Select “Print” to get a hard copy of your poster.
- Click on Share in the top right corner to share your poster digitally via email or generate a shareable link.
How to make a poster on Venngage?
Google Docs is a great starting point, but if you’re looking to take your poster creation to another level, check out Venngage.
They’ve got a treasure trove of poster templates – they’re like pre-built canvases ready for your creative edits.

Venngage makes it easy for ANYONE to create professional-looking posters. No prior design skills needed.

To get started, sign up for a free account and browse through the massive collection of templates. I’m sure you’ll find one that matches your vibe and brand, or if you’re feeling brave you can start from scratch with a blank canvas.
Play around with the drag-and-drop editor, it’s a breeze to use, and you can arrange everything for a layout that pops.
Before you hit download, give it a quick once-over. Make sure your message is clear and easy to read.
Once you’re happy with your poster, download it as a PDF or image file, or share it directly from Venngage with a link.
No matter what the mood, there’s a poster template to go with it. Choose from 265+poster categories like advertising, recrutiment, technology and many more and create your own striking poster!
Create posters that WOW. No design skills needed!
While Google Docs is a familiar workspace for most, it comes with limitations in page size and design tools for poster creation.
For serious poster firepower, Venngage is your new go-to. Easily design eye-catching posters that effectively communicate your message and grab your audience’s attention.
The free poster-maker by Venngage is just what you need to make your next show-stopping poster.
Choose from a rich library of icons, images and fonts, a wide range of customizable poster templates, an intuitive drag-and-drop editor to create compelling posters. Sign up to get started today!


