
If your company has a new hire or intern, how do you get them to know who is who in the company quickly? An organizational chart! It is basically a detailed diagram that shows the roles and responsibilities of employees in a company.
Google has a handful of productivity tools, one of which is Google Slides. It might interest you to know that Google Slides can be used for more than making presentations. Yes, with Google Slides, you can design pretty much anything, including an organizational chart that will make your team structure as easy to understand as your favorite board game.
In this post, I’ll walk you through the steps to create an organizational chart with Google Slides. But if you’re looking for more customization and design options for more complex organizational charts, then explore our Organizational Chart Maker and Free Organizational Chart Templates.
Click to jump ahead:
- Step by step guide for creating an organizational chart on Google Slides
- How to make an organizational chart in Venngage
- Conclusion: Start creating professional organizational charts with Venngage
Step by step guide for creating an organizational chart on Google Slides
To create an organizational chart in Google Slides, you can do the following:
- Step 1: Open Google Slides
- Step 2: Set up the slide layout
- Step 3: Insert a shape for the top-level position
- Step 4: Add text to the shape
- Step 5: Duplicate shapes for subordinate positions
- Step 6: Connect the shapes
- Step 7: Add text to subordinate shapes
- Step 8: Customize the design
- Step 9: Review and adjust the chart
- Step 10: Save and share the presentation
Ready to create an organizational chart with Google Slides? Let’s walk through this step-by-step guide that will show you the process from start to finish.
Step 1: Open Google Slides
To begin to create an organizational chart, open Google Slides. Navigate to the website and click on Blank presentation.
- Open Google Slides:
- Go to Google Slides.
- Click on Blank to start a new presentation.

Step 2: Set up the slide layout
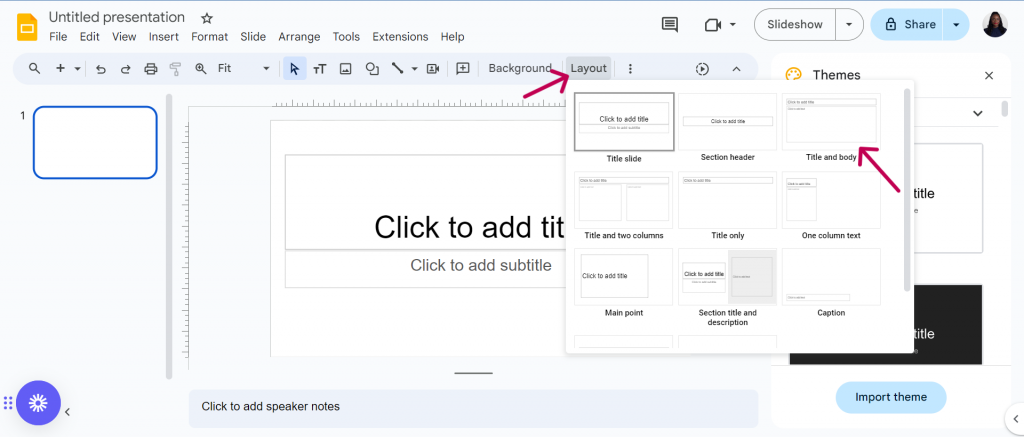
Next, you want to choose the appropriate slide layout for your organizational chart. You can choose a layout with a title and body text or another suitable layout. Starting with a clean, well-organized slide to build your chart on is very important.
- Set up the slide layout:
- Click on Layout in the toolbar.
- Choose a layout that suits your organizational chart. The Title and Body layout is a good starting point.
Step 3: Insert a shape for the top-level position
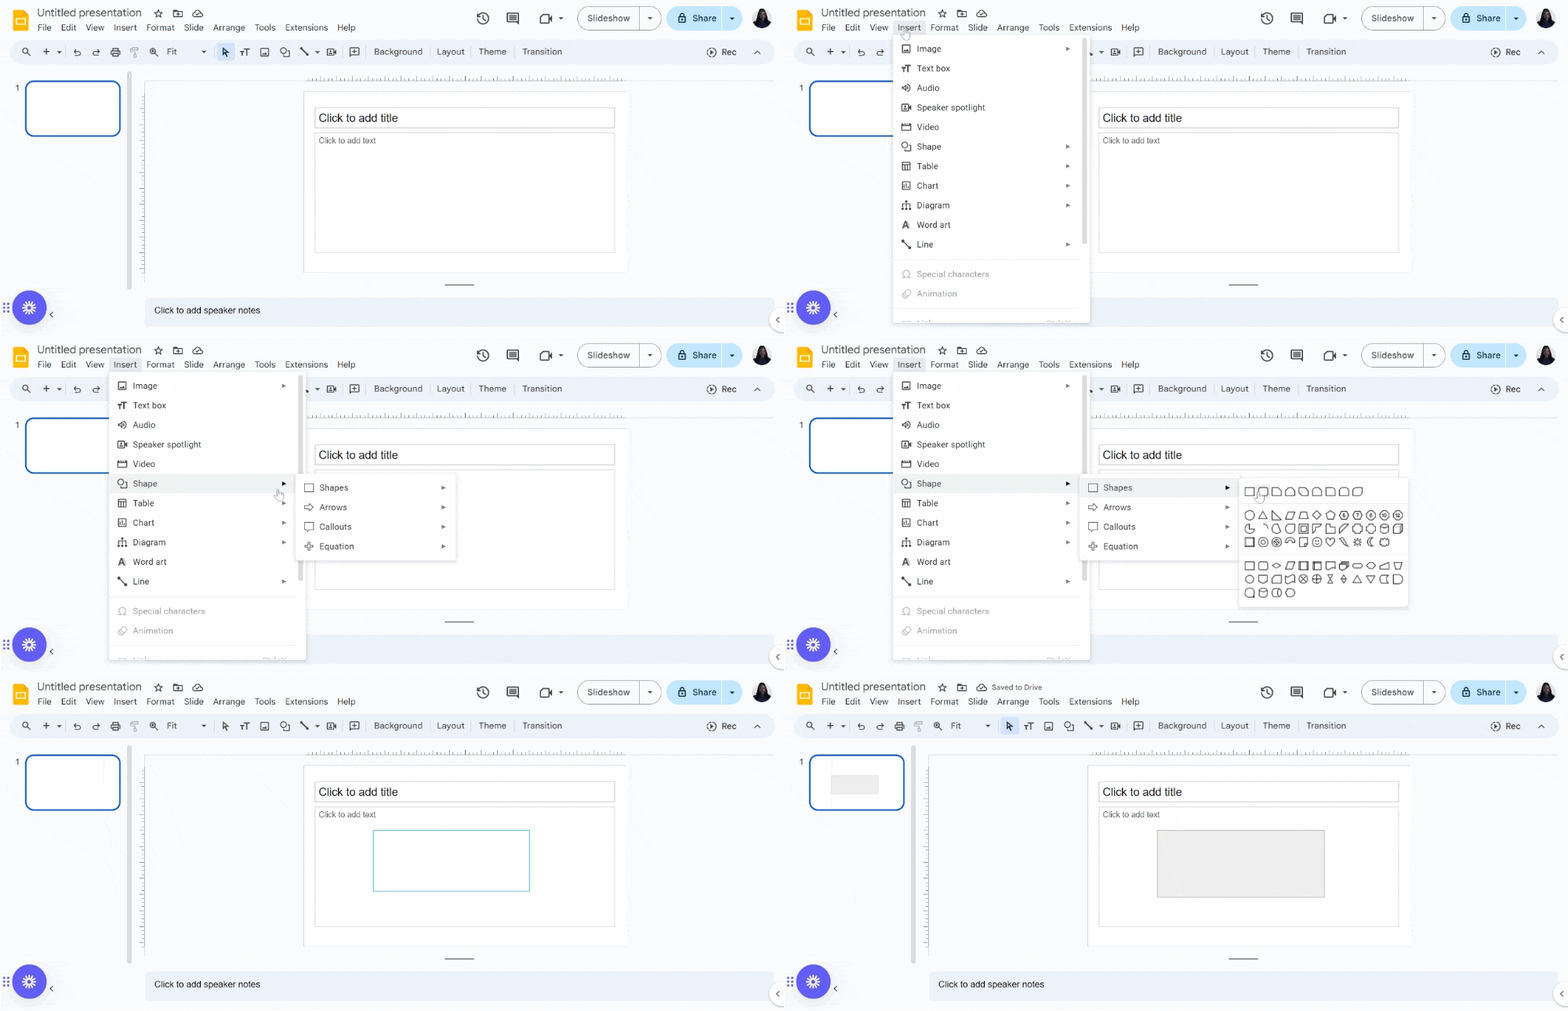
Rectangles, circles and diamonds are shapes that are often used in an organizational chart. To begin to add shapes for your organizational chart, access the shape tools, select a shape, and place it on the slide. This section is crucial as it introduces the first visual element of your organizational chart.
- Insert a shape for the top-level position:
- Click on Insert in the menu.
- Select Shape, then choose the desired shape (e.g., rectangle or oval).
- Draw the shape on the slide to represent the top-level position.
Step 4: Add text to the shape
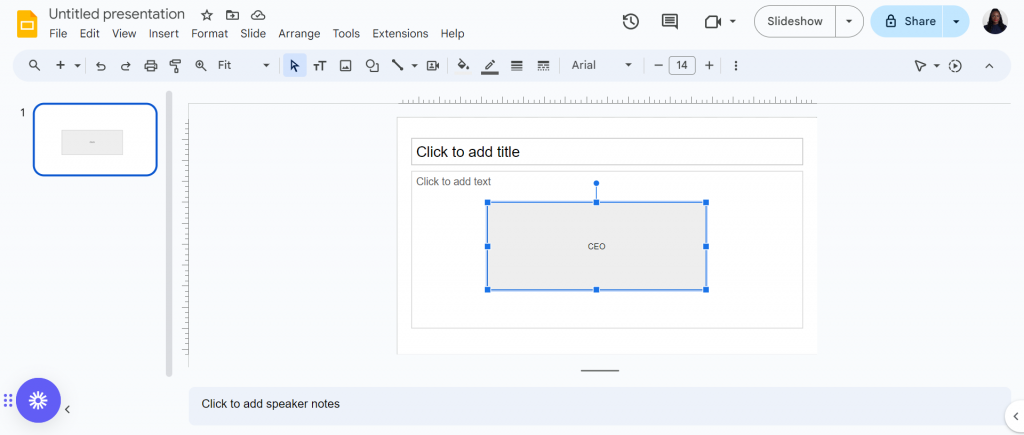
Double click on the shape that you want to add your text to and fill accordingly. Ensure your text is readable and professional by using professional fonts such as Calibri, Arial, Times New Roman etc.
- Add text to the shape:
- Click inside the shape.
- Type the name and title of the top-level person (e.g., CEO).
Step 5: Duplicate shapes for subordinate positions
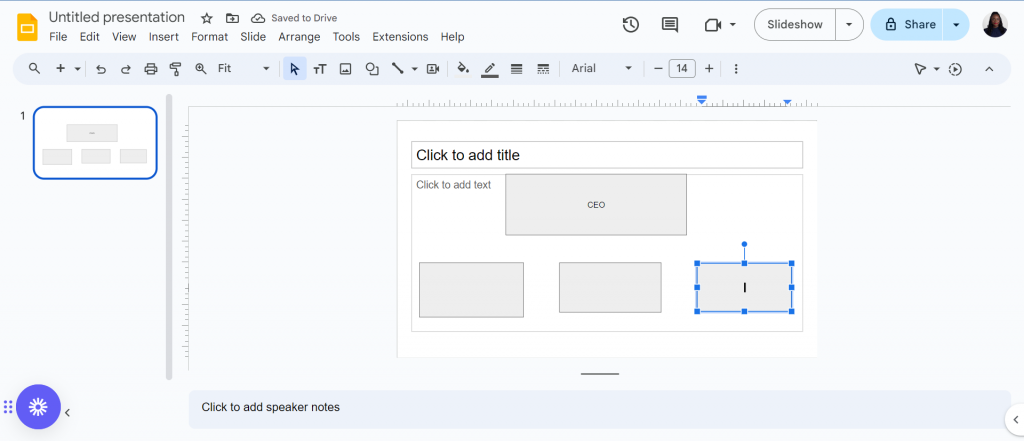
Maintaining a consistent size and spacing is important for visual clarity and also communicates professionalism. Ensure that your shapes align and are well structured.
- Duplicate shapes for subordinate positions:
- Select the top-level shape.
- Press Ctrl+C to copy, then Ctrl+V to paste.
- Adjust the size and position of the new shapes to represent subordinate positions.
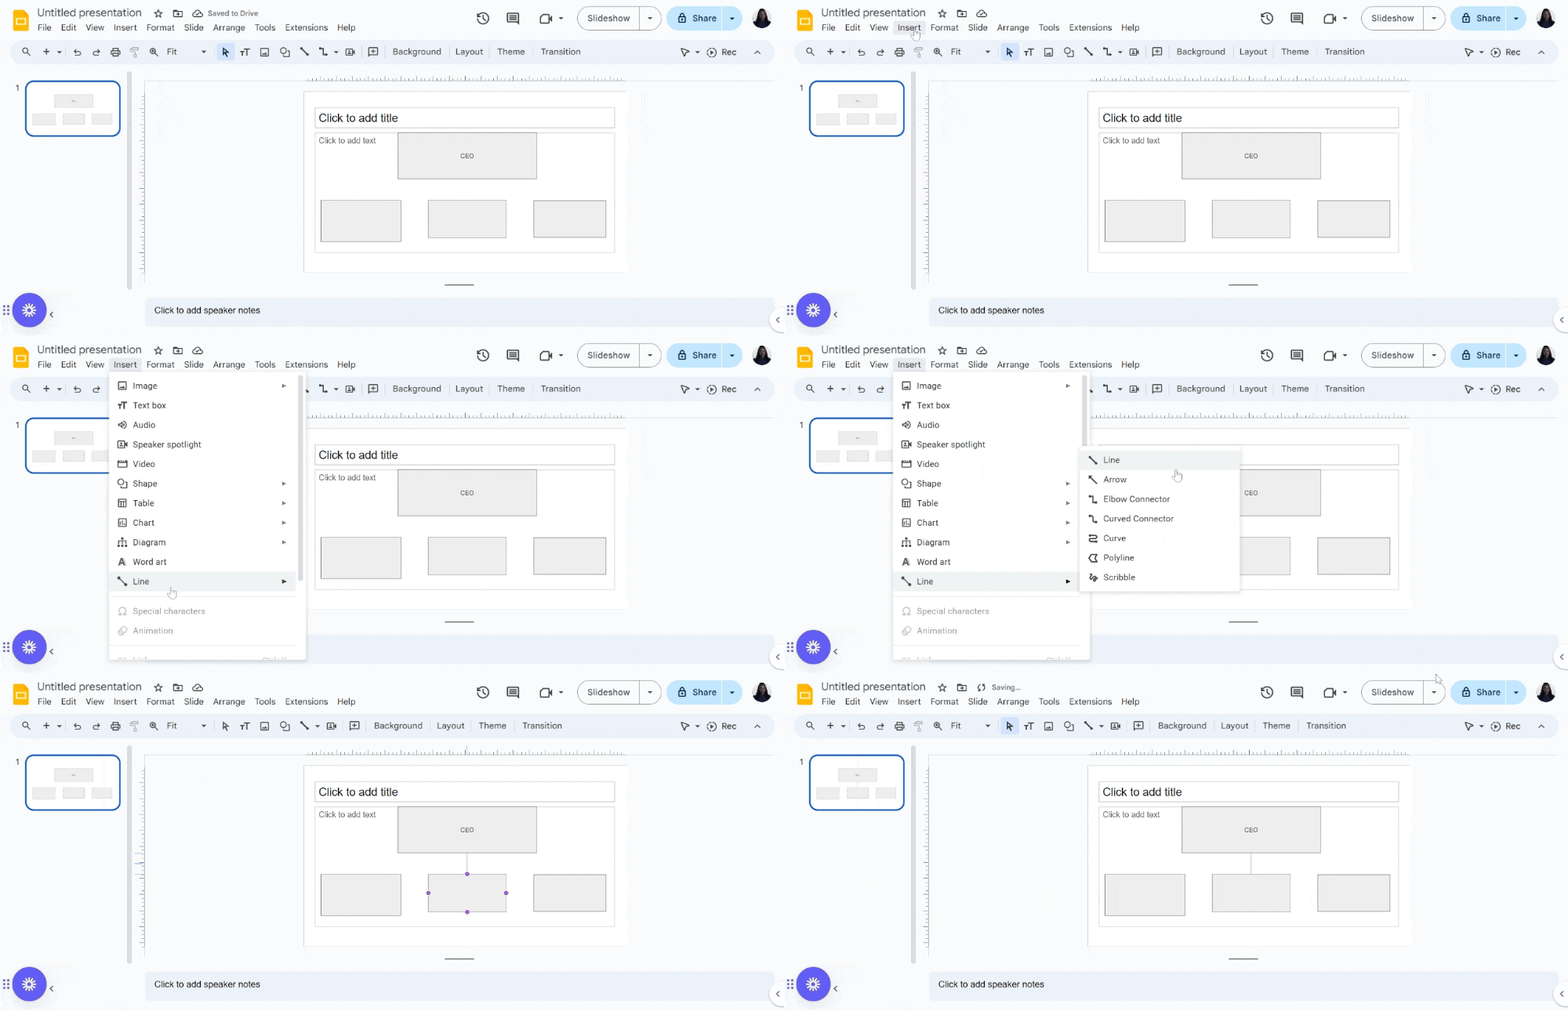
Step 6: Connect the shapes
Use lines or connectors(elbow or curved) to link the shapes, representing the hierarchy within the organization. The type of connector you choose is determined by the positions you wish to connect. Ensure that the people and positions are hierarchically placed so your organizational chart does not communicate an intern as the boss. Also, place them accurately and ensure enough space to avoid clutter.
- Connect the shapes:
- Click on Insert in the menu.
- Select Line, then choose Elbow Connector or Curved Connector.
- Draw lines connecting the top-level position to subordinate positions.
Step 7: Add text to subordinate shapes
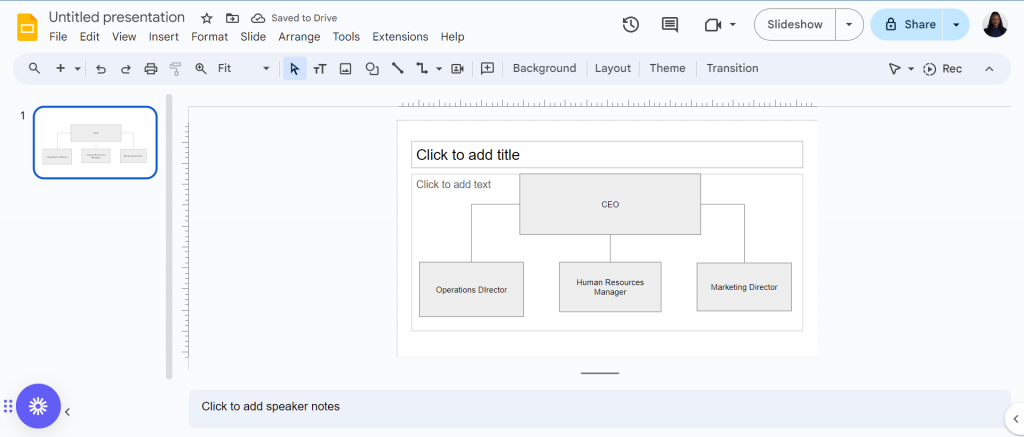
Add names and titles to the shapes of the subordinates to show who is who. Again, ensure your text is consistent and aligned properly within each shape.
- Add text to subordinate shapes:
- Click inside each subordinate shape.
- Type the name and title of each person.
Step 8: Customize the design
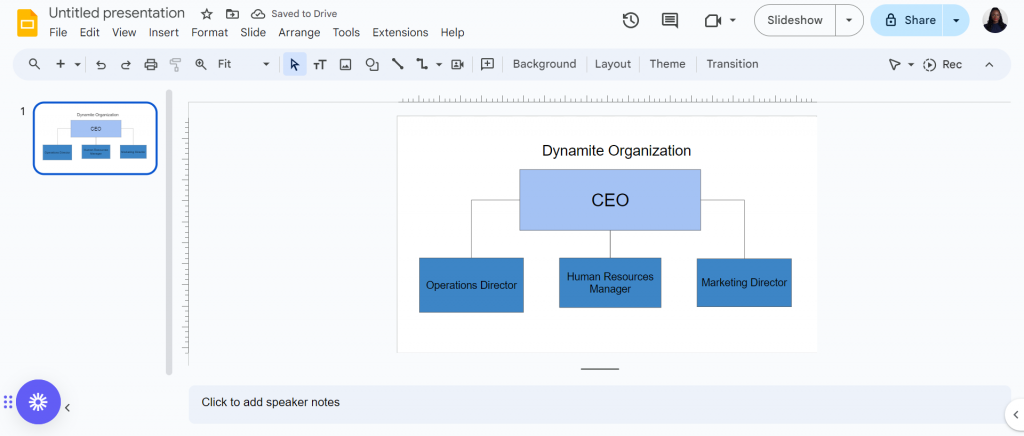
You can further personalize your organizational chart by changing colors, fonts, and sizes. Navigate the toolbar options to make these adjustments. Ensure to create a cohesive and visually appealing design that aligns with your organization’s branding.
- Customize the design:
- Change the colors, fonts, and sizes to match your brand or preference.
- Click on a shape or line, then use the toolbar options to customize.
Step 9: Review and adjust the chart
Carefully review your organizational chart for accuracy and visual balance. Look out for typographical or grammatical errors that you may have made. Then, make final adjustments to ensure all elements are correctly positioned and the chart is easy to read.
- Review and Adjust the Chart:
- Ensure that all names and titles are correctly spelled and positioned.
- Make sure the chart is easy to read and visually appealing.
Step 10: Save and share the presentation
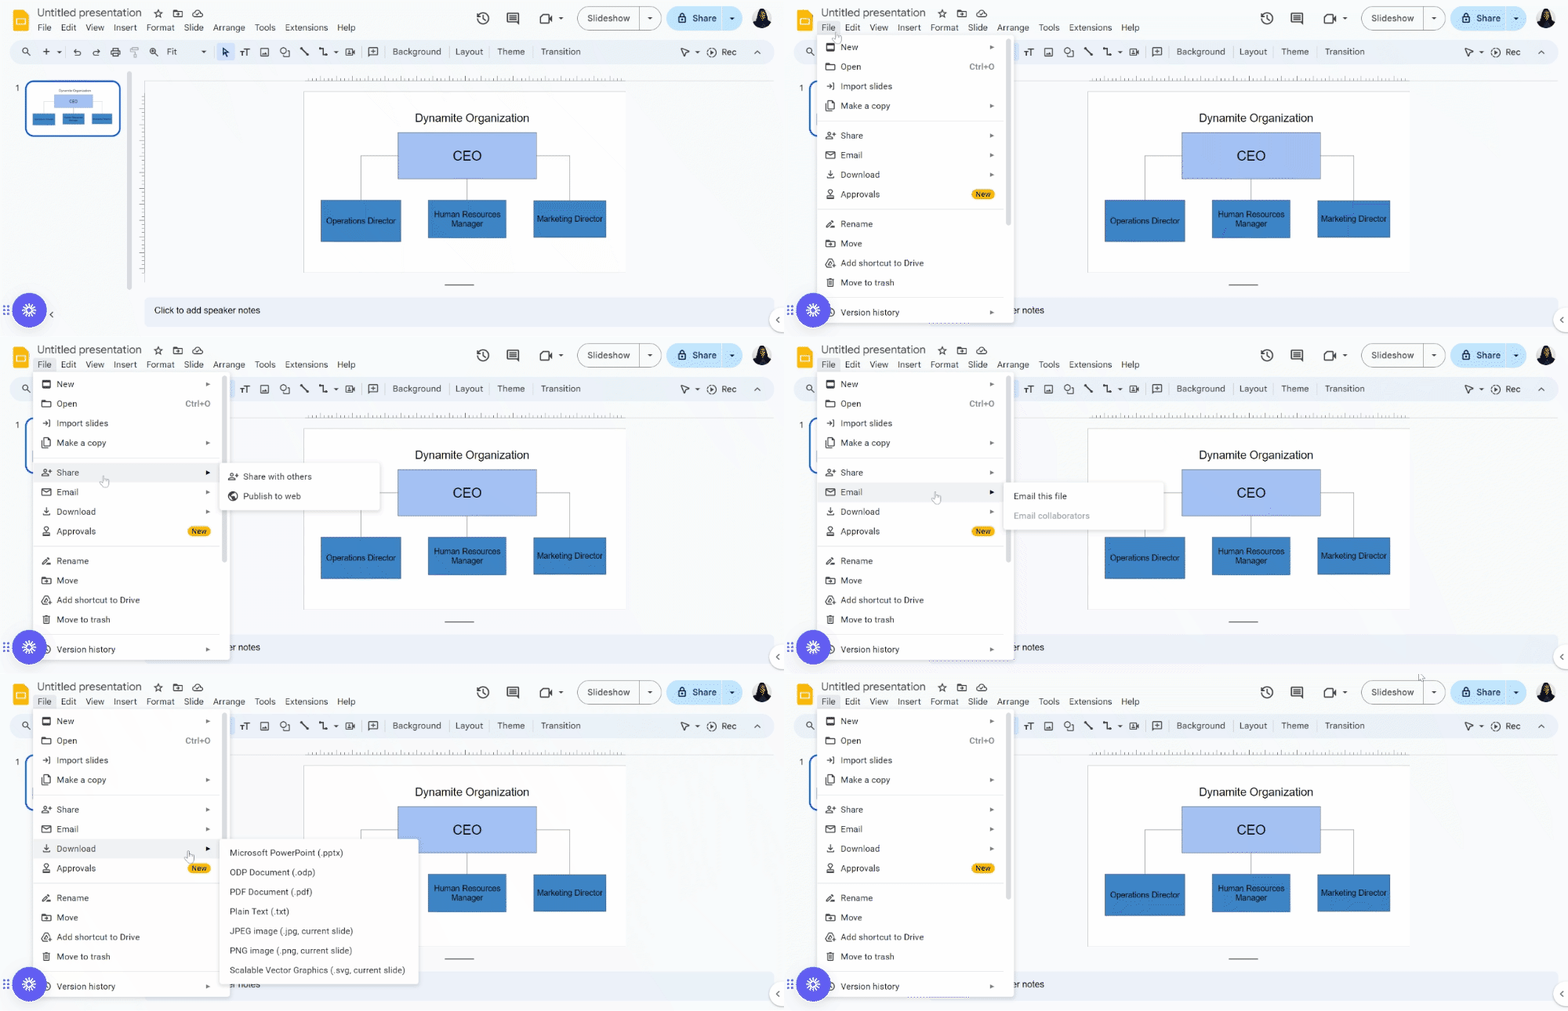
Now that you have completed the organizational chart, you can save it, share with others, email it to your colleagues or download it in any format that you wish. Also, regularly saving your work while editing can save you from losing any progress.
- Save and share the presentation:
- Click on File in the menu.
- Select Save or Save as to save your presentation.
- To share, click on Share and enter the email addresses of your collaborators.
How to make an organizational chart in Venngage?
At Venngage, we pride ourselves on our pre-made templates designed by professional designers so you can effortlessly create an organizational chart, even without any design experience whatsoever!
You can easily edit texts, images, icons and even colors with our intuitive in-app editor by simply clicking on it. Let me show you how:
Step 1: Sign up for free!
To begin, sign up for a free Venngage account using your Gmail, email address or Facebook account.
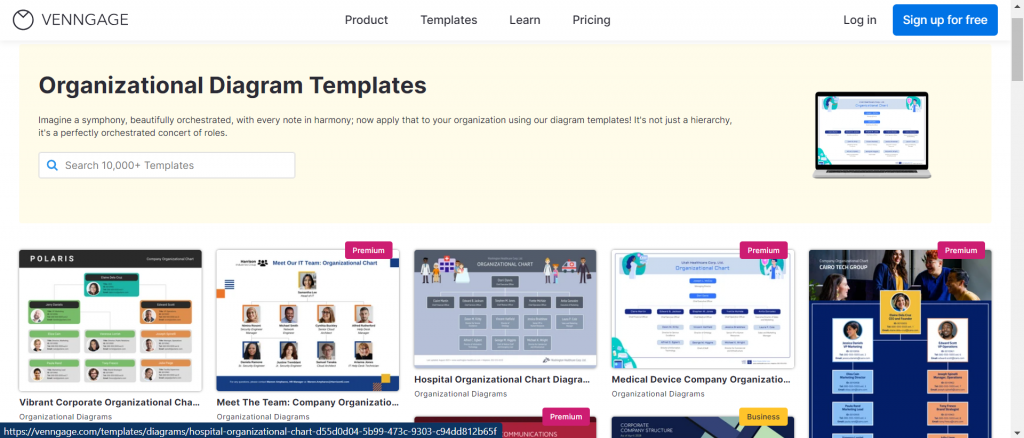
Step 2: Select an organizational chart template from our library
Choose a template from our organizational chart templates library.
Step 3: Customize your organizational chart template
Now that you’ve found a template you love, it’s time to customize and make it yours! Click on Create to open our intuitive editor where you can make changes to your template.
Making changes to our template is pretty straightforward, just click on an icon or image and click on Replace, as shown here:
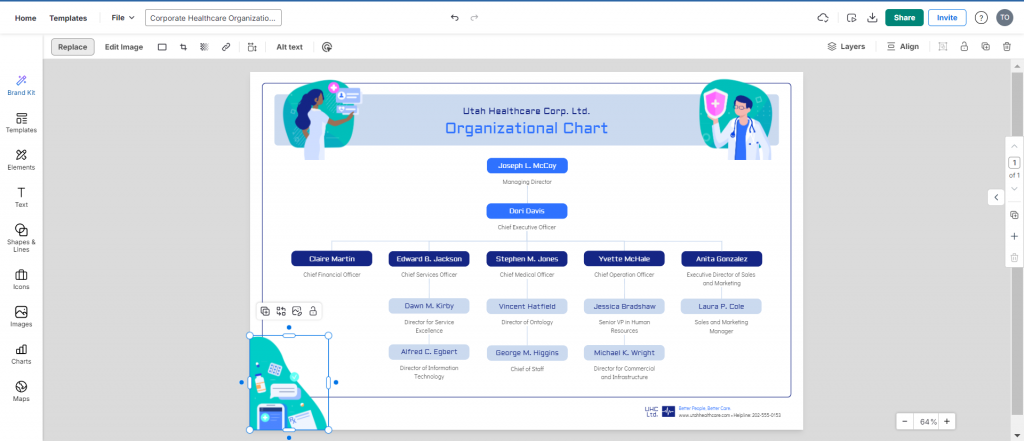
The icon panel will open up for you to make a choice of icon that you wish to use. There are thousands of icons and images at your disposal with Venngage.
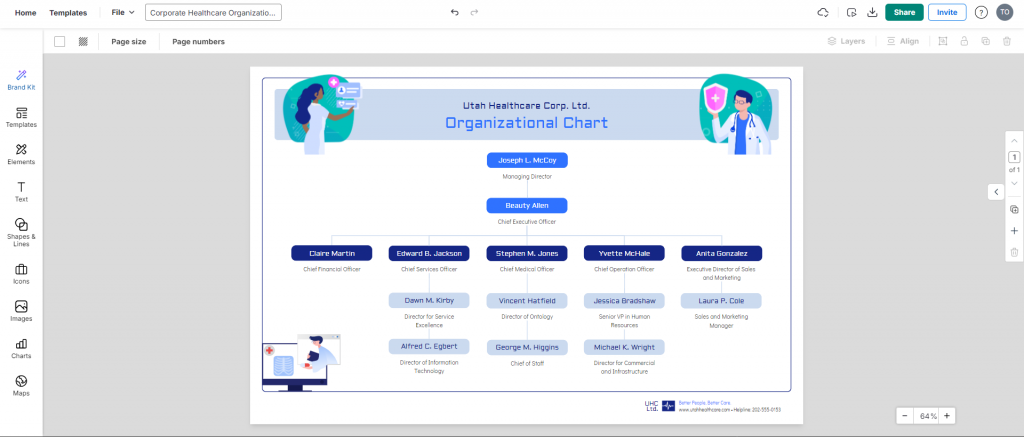
You can also edit text by selecting the text and just typing in your desired words. With MyBrandKit, which is available to Business users, you can upload your company’s colors, logo and images, which can be applied to your organizational chart in a single click.
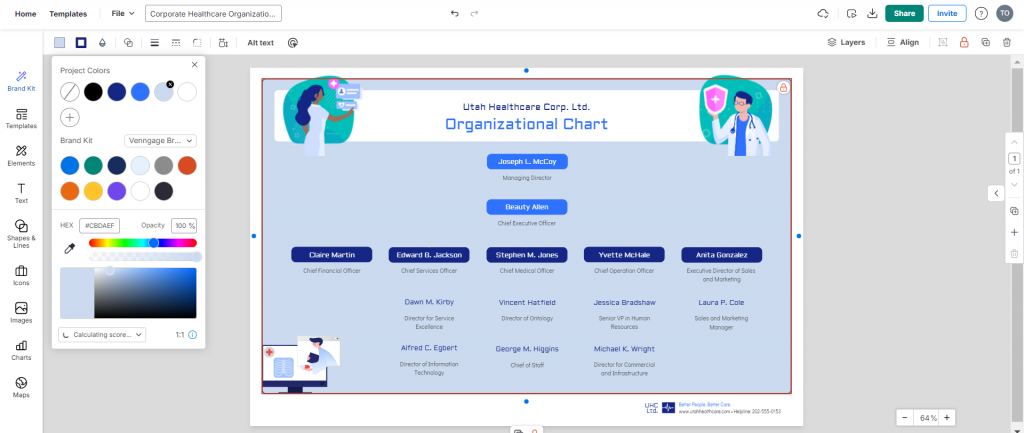
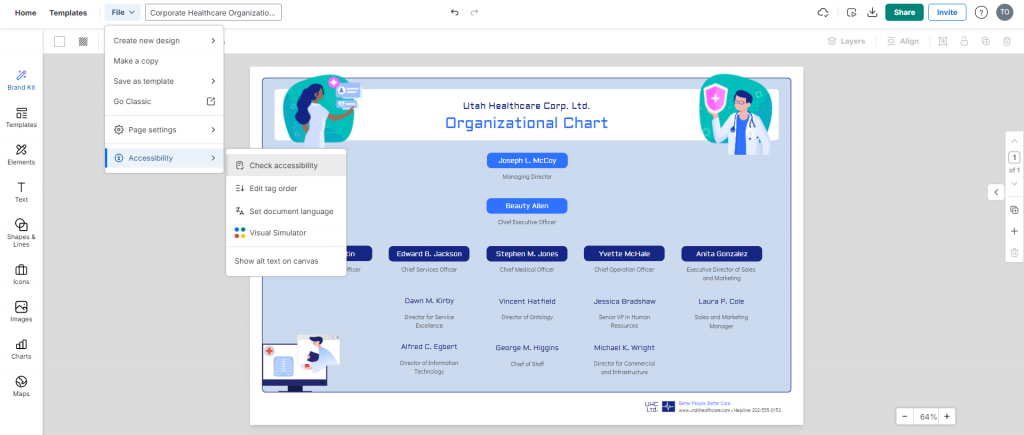
Make your organizational chart accessible with our accessibility checker. This way, you are sure everybody in your company (including the new hire or intern) can navigate the company easily using the organizational chart. It also places your company as one that values accessibility and inclusion!
Conclusion: Start creating professional organizational charts with Venngage
Google Slides offers tools that help you create basic organizational charts. These tools however are limited in page size and design and customization options. With Google Slides you may not be able to create more complex organizational charts, especially if you have a large company or large staff database.
So, switch to Venngage where you have more customization options to make an organizational chart your own, with tons of templates, images and icons and an inbuilt accessibility tool.


