


One of the best ways to make presentations more engaging is to add visual elements like flowcharts to explain a complex process or sequence.
And with attention spans getting smaller these days, presentations need to be more visual than ever and focus on data-driven storytelling.
Making flowcharts in Google Slides is pretty convenient since it syncs across the Google ecosystem, but if you want more control and customization options, Slides leaves a lot to be desired.
In this post, I’ll show you how to make flowcharts in Google Slides and then teach you how to use Venngage’s Online Flowchart Maker and flowchart templates to make more professional flowcharts for your presentations.
Click to jump ahead:
- How to create a flowchart in Google Slides from scratch
- How to create a flowchart using Google Slides diagram tool
- How to create a flowchart with Venngage
- Conclusion
How to create a flowchart in Google Slides from scratch
Google Slides offers two ways of making flowcharts.
You can either design flowcharts manually by inserting and aligning shapes or use a pre-built Google flowchart template if you’re willing to trade control for time.
To make a flowchart manually in Google Slides, follow these steps.
- Step 1: Create a “Blank Presentation” slide
- Step 2: Go to “Insert” and then select “Shape“
- Step 3: Add lines or arrows to connect your flowchart shapes
- Step 4: Add text to your flowchart
- Step 5: Customize your flowchart
- Step 6: Save your flowchart
Let’s see each of these steps in detail:
Step 1: Create a blank presentation slide
To start, I’ll first open up a slide where our flowchart will come to life.
To do this, on the Slides welcome page, click on the “Blank Presentation” option. This will open a new slide with an area to add your title and text, but we don’t want that as it’ll get in the way of our flowchart.
To get rid of the default slide format, change the Slide layout by clicking on “Slide” on the menu bar and then “Apply Layout“.
You’ll then be prompted to to pick a different default slide design (pick the “Blank” option).
Step 2: Click on “Insert” > “Shape” to add flowchart shapes
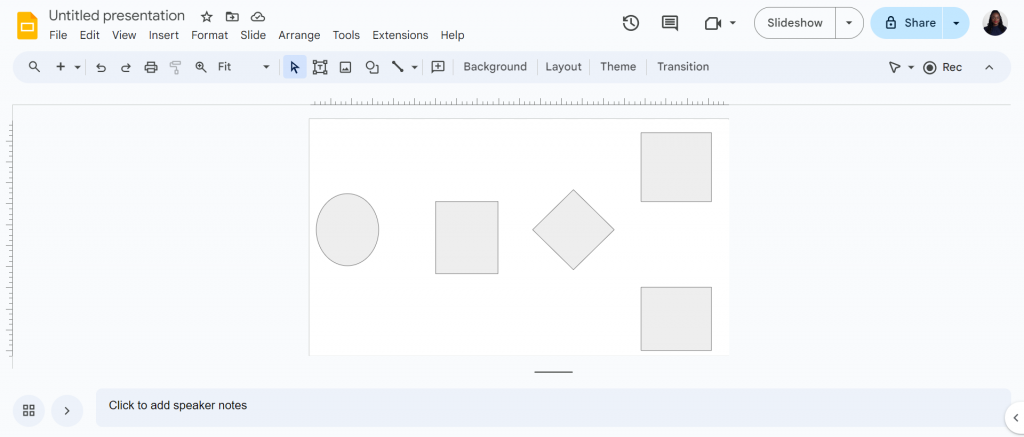
Once you’ve changed the slide layout and have a blank canvas to work with, it’s time to start drawing the structure of our flowchart.
To do this, click on “Insert” on the menu bar and browse until you see “Shape“. You should see a “Shapes” sub-menu prompting you to select shapes.
Here’s a quick recap of flowchart shapes you’ll find in Slides.
- Oval: Represents the start or end point of a flowchart.
- Rectangle: Used to indicate each process or action within a flowchart.
- Arrow: Indicates the direction of flow between sequences or steps.
- Diamond: Represents decision points (yes/no conditions) from which multiple branches start.
- Parallelogram: Serves as a visual reminder of data input or output in a process.
Related: Flowchart Symbols and Meaning: A Complete Guide (2024).
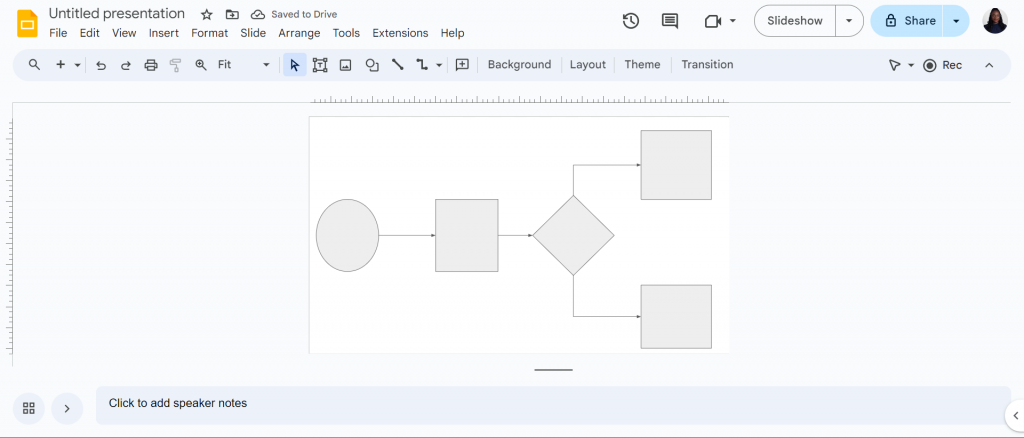
For my example, I selected oval, rectangles and a diamond to create this basic flowchart shape.
Step 3: Click on “Insert” > “Line” to add flowchart lines
Once you have the basic shapes drawn, it’s time to add lines and/or arrows to the structure. Without these connectors, it’s hard to tell which direction information flows in a flowchart.
In my example, the oval on the left is a clue that the flowchart should be read from left to right, but what if we had an oval endpoint as well? There would be no way to know without lines indicating flow of direction.
To add connecting lines to a flowchart in Slides, click on “Insert” and then select the “Line” option.
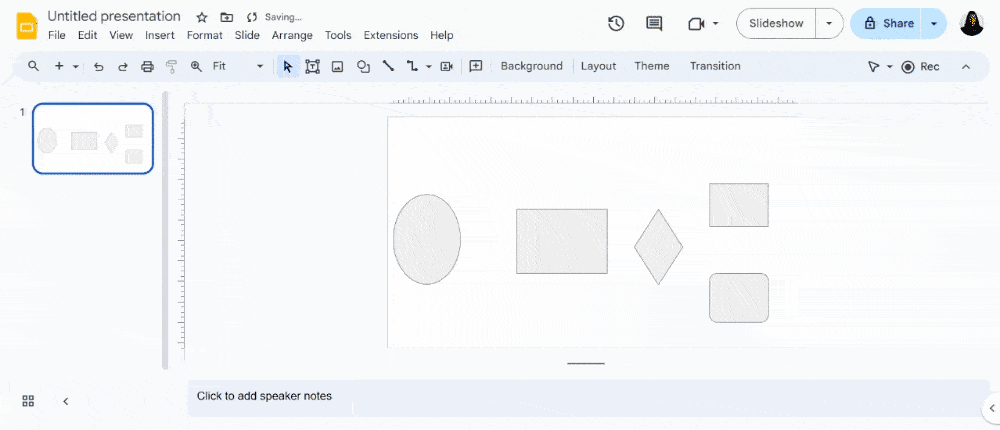
Here’s how my flowchart looks after I add the lines.
Step 4: Add text to your flowchart
With the basic structure ready, it’s time to add text to explain what each symbol represents or describe the steps/actions of a process.
To do this, click on “Insert” and then select “Text Box“. This will create a pop-up where you can type your information which you can then drag into place over your shape.
Note: A much better option is to double click the shape to enter text directly.
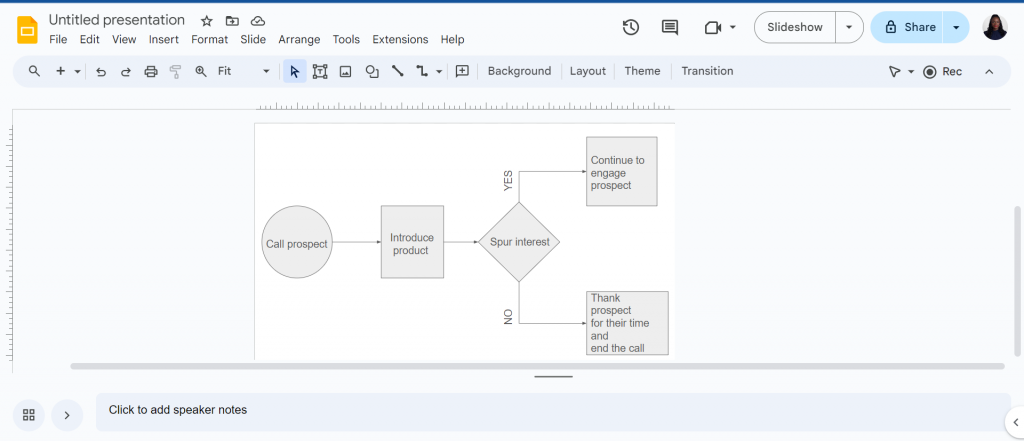
After adding text, my flowchart can now be used as an instructional guide by sales representatives on how to handle/behave during a cold call.
Step 5: Customize your flowchart
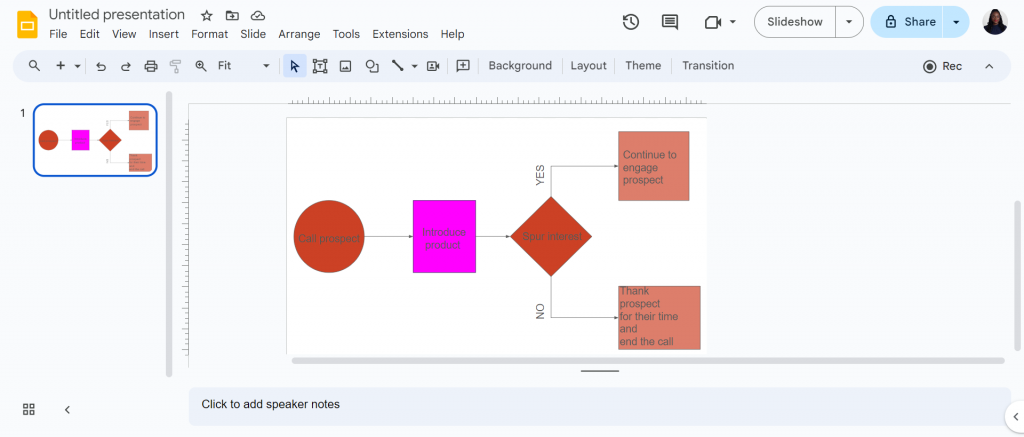
If I handed out my flowchart to a sales rep as is, it’ll get the job done but it’s not exactly appealing. I probably wouldn’t it save it as a resource to come back to often.
This is why customization is important. You need to make flowcharts colorful, fun, and engaging for people to pay attention.
Some of your flowchart customization options in Slides include changing colors to categorize different actions or to highlight specific parts of a process and/or change line styles to emphasize certain paths.
Here’s how my flowchart looks now after a bit of color magic.
Step 6: Save your flowchart
After finalizing your flowchart, it’s ready to be added to your presentation.
You don’t need to worry about saving as Google Slides automatically saves changes in the background while you’re designing.
Now that I’ve shown you the manual way of making flowcharts in Slides, let’s see how the process compares to using a built-in template.
How to make a flowchart using Google Slides’ diagram option
To make a flowchart using a Google Slides flowchart template, follow these steps.
- Step 1: Open a blank presentation
- Step 2: Change the layout of your presentation
- Step 3: Go to “Insert“, select “Diagrams“, and then “Process“
- Step 4: Add text and customize your flowchart
- Step 5: Save your flowchart
This method is definitely faster, but you’ll have less control over how your flowchart appears.
In any case, let’s walk through the steps.
Step 1: Open a blank presentation
Just like last time, I’ll start with a blank presentation slide by selecting “Blank presentation.”
You can also add a new blank slide to a presentation by clicking the “+” symbol on the top left of the toolbar.

Step 2: Change the layout of your presentation
Remember, Google Slides loads new slides with a default format where you’re prompted to add a title and sub-header text.
We don’t want that, so I’m going to change the style of the slide again to get a blank slate so the focus is on the flowchart design
To do this, click on “Slide” in the menu bar and then scroll down to the “Apply Layout” option. Under this option, select the “Blank” option.
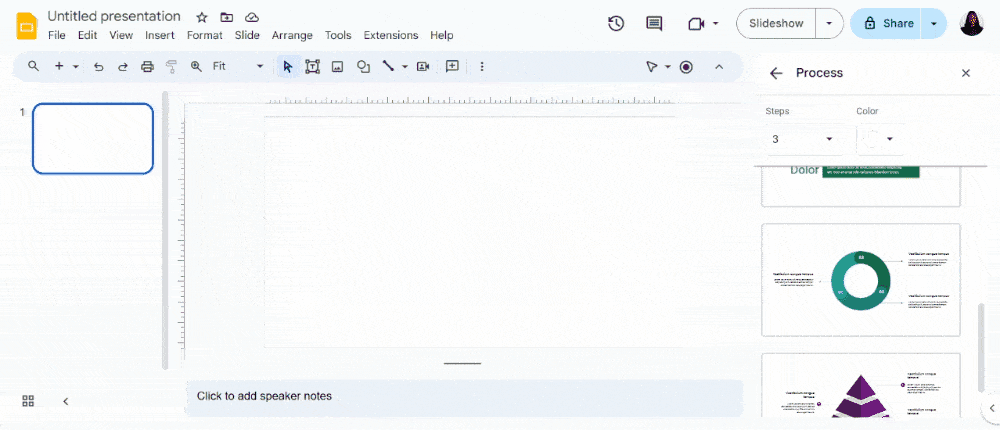
Step 3: Go to “Insert”, then select “Diagrams”
Now it’s time to add a flowchart template from Slides.
You can find flowchart templates by clicking on “Insert” and then clicking “Diagrams“.
This will open a side-panel where you can choose the type of diagram to insert into your presentation (flowcharts can be found under “Process.”)
Here’s an overview of diagram templates offered by Google Slides.
- Grid: For creating matrix diagrams
- Hierarchy: For making organizational charts
- Timeline: For creating timeline infographics
- Process: For making flowcharts
- Relationship: For creating Venn diagrams
- Cycle: For making cycle diagrams
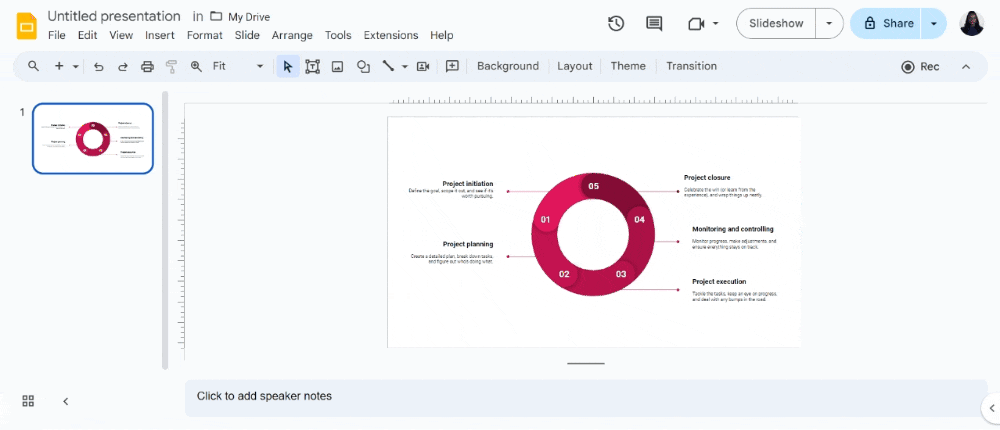
Step 4: Add text and customize your flowchart
Flowchart templates in Slides do have some customization options like the ability to choose how many steps to include and the color scheme.
However, Slides limits you to five steps max so if your process has more steps, you’re out of luck and will have to draw your flowchart manually.
Once you’ve inserted the flowchart, you can replace the text with your own.
Step 5: Save your flowchart
Once you’re done editing the flowchart, it’s time to save it.
Google autosaves your work but you should at least name the project so you can find it easily later.
How to create a flowchart with Venngage
Google Slides is handy if you want to make a flowchart quickly and don’t need to use it in a professional setting or care much for how your presentation looks.
But if you want your presentations to be taken seriously, Venngage is a much better option for creating flowcharts. And the best part is, you don’t need any design skills.
Don’t believe me? Check out this Venngage flowchart template you can edit and make your own in minutes.

Note: Some of our flowchart templates are free to use and some require a small monthly fee. Sign-up is free, as well as access to Venngage’s online drag-and-drop editor.
Let’s walk through how easy it is to edit a flowchart template in Venngage.
Step 1: Sign up for a Venngage account (it’s free!)
Sign up for a Venngage account with your Gmail or Facebook account. It’s free!

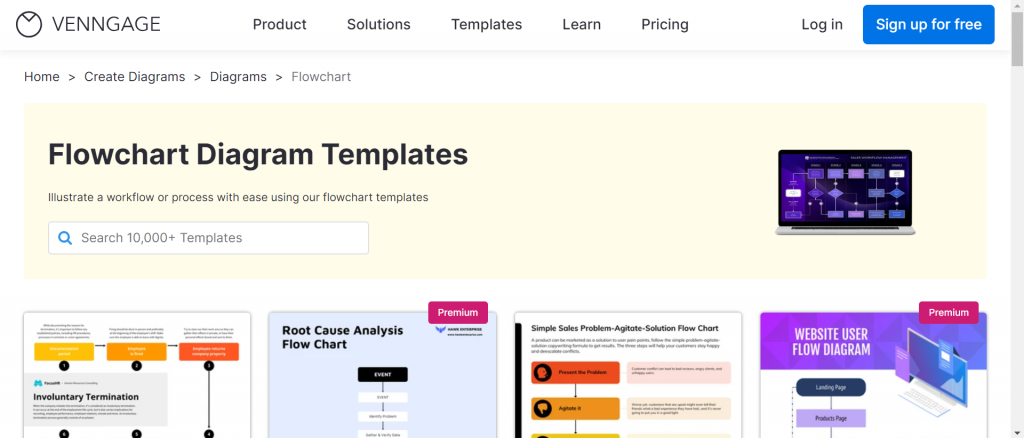
Step 2: Head to our “Diagram” category
On our templates page, select the “Diagram” category. Here, you’ll see our entire catalog of diagram templates, including flowcharts.
To filter the templates to flowcharts only, select the “Flowchart” subcategory.
Step 3: Customize your flowchart
Our editor has a drag-and-drop interface, so it’s easy to make changes to the text, reposition elements, change the color to match your branding, and best of all add cool icons and graphics!
Our in-editor library has thousands of free, professional stock images, plus diverse images you can use in your flowcharts. There’s no need to import them from somewhere else.
Now, let’s edit this simple email marketing flowchart template together.

Let’s say I want to replace the email icon at the top of the process to something more colorful. Well, it’s as easy as selecting it, and clicking “Replace” on the top toolbar.
This should open up our library of icons and images where you can search for what you like
Once you find what you’re looking for, click it or press “Enter” and our editor will place it in the same spot for you.
The same concept applies for colors, fonts and text.
If you’re working with a team to design flowcharts, you can get them to edit with you in real-time with our collaboration features in the Business plan.
In the Business plan, you also get access to My Brand Kit, which lets you apply your brand colors to any flowchart with a single click.
Here are a few more examples of flowchart templates you can edit in Venngage and add to your presentations.
This example shows the power of flowcharts in the decision-making process as it helps readers decide whether they should rent or buy a home.

This flowchart reveals the steps involved in a bidding process and uses purple connectors to provide a visual cue of each phase, making it a great educational tool for those new to the procurement field.

This next flowchart example demonstrates how flowcharts can make a complicated process easy to understand or in this case, the principles of how an airplane flies.
I guarantee this would be very popular among kids in a class.

As we just saw, flowcharts can also be used to outside of business settings to explain a process which means they’re also a great way to make your infographics better.
Process infographics can present information in a visually engaging way that otherwise would be boring to read. For example, you can use them to explain a life hack or a scientific concept.
Here’s an example of a process infographic that teaches readers about affiliate marketing.

Step 4: Share a link to your flowchart or download it
Once you’ve edited a Venngage template and are ready to share it, you have a few options
If you’re on a free plan, you’ll get access to a link you can share or embed in your presentations. But Business users can download flowcharts.
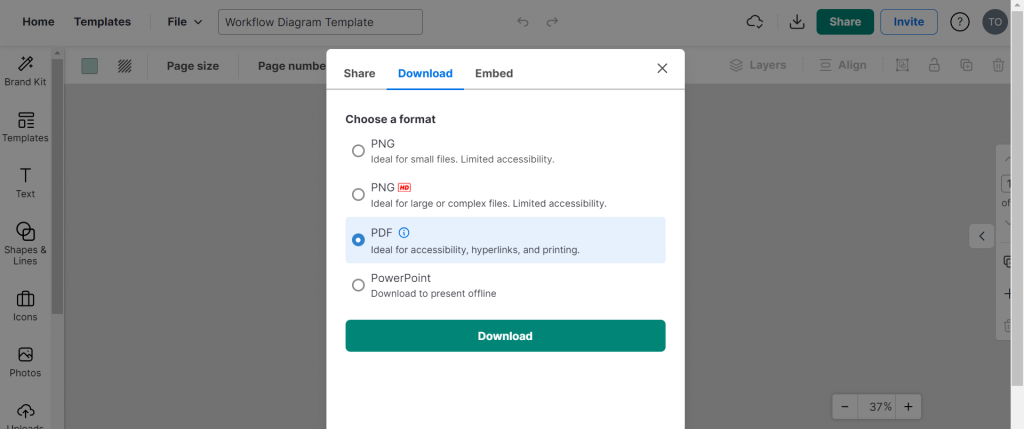
Besides the ability to save your flowcharts as PDF and PNG, Venngage also lets you save flowcharts PPT which means they’ll slot right into your presentation without requiring you to do anything extra.
Conclusion: Liven up your presentations with professional and engaging Venngage flowcharts
Whether you need a flowchart for a presentation about project management, a cool method to explain a process, or a fun way visualize a workflow, Venngage is here to help.
Our flowchart templates are easy to use and and come in a variety of styles, from classic to professional and modern to creative.
Get started today and create a flowchart for presentations that will impress your audience!


